Jump to content

15 Screenshots

  • Like 21
  • Voron FTW! 14
  • Thanks 2

Recommended Comments


11 hours ago, mvdveer said:

I used the side mount as I had the same issue. This is adjustable along the Y - Axis

https://github.com/zruncho3d/ZeroClick/blob/main/STLs/ZeroClick_Dock_Side.stl

I use the dock center, since I dont need to preload any nuts 😛 This is the most used one, but I get your choice, since you can adjust... but it would mean its getting almost above your print plate... I want to keep that clear..

Link to comment
Share on other sites
13 hours ago, atrushing said:

This one is 3mm deeper with the outside hole routed to the inside. Want to give it a shot?

ZeroClick_Mount_Mini_Stlb_ver0.3.stl 295.3 kB · 1 download

oooooh, I will try this one, I noticed the wire hole you made! woohooo!


AND.. it wont work...

I noticed the ZeroClick is on Y0 already running against the railguards.
Lets just call it a Journey... so a thicker one is not a solution, since it would only make this worse, sure you dont necessary need to travel this way to mount or dismount the ZeroClick, but its just not perfect that way I think.

So... I think I need to divert to @mvdveer his choice, and go for the side station version, what means taking the printer half apart to load some nuts... f*ck me.. hahaha! realize how much I love the 2020 frame and its slot nuts.

20221103_110753277_iOS.jpg

Edited by Buurman
Link to comment
Share on other sites
1 hour ago, Buurman said:

I use the dock center, since I dont need to preload any nuts

What if I stretched the dock_center forward by the 2 or 3mm? Then we could go back to the first ZeroClick_mount and try to fit the wire routing hole.

Link to comment
Share on other sites
1 hour ago, Buurman said:

I noticed the ZeroClick is on Y0 already running against the railguards.

Here is what it would look like with the dock_center brought forward by 3mm. It is still behind the z-axis rail guards.

2022-11-03-131747_1920x1054_scrot.thumb.png.62ab0b0b3e58d4779b216b6f77d0c2fb.png

  • Like 1
Link to comment
Share on other sites
3 hours ago, Buurman said:

I noticed the ZeroClick is on Y0 already running against the railguards.

Is it hitting the plastic piece or the M3 screw head? Of course my model isn't perfect but using a flat-head screw could help. I could even adjust the plastic stop to give a little more clearance for the top half.

2022-11-03-145612_1920x1054_scrot.jpg.d42e47e660cdeb7db4e06ee8c9411eea.jpg

I have added stl files for the center mount and the first ZeroClick_mount but with the hole routing to the inside.

ZeroClick_Dock_Center_3mm_Offset_ATR.stl ZeroClick_Mount_Mini_Stlb_ver0.4.stl

Link to comment
Share on other sites

Oh dear... I took out the center one and just put in the side one, but... I can still test the center because I do think that would do the trick.

I just hung the side one, and... pfff... what a horror, but its too high (or the mount too low).

So I can edit the SIDE station and add... about 3 or 4 mm.

I think I will print 2 infills, one of 3mm one of 4mm and try them.


I think the SIDE station is better anyhow, the center one is too large, it spoils the beauty of a V0.

20221103_143051438_iOS.jpg

Edited by Buurman
Link to comment
Share on other sites
56 minutes ago, Buurman said:

the center one is too large, it spoils the beauty of a V0.

True, and it is very visible in the middle of the printer.

I have adjusted the ZeroClick_mount so that it is 1mm shorter. This also makes it more flush with the bottom of the mini-sb.

ZeroClick_Mount_Mini_Stlb_ver0.5.stl

  • Thanks 1
Link to comment
Share on other sites

yeah, great idea! it sticks out a bit too much, but for me, I am going with wat I have.

If the 4mm infill is good, it means that it should be 3mm for the ones with the new mount.

Link to comment
Share on other sites
6 minutes ago, Buurman said:

yeah, great idea! it sticks out a bit too much, but for me, I am going with wat I have.

If the 4mm infill is good, it means that it should be 3mm for the ones with the new mount.

When I find some time I will install this on my Trident. Then I will get a better feel about how it all fits and works together.

Link to comment
Share on other sites

with the 4mm infill it works perfectly! so you need the 3mm difference on the center station if you already took 1mm off of the SBmount.

nothing like the reward after a hard day work.... oh wait... WORK! I knew I forgot something...

20221103_172120100_iOS.jpg

  • Like 3
  • Voron FTW! 1
Link to comment
Share on other sites
52 minutes ago, Buurman said:

with the 4mm infill it works perfectly! so you need the 3mm difference on the center station if you already took 1mm off of the SBmount.

nothing like the reward after a hard day work.... oh wait... WORK! I knew I forgot something...


Looking good!

Link to comment
Share on other sites
12 hours ago, Buurman said:

think the SIDE station is better anyhow, the center one is too large, it spoils the beauty of a V0.

Agree, but it needed nuts .... (Told you preload for mods. Ha ha ha ha)

Link to comment
Share on other sites
5 hours ago, mvdveer said:

Agree, but it needed nuts .... (Told you preload for mods. Ha ha ha ha)

Yeah I’m lazy/stubborn that way 😂😂

  • Haha 1
Link to comment
Share on other sites
2 hours ago, Selcuk said:


Can someone share me the X and Y offset values?

I did my best to keep the X and Y nozzle position the same as stock in both the V0.1 and Trident/V2.4 installs. It is only the front face that sits further forward in the V0.1.

Link to comment
Share on other sites
On 04.11.2022 at 12:00, Buurman said:

Evet ben bu şekilde tembel/inatçıyım😂😂


On 03.11.2022 at 20:23, Buurman said:

4 mm dolgu ile mükemmel çalışıyor! yani SBmount'tan zaten 1mm çıkardıysanız, merkez istasyonda 3mm farka ihtiyacınız var.

zor bir günün ardından verilen ödül gibisi yoktur.... ah bekle... ÇALIŞ! Bir şey unuttuğumu biliyordum...

20221103_172120100_iOS.jpg


Hello my friend. How can I reach you.


Link to comment
Share on other sites
On 11/18/2022 at 11:21 AM, Buurman said:

All questions can be done here, we are all here to help and look at topics daily.


I need bad mesh and X-Y offset values. I could never

Link to comment
Share on other sites
11 minutes ago, Selcuk said:

I need bad mesh and X-Y offset values.

For the ZeroClick probe, it looks like it is -19 in the X axis and +14 in the Y axis.

2022-11-19-143717_1920x1054_scrot.thumb.png.6c8981dcafbf7a67e18890543835709d.png

I'm not sure if the offset in Klipper measures from the nozzle to the switch (my measurements) or from the switch to the nozzle, so you may have to invert the +/- of those values.

  • Like 2
Link to comment
Share on other sites
1 hour ago, atrushing said:

For the ZeroClick probe, it looks like it is -19 in the X axis and +14 in the Y axis.

2022-11-19-143717_1920x1054_scrot.thumb.png.6c8981dcafbf7a67e18890543835709d.png

I'm not sure if the offset in Klipper measures from the nozzle to the switch (my measurements) or from the switch to the nozzle, so you may have to invert the +/- of those values.


Thank you so much. With the information I need. Everything is working normally now.


WhatsApp Image 2022-11-19 at 18.35.57.jpeg

  • Like 1
Link to comment
Share on other sites

Hi,

I'm new here and still relatively new to 3D printing in general (~1 year).

Already got a ORBITER 2.0 on my desk and a Dragon SF on the way.
Is there anywhere a BOM for this beauty ? (LEDs, screws, thread inserts.... anything else?)

Has anyone installed it on an Ender 6 (stock rails, no linear rails mod) ?
Any tips how to do it or things to take care of?

Thanks,
Rixi


Link to comment
Share on other sites
6 minutes ago, Rixi said:

Hi,

I'm new here and still relatively new to 3D printing in general (~1 year).

Already got a ORBITER 2.0 on my desk and a Dragon SF on the way.
Is there anywhere a BOM for this beauty ? (LEDs, screws, thread inserts.... anything else?)

Has anyone installed it on an Ender 6 (stock rails, no linear rails mod) ?
Any tips how to do it or things to take care of?

Thanks,
Rixi


You need a pair of 4010 blowers and 3 neopixel RGB button LEDS (WS2812B)

screws, no idea anymore... nothing exotic.

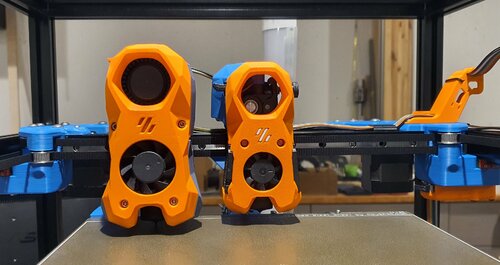
The mini fits the Orbiter 2/Dragon SF (since I have that too, so download the right one)

Just dont know about the mount to a Ender 6 rail, since I only Voron's left 😛 

20221104_210843192_iOS.jpg

  • Thanks 1
Link to comment
Share on other sites

Thanks @Buurman,

Wow, that was a rapid reply! 👍

I googled a bit regarding the LEDs and now ended up with a hand full of SK6812 (these ones from Ali) in my basket. Same protocol as the WS2812B, but with an additional white channel. Work with Klipper.

I have a few sets of 4010 blowers laying around. What size is the hotend fan?
I also have a good assortment of screws, but not the screw/thread inserts. What size is needed?

Is PETG sufficient for printing the parts?

Just realized that the the top cover I just ordered yesterday will never-ever fit in combination with the Mini Stealth 🙄
Where the white clamp sits is where the (metal) plate of the carriage ends. My understanding is that the ORBITER would sit on top of this:

image.png.cf582d174be5b6d4fa561465a1f48918.png

Is there any experience with placing the whole mini Stealth (including the ORBITER) in front of the rail?

Best,
Rixi

Link to comment
Share on other sites
1 hour ago, Rixi said:

Already got a ORBITER 2.0 on my desk and a Dragon SF on the way.
Is there anywhere a BOM for this beauty ?

Thanks for the compliment!

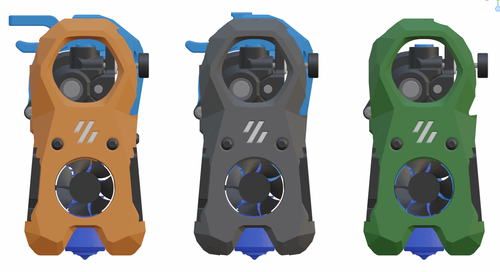
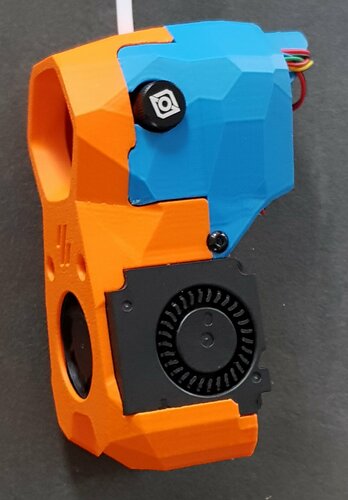
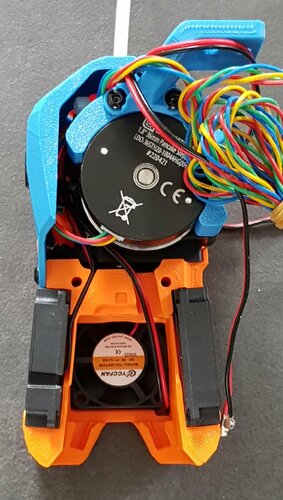
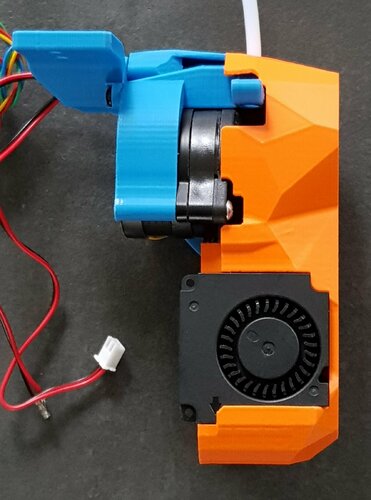
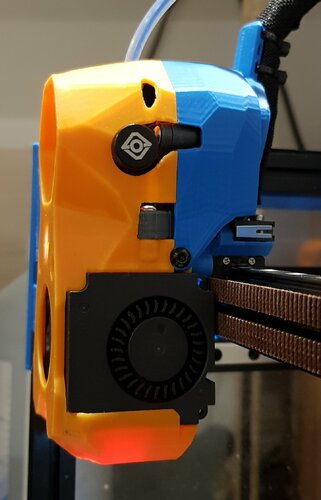
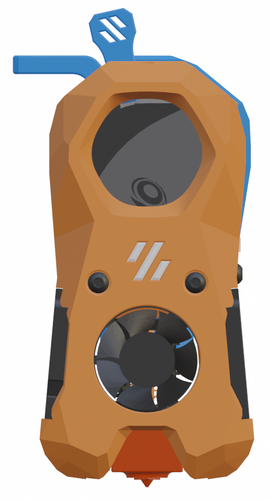
Here is a basic BOM for the Mini SB Orbiter 2.0:

1 x hotend (Heat me up Scotty!)
1 x extruder (Push it real good!)
2 x 4010 blower fan 24V (part cooling)
1 x 3007 fan 5V (hotend fan)
3 x SK6812 WS2812B RGBW - single LED PCB
5 x M3x4x5 heat set inserts (3 for toolhead and 2 for x-carriage)
3 x M2.5x6 screws (hotend mounting) [M3x6 for Revo Voron]
1 x 4mm OD 2mm ID PTFE tube
4 x M3x8 BHCS (secure extruder and cable_strain_relief)
1 x M3x10 BHCS (cable_door pivot)
1 x M3x6 (secure cable_door)
2 x M3x35 BHCS (secure toolhead to x-carriage)

14 minutes ago, Rixi said:

Just realized that the the top cover I just ordered yesterday will never-ever fit in combination with the Mini Stealth 🙄
Where the white clamp sits is where the (metal) plate of the carriage ends. My understanding is that the ORBITER would sit on top of this:

Here is a mockup of how the Mini SB would sit on the Ender 6 carriage to maintain the same Z distance to the build plate:2022-11-28-113906_1920x1054_scrot.png.6100fd488d8119c29818e96941fb6020.png

The top of the Mini SB is 20mm higher than the metal plate. It would also sit at least 15mm further forward than the stock hotend. I don't know if that would affect the Y travel or if the build plate could be adjusted to maintain the same build volume. The green body is a model I found for using the Orbiter 1.5 on the Ender 6.

2022-11-28-114807_1920x1054_scrot.thumb.png.9e6112de4f548ab40847c9db8210711c.png

  • Like 1
  • Thanks 2
Link to comment
Share on other sites

Join the conversation

You can post now and register later. If you have an account, sign in now to post with your account.

Guest
Add a comment...

×   Pasted as rich text.   Paste as plain text instead

  Only 75 emoji are allowed.

×   Your link has been automatically embedded.   Display as a link instead

×   Your previous content has been restored.   Clear editor

×   You cannot paste images directly. Upload or insert images from URL.


User Feedback

×
×
  • Create New...