Search the Community
Showing results for tags 'bowden'.
Found 6 results
-


Version 2
2,573 downloads
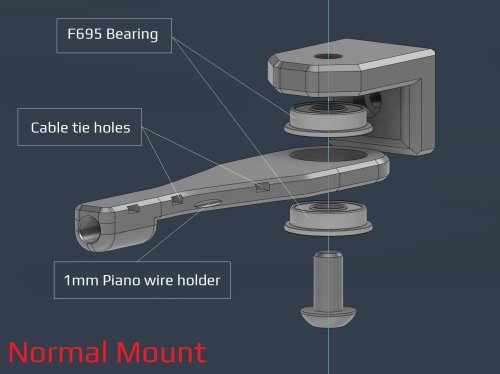
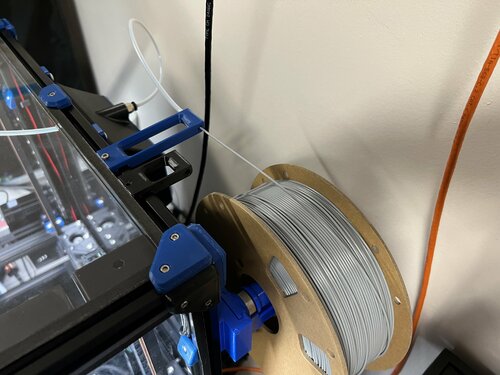
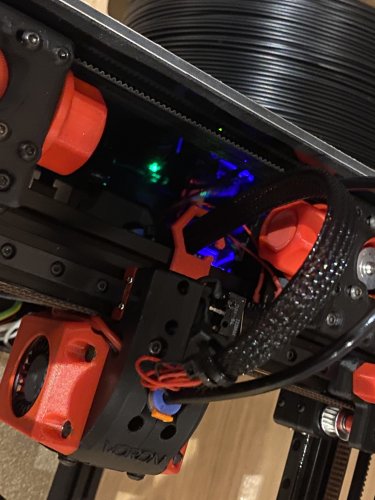
V2- PTFE bowden tube guide and CANBUS wire support I've made some adjustment after some feedback from the community. Changes made over V1: Added a option to have F695 bearings incorporated Enlarged the tube opening Added cable/zip tie openings Added spot for 1mm piano wire if needed. Recommended print settings: Voron print settings (4 walls, 40% infill and 5 top and bottom layers) Turn off thin walls Bridge setting: keep only bridges (watch out for bridging for cable tie holes) 0.2mm layers and 0.2mm first layer No need to adjust for ABS shrinkage Required Hardware: M3x8 Bolt and M3 T-nut M5 bolt to suit option. Optional M5 nut if you can fit it with the bearing option. V1 - PTFE bowden tube guide and CANBUS wire support This is can found inside the zip files and of the initial release Required Hardware: M3x8 Bolt and M3 T-nut M5x10 Bolt or a M5x8/12 Optional 4mm drill bit for cleaning out bowden tube path About In my 350 build the PTFE tube kept getting caught so I made this arm to keep it up. The shorter arm works better so I recommend using it instead The setup has also been used by a few user to support their CANBUS wires (zip tied to the reverse bowden) Install Drill out bowden guide with 4mm drill bit for a perfect fit (optional) Bolt mount to rear frame with M3x8 and tnut putting the lip at the top Screw arm on with M5x10 (I used a M5x8mm and it works fine) into the plastic allowing the arm to still be able to swivel- 3 comments
- 1 review
-
- 15
-

-
- canbus
- galvanicglaze
- (and 3 more)
-
 Inspired by the LGX lite Mount for the Stealthburner, I really liked the possibility to use a UM2 clip to lock your bowden tube. https://github.com/Eytecz/LGX_Lite_Stealthburner_CW2_style_mount (images and STEP files there) I like the Stealthburner, but I really dont like inserting filament, pushing a bit too hard and pushing out the bowden tube... So, I thought, can I make this work on the original CW2 for Stealthburner? You need to know that I dont do 3d designing, my skills are from a 3 year old, but it doesn't mean its a bad idea... (I hope) So I started cutting, adding, printing, testing... fitting.. and came to this... first Alpha, then Apha2 or maybe Beta.. whatever.. Because the tube entry is now wider, it sticks out a bit, so had to shave of a bit from the Guidler, yet, doesnt have any negative effect and you almost cant see it. On the side its still full width, so you cant see any change looking at the Stealthburner form the front. Yet... big benefit of using the UM2 clip, I hope someone with Fusion skills or whatever picks this up and makes a good design, yet all tested and works from this STL's. [a]_guidler_b.UM2-Beta.stl main_body.UM2-Beta.stl
- 2 replies
-
- 1
-
-
- stealthburner
- cw2
- (and 2 more)
-
Hi everyone, Having never owned a bowden printer I am wanting to know the pro's and con's of bowden over direct drive, and if there would be much of a difference between the two when installed in a V0.1 I ask as I have a customer who is very particular about the exterior surface quality on a 150mm tall abs box enclosure I print for them. I use my V0.1 (direct drive) as I normally like to print them one at a time and only ever have a few to do each job. My V0.1 suffers from the 'inconsistent extrusion' issue and I have never been able to reduce or fix the problem. I am very tempted to try going to a bowden setup, the default V0.0 setup with pocketwatch. I'm interested to know what issues or difficulties I might be getting myself into with going this route. Thanks!
-

Version 1.0.0
119 downloads
Simply elongated the stock bowden retainer to be more inline with the roller spool holders like the one below. This adds 35mm to the overall length of the retainer. -
Version 2021.06.16
141 downloads
This is a remix of the Dual Bowden but for filaments/extruders. M4 is the recommended extruder.-
- 3
-
-
- afterburner
- bowden
- (and 1 more)
-
Version 2020.12.22
20 downloads
Overview A little "fence" to hold the tubes away from the belts. Clipmount so no further nuts in extrusions are needed. Print one of the clips (either LDO or Makerbeam) together with the BowdenFence.stl Don't rotate the clips, otherwise they may break upon inserting into the extrusion. They need to be orientated like in the picture Attach a the clip into the bowdenfence piece with a short M2 self-tapping screw.