Jump to content

15 Screenshots

  • Like 21
  • Voron FTW! 14
  • Thanks 2

Recommended Comments


@atrushing I thought about using white on the way to the Shops. Thanks for the useful Feedback. 

I'm just a bit puzzled as to what parts i need for my setup. I have the full cowl (the walls are nice and thick now), the EBB36 and an umbilical.  

Link to comment
Share on other sites
9 minutes ago, TitusADuxass said:

I'm just a bit puzzled as to what parts i need for my setup. I have the full cowl (the walls are nice and thick now), the EBB36 and an umbilical.

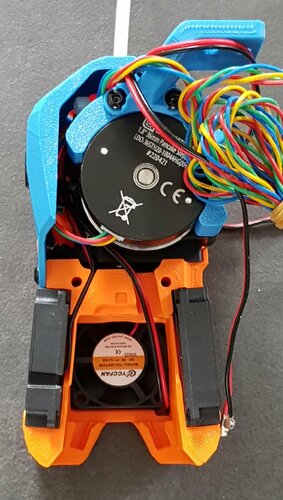
For the EBB36 you will need the Motor Bridge and the PCB mount.

2024-08-08-182713_955x822_scrot.thumb.png.5fc1019bcf9ab3d82fc9ae8817d78f32.png

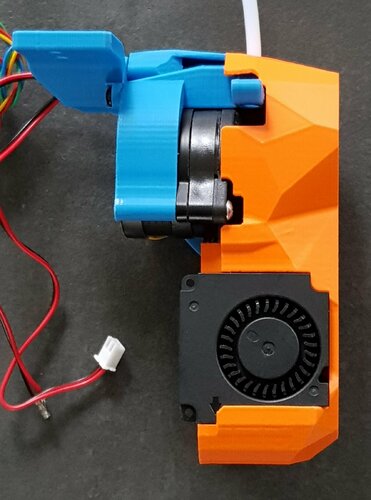
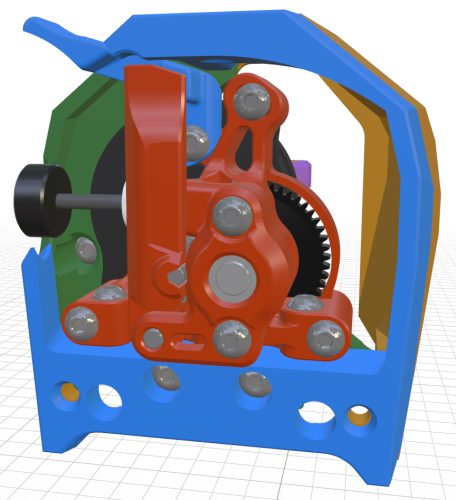
The M3 screws go through planetary gear cover and the stepper motor then thread into the motor bridge which fits two M3 heat-inserts for securing the PCB and mount from behind. The hole you can see in the PCB mount is for connecting the cable door with another M3 screw. You can also see the blue reverse-bowden press-fitting that makes it easier to slide the PTFE tube in and out since the shroud gets in the way of accessing the standard Orbiter fitting.

  • Like 1
Link to comment
Share on other sites
On 8/6/2024 at 4:55 PM, atrushing said:

As part of a larger update, I have fixed these thin sections on all of the shrouds and pushed the change to GitHub.

Hi, it seems to me that the same problem is present on the shroud that you made for my LED. Is it possible to have a fix?

Link to comment
Share on other sites

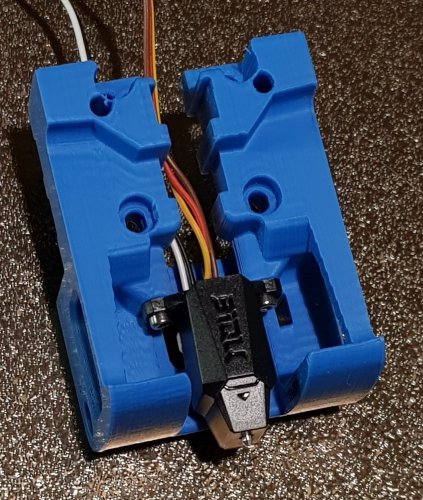
Hello. I'm building the miniSB with a G2SA & Knomi2 but I'm facing an issue with the shroud not being deep enough for the Knomi2 so the aluminium carrier of the G2SA is pushing it. Maybe I'm missing something. I printed the [a]_MiniStealth_Shroud_GalileoSA_Knomi2_UHF.stl

20240819_183056.jpg

20240819_182902.jpg

Link to comment
Share on other sites
7 hours ago, Synerone said:

Hello. I'm building the miniSB with a G2SA & Knomi2 but I'm facing an issue with the shroud not being deep enough for the Knomi2 so the aluminium carrier of the G2SA is pushing it. Maybe I'm missing something. I printed the [a]_MiniStealth_Shroud_GalileoSA_Knomi2_UHF.stl

20240819_183056.jpg

20240819_182902.jpg

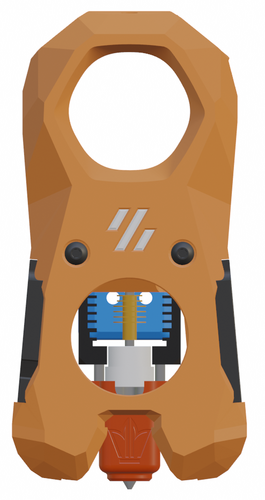
Yeah, sorry. That is a design feature of the Galileo SA that I don't really understand. It would be possible to trim off the front 2-3mm of the aluminum carrier shaft or the whole shroud would have to be stretched forward just for this combination..

2024-08-20-085647_864x894_scrot.thumb.png.db6256cffc1ce458979f62c0b1a14042.png

Link to comment
Share on other sites

I understand, probably I should stretch the shroud, but I need to check if trimming the aluminum carrier is a viable option, I don't know if being this large is an important feature.  Do you have the STEP files?  Maybe I can work in something. 

Link to comment
Share on other sites
5 hours ago, Synerone said:

I understand, probably I should stretch the shroud, but I need to check if trimming the aluminum carrier is a viable option, I don't know if being this large is an important feature.  Do you have the STEP files?  Maybe I can work in something. 

Sorry again, this was designed entirely in Blender by editing the raw mesh.

From what I understand about the Galileo, the main purpose for the shaft sticking out is to make it easier to advance the filament by hand with the knob the design provides. 

I am away on vacation so I can't really look into the feasibility of stretching the shroud right now. 

Link to comment
Share on other sites
4 hours ago, atrushing said:

I am away on vacation so I can't really look into the feasibility of stretching the shroud right now. 

Hope you have a great trip and awesome time! 🍻

  • Like 1
  • Thanks 1
Link to comment
Share on other sites

hi guys. back again. decided to convert mine to a switchwire. but like everything else i do there are obviously non standard parts. i went through the repo but couldnt find what i was looking for. has anybody here made an x carriage for a switchwire with a bltouch that fits on a mgn9h rail? as before i wouldnt mind doing this myself but im useless at blender.

Link to comment
Share on other sites
16 hours ago, nvanstaden said:

hi guys. back again. decided to convert mine to a switchwire. but like everything else i do there are obviously non standard parts. i went through the repo but couldnt find what i was looking for. has anybody here made an x carriage for a switchwire with a bltouch that fits on a mgn9h rail? as before i wouldnt mind doing this myself but im useless at blender.

Is it a single MGN9 rail or is the older style double MGN9 setup?

If it is a single rail, it might not be too hard for me to modify the MGN12 holes to fit an MGN9 (C or H?) linear carriage. I think the older double MGN9 would require designing a new x-carriage from scratch and I'm a little short on time currently.

  • Like 1
Link to comment
Share on other sites

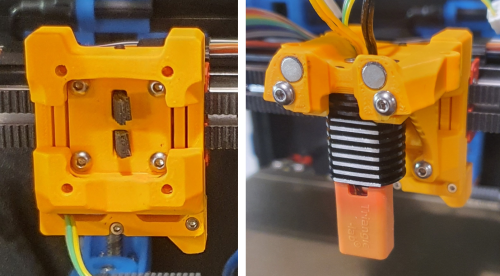
single mgn 9h however i tried to convert it and modify it africa style, only problem is it seems the holes are going to interfere when the flange of the bl touch mounts

Link to comment
Share on other sites
5 hours ago, nvanstaden said:

single mgn 9h however i tried to convert it and modify it africa style, only problem is it seems the holes are going to interfere when the flange of the bl touch mounts

Yeah, the BL-Touch takes a lot of space there. I will look into the design. There is also the side mount for the BL-Touch that can be installed on either side of the shroud but it doesn't look as clean as when it is hidden behind the hotend.

2024-09-16-235145_736x755_scrot.thumb.png.8591b0017d747fccf5d26cfb6450f6cc.png

Link to comment
Share on other sites

yeah i know about the side mount. not my cup of tea. dont break your head though. i was only asking. maybe ill just switch out the rail. thx buddy

  • Like 1
Link to comment
Share on other sites
4 hours ago, nvanstaden said:

yeah i know about the side mount. not my cup of tea. dont break your head though. i was only asking. maybe ill just switch out the rail. thx buddy

I did a quick check on the MGN9H hole pattern and, if you could move the BL-Touch up by 1.5mm while still triggering before the nozzle collides, then it should work. I will have to look up the specs on the BL-Touch again to see what the deployed and stowed dimensions are. The red circles are the diameter of the head of the four M3 BHCS for the MGN9H lined up with the stock MGN12 x-carriage and I have dragged the BL-Touch lugs up by 1.5mm.

2024-09-17-214508_687x860_scrot.thumb.png.c9211bdb4a227e1eb7af163995333030.png

Link to comment
Share on other sites

oof thats a bit too lose for comfort with how finicky these bltouches are.

stress not. ill replace the rail for a big boy rail. thanks for your effort buddy.

  • Like 1
Link to comment
Share on other sites
8 hours ago, Synerone said:

Hi, what do I need to install a klicky probe? I see the zeroclick but idk if i need to modify something

The Klicky probe fits into the standard Omron probe x-frame pieces and you can use the standard shroud with it. This setup fits the V2.4 or the Trident and there is another x-frame set that fits the Klicky/Omron for a Switchwire.

Link to comment
Share on other sites

Hi there, I am a bit confused on how to get this set up, I'm looking to swap out the PitStop on my Prusa MK3s+ with this with the following configuration as I am planning to move it to Klipper:

Pinda, Sherpa mini, CHC v6 / standard v6, EBB36 board

I have a few questions if that is OK:
1. I am a bit lost looking at the github page - how do I determine which parts I need to print please?
2. Is there a compatible backplate for the prusa mk3s? Otherwise I can design one no problem
3. How quick is it to swap the hotend out with an EBB36 board?
4. Can you suggest any other hotends which will have a better flow rate pls?

Thanks
Z

Link to comment
Share on other sites
3 hours ago, Zhao said:

Hi there, I am a bit confused on how to get this set up, I'm looking to swap out the PitStop on my Prusa MK3s+ with this with the following configuration as I am planning to move it to Klipper:

Pinda, Sherpa mini, CHC v6 / standard v6, EBB36 board

I have a few questions if that is OK:
1. I am a bit lost looking at the github page - how do I determine which parts I need to print please?
2. Is there a compatible backplate for the prusa mk3s? Otherwise I can design one no problem
3. How quick is it to swap the hotend out with an EBB36 board?
4. Can you suggest any other hotends which will have a better flow rate pls?

Thanks
Z

I will save your first question for last..

2. I never designed a backplate to fit this onto a Prusa MK3 but it would be a fun exercise. To get the extruder motor above the LM8UU bearings, you would need to raise the nozzle up by at least 10mm and I think it would help to switch the double bearings to the bottom so that you could make the top section more narrow. (yes, I already had a mockup of the MK3s toolhead in Blender 🙂)

2025-03-09-205143_1041x778_scrot.thumb.png.3836897e872a10fd7ab15aa04d3405d1.png

3. If you would like quick hotend swaps, the Bambu hotend is the only one that could be removed (by removing two screws from the side) without first removing the extruder. The rest of the compatible hotends are held on by screws from above or behind the core piece.

4. If you are looking for high flow on a budget, I have heard that the Dragon Ace hotend is pretty good. I have a CHC TD6S on my Trident and can print at up to 200mm/sec with it. The Bambu hotend is quite respectable as well as cost friendly and would allow you to remove/swap it quicker. The Mini Stealth cannot fit a V6 style hotend with the groove mount. That style is just too tall.

1. Most of the .stl files you would need are in the Sherpa Mini folder under the main Extruders folder.

  • You would need to pick the core piece that fits your choice of hotend.
  • The shroud would probably use a 3010 hotend fan
    • under the probe_left or right folder you would use the first option unless you wanted to use a Knomi display on your toolhead.
    • If you can fit the Pinda to the Prusa-style backplate then you could use a standard shroud
  • You would need the motor bridge and PCB mount for the EBB36 as well as the cable door
  • The Common Parts folder has the rest of the components you would need such as:
  • Like 1
  • Thanks 1
Link to comment
Share on other sites
23 hours ago, atrushing said:

I will save your first question for last..

2. I never designed a backplate to fit this onto a Prusa MK3 but it would be a fun exercise. To get the extruder motor above the LM8UU bearings, you would need to raise the nozzle up by at least 10mm and I think it would help to switch the double bearings to the bottom so that you could make the top section more narrow. (yes, I already had a mockup of the MK3s toolhead in Blender 🙂)

2025-03-09-205143_1041x778_scrot.thumb.png.3836897e872a10fd7ab15aa04d3405d1.png

3. If you would like quick hotend swaps, the Bambu hotend is the only one that could be removed (by removing two screws from the side) without first removing the extruder. The rest of the compatible hotends are held on by screws from above or behind the core piece.

4. If you are looking for high flow on a budget, I have heard that the Dragon Ace hotend is pretty good. I have a CHC TD6S on my Trident and can print at up to 200mm/sec with it. The Bambu hotend is quite respectable as well as cost friendly and would allow you to remove/swap it quicker. The Mini Stealth cannot fit a V6 style hotend with the groove mount. That style is just too tall.

1. Most of the .stl files you would need are in the Sherpa Mini folder under the main Extruders folder.

  • You would need to pick the core piece that fits your choice of hotend.
  • The shroud would probably use a 3010 hotend fan
    • under the probe_left or right folder you would use the first option unless you wanted to use a Knomi display on your toolhead.
    • If you can fit the Pinda to the Prusa-style backplate then you could use a standard shroud
  • You would need the motor bridge and PCB mount for the EBB36 as well as the cable door
  • The Common Parts folder has the rest of the components you would need such as:

Thanks for this. Is the backplate attached to the mini stealth through just the two holes on the core pieces?

Also, I have a spare stealthburner kit that I never assembled - is there currently an attachment for the Cw2 stealthburner PCB board with the mini stealth?

Edited by Zhao
Link to comment
Share on other sites
11 hours ago, Zhao said:

Thanks for this. Is the backplate attached to the mini stealth through just the two holes on the core pieces?

Correct. The holes are slightly elongated so that they will fit the old Mini Afterburner spacing of 26mm or the newer Mini Stealthburner spacing of 25mm.

11 hours ago, Zhao said:

Also, I have a spare stealthburner kit that I never assembled - is there currently an attachment for the Cw2 stealthburner PCB board with the mini stealth?

The Stealthburner PCBs are quite large compared to the Mini Stealth and I can't imagine a good way of mounting them. Plus there are a good few different versions which would need different mounting solutions.

2025-03-11-084418_618x822_scrot.thumb.png.a2126d283cd5c94561b6e737dde28b37.png

Link to comment
Share on other sites
12 hours ago, Zhao said:

Someone has made a backplate for the ProosaXY already, and I think it should be fine for the mk3s as well.

Cool stuff! One problem is that the ProosaXY runs two belts vertically in the Core XY setup where the Prusa just uses a single horizontal belt for the X axis. This would still be a great start for making a standard Prusa backplate.

The other thing that I noticed is that there isn't much room for some hotends.

2025-03-12-075455_668x910_scrot.thumb.png.c71c3b08165f16f5cb416c3647834fd5.png

I will see if I can find some time to tinker with this design and hopefully make something that would fit more extruder/hotend combinations.

Edit: Stay tuned.. I think I will be making a second set of all the core pieces that will replace the need for the orange spacer above and add a lot of rigidity to the toolhead. This should help with StealthChanger compatibility as well.

Edited by atrushing
  • Haha 1
Link to comment
Share on other sites

Join the conversation

You can post now and register later. If you have an account, sign in now to post with your account.

Guest
Add a comment...

×   Pasted as rich text.   Paste as plain text instead

  Only 75 emoji are allowed.

×   Your link has been automatically embedded.   Display as a link instead

×   Your previous content has been restored.   Clear editor

×   You cannot paste images directly. Upload or insert images from URL.


User Feedback

×
×
  • Create New...