Jump to content

13 Screenshots

  • Like 8
  • Voron FTW! 4
  • Thanks 1

Recommended Comments


59 minutes ago, mvdveer said:

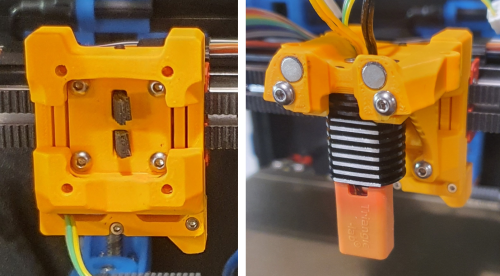
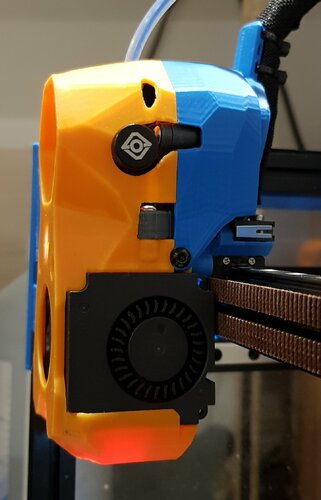
@atrushing Printed a the mini-stealthburners and went to assemble when I noted the mounting for the Dragon hotend is rotated about 15 degrees. 

image.thumb.jpeg.534017e2af64ac6ad35ed32e41472b66.jpeg

image.thumb.jpeg.f682a854b810e4eb01d02a3863e7e278.jpeg

When mounted this leaves the heater block very close to the LED's in the front of the toolhead. I assume this is deliberate, just want to check before continuing the build. Also: I test fitted the shroud to the existing X-Rail mount and it fits. Is the mount you included essential - does it add strength, height, etc?

Thanks in advance


Sorry, that isn't a 'feature' of the design. It looks like I need to make a Dragon specific version. The holes are oriented for the Dragonfly hotend.

_20221014_223509.thumb.jpg.844c727e6f332dffe36a750fe9627f9e.jpg

Link to comment
Share on other sites
1 hour ago, mvdveer said:

I test fitted the shroud to the existing X-Rail mount and it fits. Is the mount you included essential - does it add strength, height, etc?

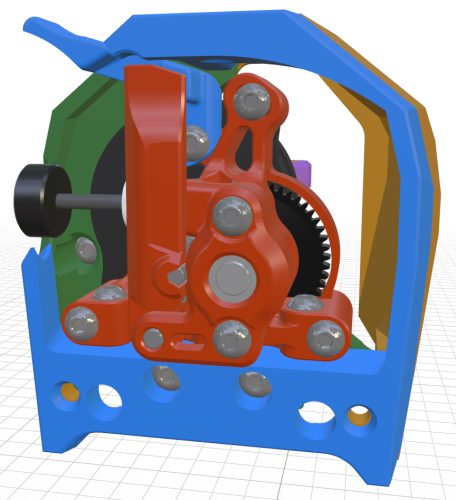
The mount I included is necessary because it fits the Orbiter extruders (both 1.5 and 2.0) and the mounting holes are moved up by 1.6mm to provide clearance for the 4010 part cooling fans.

The green x-carriage is the official .stl and the blue is my modification.

2022-10-15-101130_1920x1054_scrot.thumb.png.43abd20e7c0bd7732cc9ddc59d2583a1.png


Link to comment
Share on other sites
21 minutes ago, atrushing said:

. The holes are oriented for the Dragonfly hotend.

All sorted - got the phaetus hotends confused

Thanks


image.thumb.jpeg.447487a339d035ce39f2741d21515496.jpeg


  • Like 1
Link to comment
Share on other sites
2 minutes ago, mvdveer said:

All sorted - got the phaetus hotends confused

That is the problem with having too many hotends laying around!

  • Like 1
Link to comment
Share on other sites
7 minutes ago, mvdveer said:

image.thumb.jpeg.447487a339d035ce39f2741d21515496.jpeg

I don't know how heat resistant the RGBW neopixels are, but if you rotate the hotend 180 degrees it gives them a little more room to breathe.

Link to comment
Share on other sites
52 minutes ago, atrushing said:

I don't know how heat resistant the RGBW neopixels are, but if you rotate the hotend 180 degrees it gives them a little more room to breathe.

Will do thanks

Link to comment
Share on other sites
7 hours ago, atrushing said:

That is the problem with having too many hotends laying around!

😆 Like Nero rooting around in parts boxes the other day "Oh look, another Revo!"

  • Like 1
  • Haha 1
Link to comment
Share on other sites
On 10/15/2022 at 5:26 PM, claudermilk said:

Like Nero rooting around in parts boxes the other day "Oh look, another Revo!"

Wish I had that issue 😛 like everyone else with me I think 😛 


Link to comment
Share on other sites

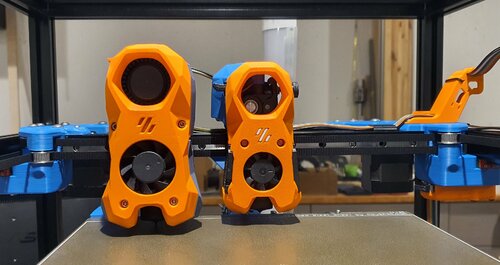
"22 Oct 2022:   I have added new versions that should fit the Revo Voron hotend. I cannot verify the fitment so if there are any issues please leave a comment."

Tested fit of Voron Revo - Perfect fit:

image.thumb.jpeg.74dee59c684e411e0783b8a9ea2d343e.jpeg

  • Thanks 1
Link to comment
Share on other sites

Hi @atrushing

I again want to thank you for this beautiful series of designs. 

Today I printed out the parts I thought I needed for


Extruder: Orbiter 1.5

Carriage: MGN12 Sidewinder

Hotend: rapido HF

Sensor: Omron probe


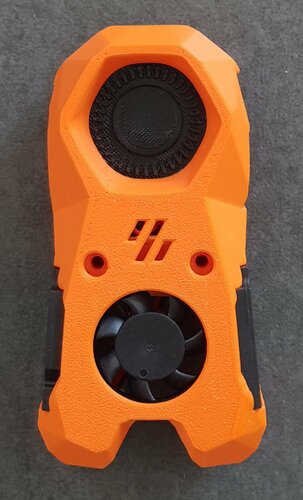
See pictures, even though it is a test print (with my white abs), it looks great. The rapido I have test-fitted and removed (afraid the thermistor wire might break), the leds have to be soldered yet and installed, the 3010 I have does not fit completely, probably a problem of my tolerances, I will look again tomorrow and the 4010s I have ordered and almost here.

What I want to ask, is what you would recommend me to use for mounting a EBB36 on the back? and/or a way of mounting the EBB sb2209? 


s1.jpg

s2.jpg

sb.jpg

sf.jpg

Link to comment
Share on other sites
19 hours ago, Dirk said:

What I want to ask, is what you would recommend me to use for mounting a EBB36 on the back? and/or a way of mounting the EBB sb2209? 

I will try modifying the motor_bridge to accept a spacer that can hold the EBB36. Checking the GitHub, it looks like their EBB SB2209 would be too large for the Mini Stealth unless it was just slapped on the side of the toolhead. It is a good idea to go umbilical with the Orbiter 1.5 on a Switchwire as the cable chain would scrape the back of the stepper motor. On the Orbiter 2.0, the back of the stepper sits over 12mm further forward!

2023-12-28-162856_1914x1048_scrot.thumb.png.9e802a7fd60a10ea4f9a8ee72c22171c.png

19 hours ago, Dirk said:

the 3010 I have does not fit completely, probably a problem of my tolerances,

It does look like you have a little over-extrusion going on there but the 3010 fan is tight and tricky to fit into the shroud and it can depend on how you tilt it into place. Sometimes it would take me a couple attempts to get the fan to slot in well. Rev 2.0 should take care of the problem but I still have some work to finish before I can release anything.

  • Like 2
Link to comment
Share on other sites

Thank you very much 🙂
Umbilical. I will do that once I have gotten that far.

I have managed to mount the EBB by drilling out the holes on the motor_bridge_frame_new.stl. works also great with the pins that came with the EBB.

The 4010 fans came in and I fitted them in as well as the 3010, with a bit of filing and correct angling 🙂

But now all those cables are in the way and it seems the 4010s do not allow me to connect the carriage. I will reprint with my voron and see if I get a better fit. 

Thanks for your reaction again. Only assembling it with so many components in such a little space shows what kind of a complex work it is to design such a component 🙂 

And again, it really looks beautiful, even in the ugly white combination I printed it.

b2.jpg

d1.jpg

s22.jpg

  • Like 1
Link to comment
Share on other sites
32 minutes ago, Dirk said:

it seems the 4010s do not allow me to connect the carriage

You will need 4010 blowers instead of the axial fans there.

36 minutes ago, Dirk said:

I have managed to mount the EBB by drilling out the holes on the motor_bridge_frame_new.stl. works also great with the pins that came with the EBB.

That was my first idea (but maybe with heat set inserts) but the Orbiter sits too low and the EBB36 will foul on the 2020 aluminum profile..

2023-12-28-182035_1914x1048_scrot.thumb.png.3cf26cf36f0b1e42af4fd3cfd6c871ed.png

  • Like 2
Link to comment
Share on other sites
1 hour ago, atrushing said:

You will need 4010 blowers instead of the axial fans there.

That was my first idea (but maybe with heat set inserts) but the Orbiter sits too low and the EBB36 will foul on the 2020 aluminum profile..

2023-12-28-182035_1914x1048_scrot.thumb.png.3cf26cf36f0b1e42af4fd3cfd6c871ed.png

Hah. See, this is how I learn best! By making errors 🙂 luckily those fans were cheap. Now I know there's a difference between fans and blowers 😂

And I thought the ebb might hit the profile, wanted to verify that by getting it on the printer... You did that faster than me. Well... Thanks again. Will wait for your solution then. Not in a hurry, take your time 🙂


  • Like 2
Link to comment
Share on other sites
On 12/28/2023 at 8:09 PM, Dirk said:

Will wait for your solution then.

Well, here is what I have come up with. It will need a pair of heat-set inserts and M3x6 BHCS. I might clean up the design a little when I get around to releasing the v2 of the Mini Stealth - Orbiter 1.5 but that should include a newer motor_bridge design too. Let me know how this fits on your Switchwire and if it is rigid enough. I think the zip-ties holding the wires at the top should help hold the PCB pretty securely.

2024-01-03-112624_1914x1048_scrot.thumb.png.1205fb3c82cac488998c1f8a81ae71d6.png

[p]_MiniS_Orbiter_1.5_EBB36_mount.stl

  • Like 1
Link to comment
Share on other sites

Join the conversation

You can post now and register later. If you have an account, sign in now to post with your account.

Guest
Add a comment...

×   Pasted as rich text.   Paste as plain text instead

  Only 75 emoji are allowed.

×   Your link has been automatically embedded.   Display as a link instead

×   Your previous content has been restored.   Clear editor

×   You cannot paste images directly. Upload or insert images from URL.

 Share


User Feedback

×
×
  • Create New...