-
TeamFDM.com is an UNOFFICIAL companion site for the DIY Voron 3D printer community. For official docs and final source of truth, visit the Official Voron Discord or the Voron Github
Printable Voron User Mods
Voron User Mods, or "UserMods", are a collection of community created and Team FDM curated modification for Voron Printers. All of these mods are available on the VoronUsers Github repo and unless otherwise specified follow the Voron communities GPL3.0 Licensing. Use any Mods at your own risk, if you make modification please share them on the VoronUsers repo.
Mod Authors: Have a Voron mod? Upload it at TeamFDM.com and let us know you're the author. We will ensure you can update and curate your files for more feedback! Please include tags for what Voron, or extruder your mod is compatible with.
660 files
-
(0 reviews)
0 comments
Submitted
-

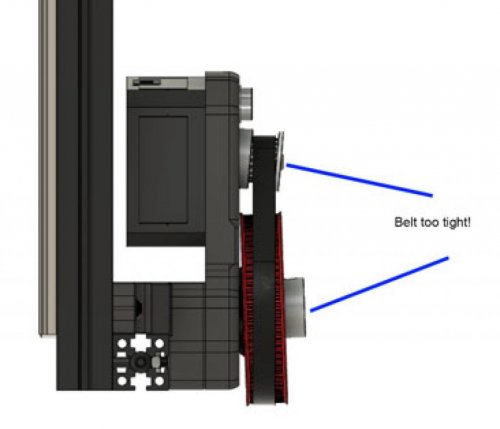
V0.1 Belted Z Drive
Same BOM as the original mod for the V0.0
BOM located at:
https://docs.google.com/spreadsheets/d/1Ucntdw1GGza19FC4mE_vLksJp4SiwUsq-mJtIgG-_OQ/edit?usp=sharing
NOTE: This is a beta release. Still testing and some minor design changes may occur in the future.
1 download
(0 reviews)0 comments
Submitted
-
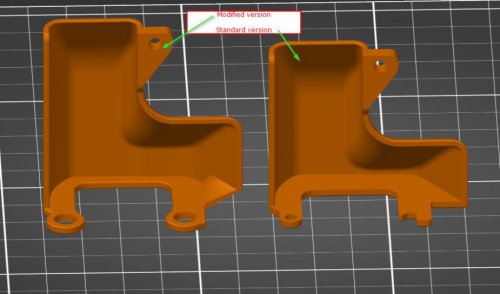
Afterburner Connector Cover 42STH20 1004AS
Afterburner connector cover for 42STH20-1004AS stepper motor
The Afterburner is designed for the 17HS08-1004S stepper motor. This stepper has notches where the motor body is screwed together and the connector cover uses the space inbetween the cable chain connector and the notch. My Afterburner uses an LDO-42STH20-1004AS2 which doesn't have this notch, hence this modified cable cover. This cable cover is designed to not need any new hardware and therefore is attached on top of the screw heads instead of being held down by the screws. This also makes the removal of the cover a little quicker, since you only have to unscrew 1/3 of the screws. There is also a little more room for cables since the cover is longer and the exit hole is a little larger.
Verified to fit on
LDO-42STH20-1004AS2 on SwitchWire Comparison to the original connector cover
What is modified from the original?
A few mm longer so that it goes past both the motor and the cable chain mount Larger cable exit so that my wires fit better A little bit modified in the back not to hit the cable chain Larger holes for the screws since this is actually not bolted down, it just snaps in place on top of the bolt heads BOM
Just this printed part, everything else is stock User photos
User Exodius Afterburner with this mod installed
49 downloads
(0 reviews)0 comments
Submitted
-
V0 Handle
Voron0 Handle for 3mm panels
print settings:
layer height: 0.2mm hardware:
8 x M3x35 SHCS 8 x M3 nut
18 downloads
(0 reviews)0 comments
Submitted
-
V0 Skirt
Voron0 dual color skirt set (SSR, PowerSwitch, Nameplate)
To match the skirt with the Midpanel with Hex Pattern by sterminatore's idea
print settings:
layer height: 0.2mm color change at 0.6mm / 2.2mm Skirt.stl, Skirt_mirror.stl
Left and right skirt part with 40 degree chamfers for color change printing. There is an extra hole for tightening the middle M3 screw.
Skirt_EmptyNameplate.stl
Empty nameplate for serial number. For example, with Tinkercad you can easily put the number on it.
Here's a quick tutorial:
Skirt_SSR.stl
SSR holder with led window.
Skirt_PowerSwitch.stl
12mm x 19mm windows for power switch.
Example power switch on aliexpress: On/Off Switch 6A-10A 110V 250V 21MM*15MM
Overview
36 downloads
(0 reviews)0 comments
Submitted
-
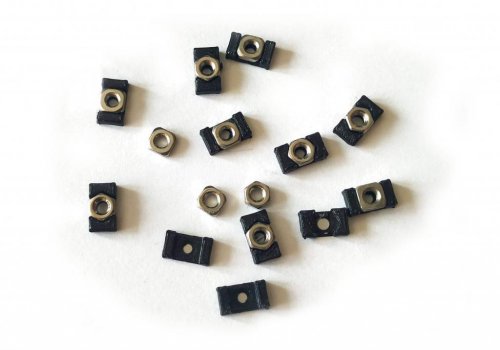
V0 1515 T Nut
Voron0 1515 T-Nut
It is a great help during installation to prevent the nuts from moving. During the construction of Voron0, it comes in very handy with the screws of MidPanel, TopHat, BedMount.
hardware:
M3 Square Nuts from Aliexpress (5.5mm x 5.5mm x 2mm) (Recommended!) or
M3 hex nuts. The hex nut is too high, it is difficult to print because only one or two layers get under the nut. (depending on the frame) But it also works. The MakerBeam version is lower than the LDO version.
print settings:
layer height: 0.2mm
138 downloads
-
V0 MidPanel HexPattern
Voron0 MidPanel with Hex pattern
print settings:
layer height: 0.2mm color change at 0.6mm / 2.2mm V0.1
hardware:
4 x M3x8 BHCS 4 x M3 nut
V0.0:
Compatibility:
Pocketwatch Z Belt mod hardware:
8 x M3x6 BHCS 8 x M3 Threaded Insert 4 x M3x8 BHCS 4 x M3 nut
268 downloads
(2 reviews)0 comments
Submitted
-
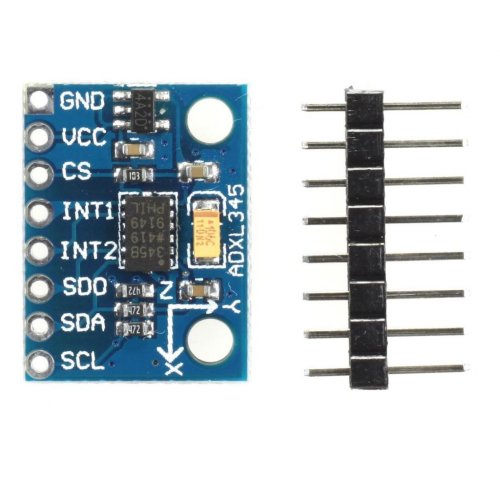
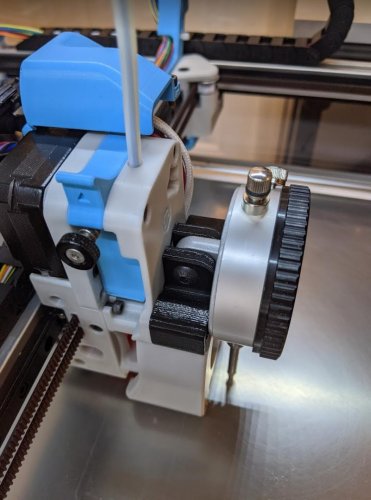
GalileoADXL
ADXL356 mounts for the Galileo extruder
These are my edited standard galileo chain mounts to be able to mount an adxl356 against it permanently. I attached them with two M3x6. It'll work for an adxl356 of the following layout: It'll end up looking like this:
13 downloads
(0 reviews)0 comments
Submitted
-
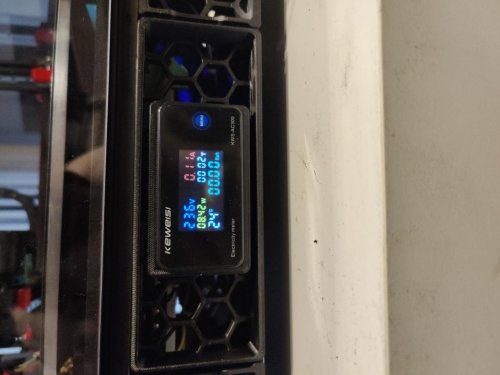
PowerSkirt
V2 Power Skirt
A skirt piece to replace the lefthand (empty) or righthand fan holder with this. I bought the screen here: https://nl.aliexpress.com/item/4001268132948.html?spm=a2g0s.9042311.0.0.48094c4dXCEnMz I chose the one with the torus because that's the easiest to install one.
Steps to install: 1) Disconnect printer from mains 2) Connect the screen's wires (L-N and CT). You can also plug in the provided temperature sensor already, just be careful when inserting the screen into the skirt. 3) Slide the screen into it, it should be press fit, maybe a bit on the loose side. 4) Slide the torus over the mains input, before you split it off to power the PSUs/Bed. This way you measure the entire printer, not just one branch of the split. 5) If you didn't do the temperature sensor at 2, now's your moment to do it. I tiewrapped mine to a wire so it measures the electronics compartment. 6) Remove the M5 T-nut from the rail and insert two M3 T-nuts to hold the skirtpiece. 7) Fasten with 2 M3*8. 8) Power up.
6 downloads
-
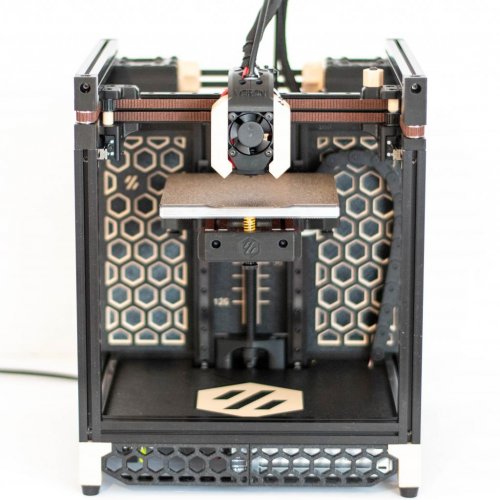
V1.8 Jigs
Jigs for assembling V1.8
Overview
These jigs are for aligning extrusions when building V1.8. This allows you to precisely align the extrusions with a minimal amount of work.
Printing instructions
Pretty much anything works. A good starting point is 2 perimeters and 10-15% infill.
Usage
Loosely assemble the extrustion blind joint and then place the entire blind joint onto the jig. While on an extremely flat surface, press down firmly on both horizontal extrusions and tighten the blind screws.
7 downloads
(0 reviews)0 comments
Submitted
-
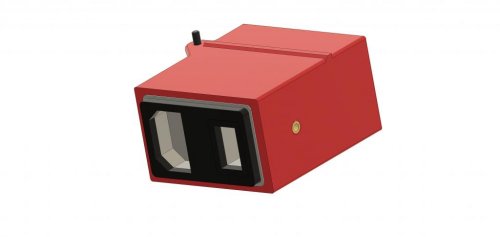
Astrodyne Inlet
Astrodyne IEC 320 C14 Power Inlet Housing for V0.1
This mod is a replacement housing for the stock v0.1 power inlet, replacing the Adam Tech IEC-GS-1-100 (which has been on back-order at Digikey for quite a while at the time of this writing) with an Astrodyne/TDI 082S/082SM.
In addition to the power inlet you will also need to acquire some inexpensive 5 mm diameter X 20 mm long 250V fast-acting fuses (see the v0 sourcing guide for details).
Files
STL STEP file Fusion 360 design Assembled view
Printed part render
Unassembled view
Front view
Rear view
Fuses
Printing notes
Slice and print with standard Voron settings (ABS, 40% infill, 0.4mm line width, 0.2mm layer height, 5 top/bottom layers, 4 walls) but there isn't a lot of surface area in contact with the bed, so you may struggle with warping unless your first layer is dialed in perfectly (perhaps with a little extra squish). There is no shame in printing this part with a brim (I've not added any fillets to the front edge for precisely this reason).
The STL should import into your slicer with the correct orientation. If not, ensure that the front (where the inlet is inserted) is face down on the bed.
Design and assembly notes
This design should be a simple drop-in replacement of the stock parts, but it's secured at just two points: the heat-set insert in the side and the screw through the ear on the top.
I've used one fewer screw than the original part, but two screws on orthogonal faces are more than rigid enough in practice.
If you've already inserted both M3 nuts, I'd recommend simply sliding one as far to the left as possible (as you face the back of the printer) and securing it with an M3 x 6mm screw. There will still be room for the other nut, and it beats having to disassemble the frame (or leaving an extra nut rattling around).
The printed housing has a slightly larger panel cutout than called for in the Astrodyne 082S/082SM datasheet. I just guesstimated the amount of offsets to account for part shrinkage and printing tolerances, but my first print of the part worked perfectly: the power-inlet snapped into place with a quite satisfying click, and felt quite secure.
WARNING: Both the 082S (general purpose) and the 082SM (
3 downloads
(0 reviews)0 comments
Submitted
-
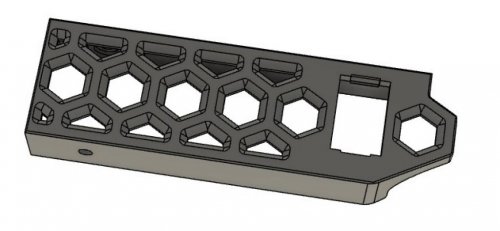
Ender Compatible Controller Mount
README
Overview
This is a mount for Creality Ender compatible controllers together with 40x40x10 fan to cool stepper drivers. Selection of compatible boards includes:
Creality v1.1.5 (TMC2208) TH3D EZboard (TMC2208) SKR mini E3 v1.2 (TMC2209) and similar Print parameters
as per Voron specifications:
Layer height: 0.2 Infill: 50% or more Infill type: Grid Perimeters: 4 or more Top/Bottom solid layers: 5 or more Filament: ABS/ABS BOM
404010 fan 12 or 24V one (check controller board supply voltage) 4x M3 thermal thread inserts 4x M3 8mm screws 2x M5 BHCS 8mm T-Nuts8 downloads
(0 reviews)0 comments
Submitted
-
Din Rail Mount
README
Overview
This is a mount for 35mm DIN RAIL in legacy v2.2 way. Available in regular and angled version.
Panel version (only angled) can be used to attach DIN rail to the back of Voron 2.4.
Print parameters
As per Voron specifications:
Layer height: 0.2 Infill: 50% or more Infill type: Grid Perimeters: 4 or more Top/Bottom solid layers: 5 or more Filament: ABS/ABS224 downloads
(0 reviews)0 comments
Submitted
-
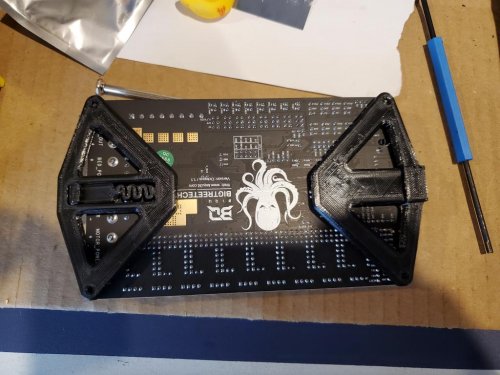
BTT Octopus DIN Vertical Mount
BTT Octopus vertical mount
Overview
This is a mount for new BTT Octopus mount for DIN rails. It mounts the board vertically to take full advantage of the fan to cool those stepper motor drivers.
Remember to use spacers and place them in between the board and mounts.
Note: you may need to adjust your DIN rail distance, it should be snug but not too far apart that you can't release the board.
# #
497 downloads
(2 reviews)0 comments
Submitted
-
Corner Panel Clip
README
Overview
This is a corner modification to alllow installing panels when some thoer way of extruction connection is used.
Print parameters
as per Voron specifications:
Layer height: 0.2 Infill: 50% or more Infill type: Grid Perimeters: 4 or more Top/Bottom solid layers: 5 or more Filament: ABS/ABS17 downloads
(0 reviews)0 comments
Submitted
-
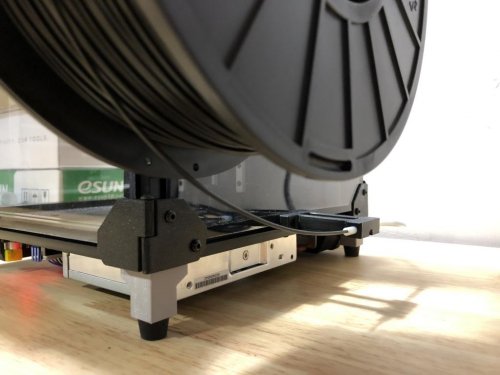
LargeSpoolHolders
Simple modification of the V1.8/2.4 spool holder to fit five pound KVP spools.
15 downloads
(0 reviews)0 comments
Submitted
-
RemovableDoors
Removable door hinges
Axes are made with 4 M3x40
Front :
Back :
To print the logo in relief simply use the stl without accent.
To print the logo with your accent color in simulated MMU mode:
open the stl in susie select the parts context menu 'Split-500 downloads
(0 reviews)0 comments
Submitted
-
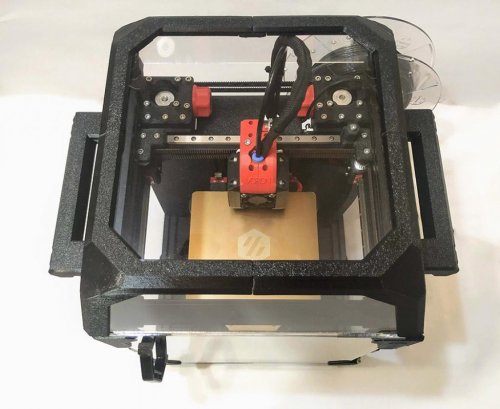
V01 LED Tophat
V0.1 LED Tophat
Printed Parts:
LED Tophat - Main Body LED Tophat - Top Cover LED Tophat - Logo Insert Parts:
4x M3x6 BHCS 4x M3x5x4 Heat Inserts 24V LED Lightstrip \\ URL: https://www.amazon.ca/gp/product/B074XCKJYB/ 22 AWG Wire Printer Config:
[output_pin caselight] pin: PC9 pwm:true shutdown_value: 0 value: 1.0 cycle_time: 0.01 [gcode_macro LEDOFF] gcode: SET_PIN PIN=caselight VALUE=0 [gcode_macro LEDMIN] gcode: SET_PIN PIN=caselight VALUE=.25 [gcode_macro LEDMAX] gcode: SET_PIN PIN=caselight VALUE=1 Note -- I am using AC Bed with SSR. SSR output on PC12 (PWR-DET) and LED Lights are running off PC9 (BED)
Pictures
48 downloads
(0 reviews)0 comments
Submitted
-
VORON 2.4 Z Chain 3 Hole Mounts
VORON 2.4 Z Chain 3 Hole Mounts
This mod is used to mount a generic 3-hole Z chain in a VORON 2.4. The lower mount replaces the stock lower mount, and the upper mount attaches to A drive in the stock location instead of the 2-hole chain, and then the 3-hole chain mounts to the upper mount.
BOM
Lower mount:
1x M5x10 BHCS 1x M5 ball spring nut (or other extrusion nut) 3x M3x8 FHCS 3x M3 threaded insert Upper mount:
2x M3x12 SHCS 2x M3 nut 3x M3x10 FHCS 3x M3 threaded insert448 downloads
(1 review)0 comments
Submitted
-
V0 Reverse Bowden Mount
VORON 0 Reverse Bowden Mount
This mount holds your reverse bowden PTFE tube near the bottom center of the spool to ensure the filament doesn't come off the spool during printing. Replace the bottom center clip of the right panel with this mount.
BOM
1x M3x12 BHCS 1x M3 nut (same one that was used for the panel clip you're replacing)80 downloads
(0 reviews)0 comments
Submitted
-
Bruag Skirts
Bruag mesh skirts for - Voron 2.4 350mm
https://www.youtube.com/watch?v=Q-Hm1xj2tds
43 downloads
(0 reviews)0 comments
Submitted
-
Skr Brace
SKR Brace.
Clips your SKR DIN rail mounts together
Rigidizes and immobilizes the mounts Keeps the boards square to one another Soothes your OCD Fits the standard V2.4 SKR 1.4 mounts.
2 downloads
(0 reviews)0 comments
Submitted
-
AB Dial Indicator Mount
AB dial indicator mount.
Installs in place of fan assembly.
Requires:
2x M3x10mm SHCS 1x M5x20mm SHCS or BHCS 1x M5 nut For use with common dial indicators. Confirmed compatible with this one: https://www.grizzly.com/products/grizzly-magnetic-base-dial-indicator-combo/g9849?gclid=Cj0KCQjwi7yCBhDJARIsAMWFScMalpVMwU7VGmgg-EX7v9XqT1Eh7hUQgv2Z1UeLJ0F9gKKqIfKyRJwaAmnLEALw_wcB
Useful for:
manual bed mesh leveling x rails verify QGL quantify the taco
22 downloads
(0 reviews)0 comments
Submitted
-
Deck Panel Support Clips
Deck Panel Support Clips
These are simple panel support clips to help better support the lower deck panels of a V2.4 and other similar models. They sandwich the deck sheet between an upper and lower support and are held in with M3 SHCS or M3 BHCS.
And the optional slotted lower mount to accommodate panels between 2mm and 6mm.
845 downloads
-
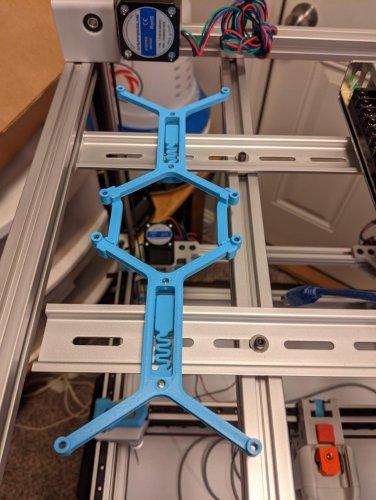
Mantis Dual 5015
Mantis Dual 5015 Toolhead by Long
Please see the (Readme_v1.06.pdf) for full description, bom, etc
Changes
7-18-2021
Now compatible with Voron 1.8! updated readme changed directory structure for clarity magprobe dock arms v1.5 - new version of dock arms (for bed and gantry mount) which are tighter and longer (thanks to ShinyPants for lots of testing with these) carriage_v1.037 - minor revision adds a hole on the left side for ADXL mounting (thanks koonweee) chain_anchor_v3.2 - moved the front ziptie location higher. added a rear ziptie location. (thanks koonweee) mantis_v1.037a.step updated - includes the above changes849 downloads