Search the Community
Showing results for tags 'mini-ab'.
Found 4 results
-

Version 1.0.0
67 downloads
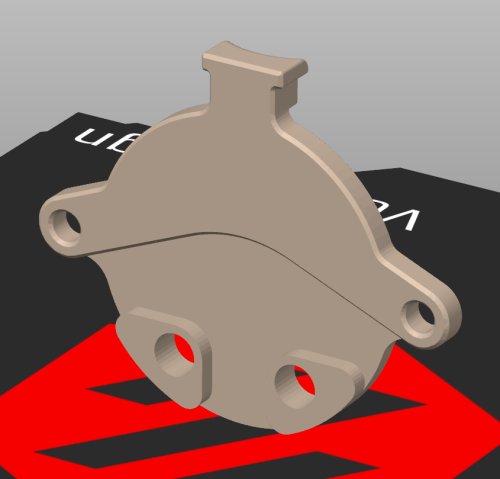
This is a modified version of the strain relief for the mini AB, which provides a well-hidden permanent mount for a cheap Chinese ADXL345 module. You need 2x 4mm heat inserts as well as 2x M3 6mm screws to attach it. -
Version 2021.08.24
63 downloads
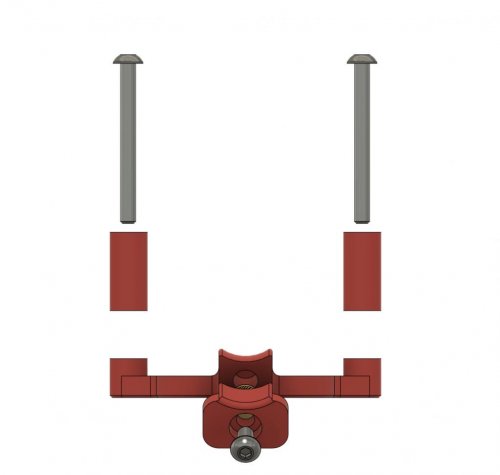
Mini Afterburner Strain Relief Replaces the stock strain relief on the V0 Mini Afterburner toolhead. BOM 1x M3x6 BHCS 2x M3x30 BHCS 2x M3 Nuts 1x M3 heat-set insert. (3x5x4) Instructions Install the M3 heat-set insert into the top of Strain_Relief_Body_x1. Use the M3x6 BHCS to attach the Strain_Relief_Body_Top_x1 to the Strain_Relief_Body_x1 Insert the 2 M3x30 screws from the front of the toolhead, through the motor, Strain_Relief_Spacer_x2 and Strain_Relief_Body_x1 finally securing them with M3 nuts on the back of the strain relief. wires can be routed between the motor and the strain relief, through the recessed area. Images -
Version 1.0.0
120 downloads
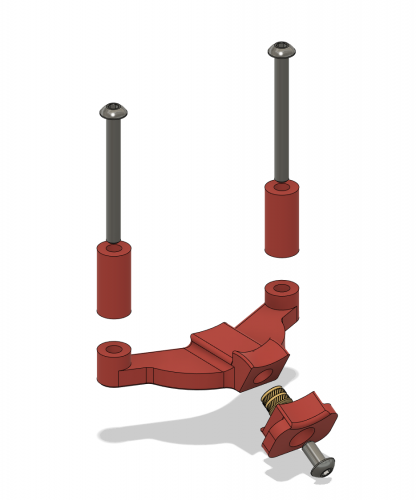
Replaces the stock strain relief on the V0 Mini Afterburner toolhead. BOM 1x M3x6 BHCS 2x M3x30 BHCS 2x M3 Nuts 1x M3 heat-set insert. (3x5x4) Instructions Install the M3 heat-set insert into the top of Strain_Relief_Body_x1. Use the M3x6 BHCS to attach the Strain_Relief_Body_Top_x1 to the Strain_Relief_Body_x1 Insert the 2 M3x30 screws from the front of the toolhead, through the motor, Strain_Relief_Spacer_x2 and Strain_Relief_Body_x1 finally securing them with M3 nuts on the back of the strain relief. wires can be routed between the motor and the strain relief, through the recessed area. -
Version 1.0.0
214 downloads
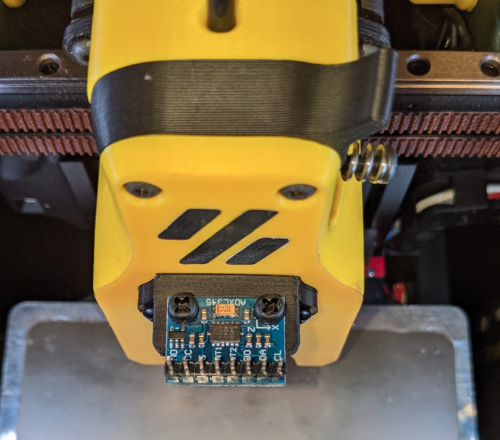
A mount to attach an ADXL345 sensor to the Mini-Afterburner toolhead. BOM 2x M3x40 BHCS 2x M3 screws (at least 4mm, preferably nylon) 2x M3 heat-set insert. (3x5x4) Instructions Install the M3 heat-set inserts into the 2 larger holes on the part. Remove the lowest 2 M3x35 screws from the front of the MiniAfterburner Attach the mount using 2 M3x40 screws in the same holes. attach the ADXL345 to the top of the mount, using m3 screws, ensure axes are oriented correctly.