Search the Community
Showing results for tags 'v0'.
-
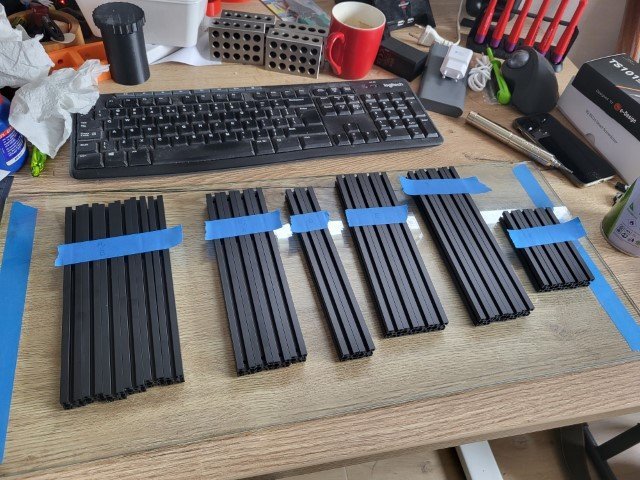
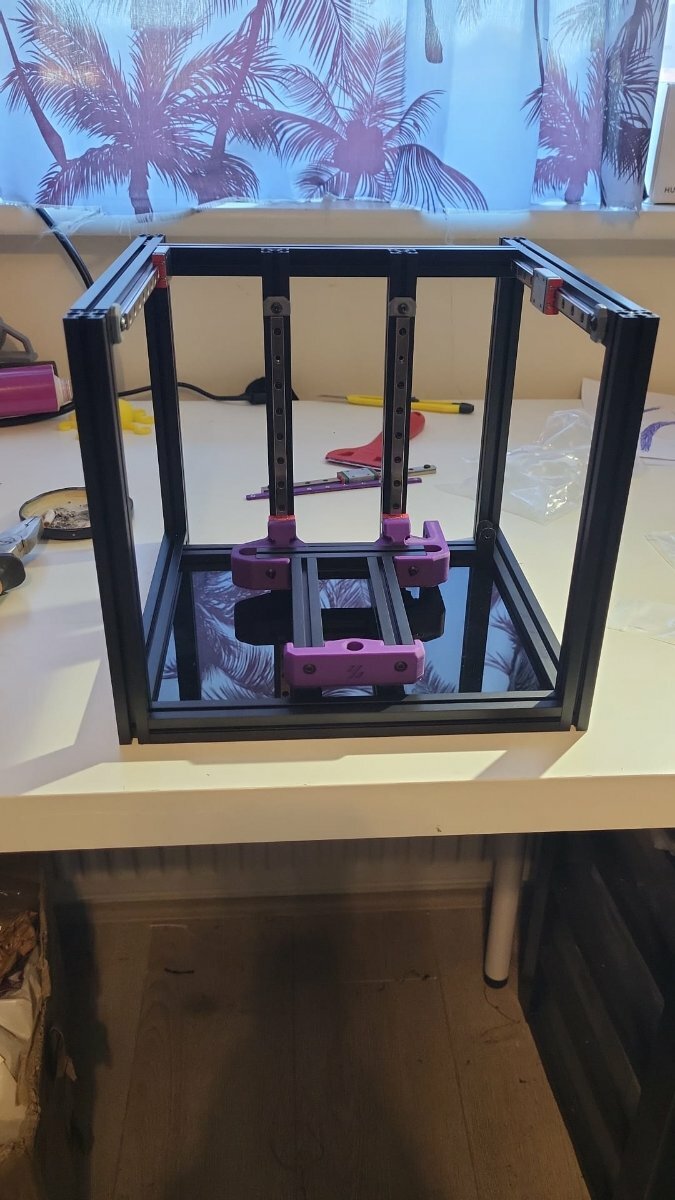
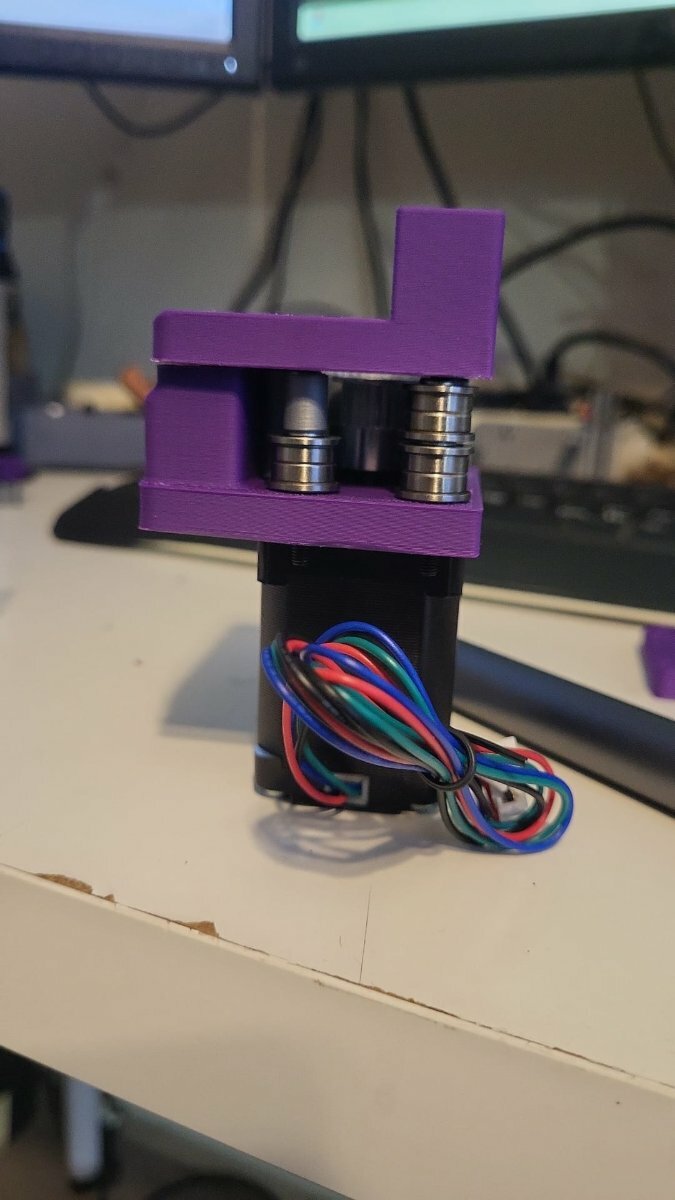
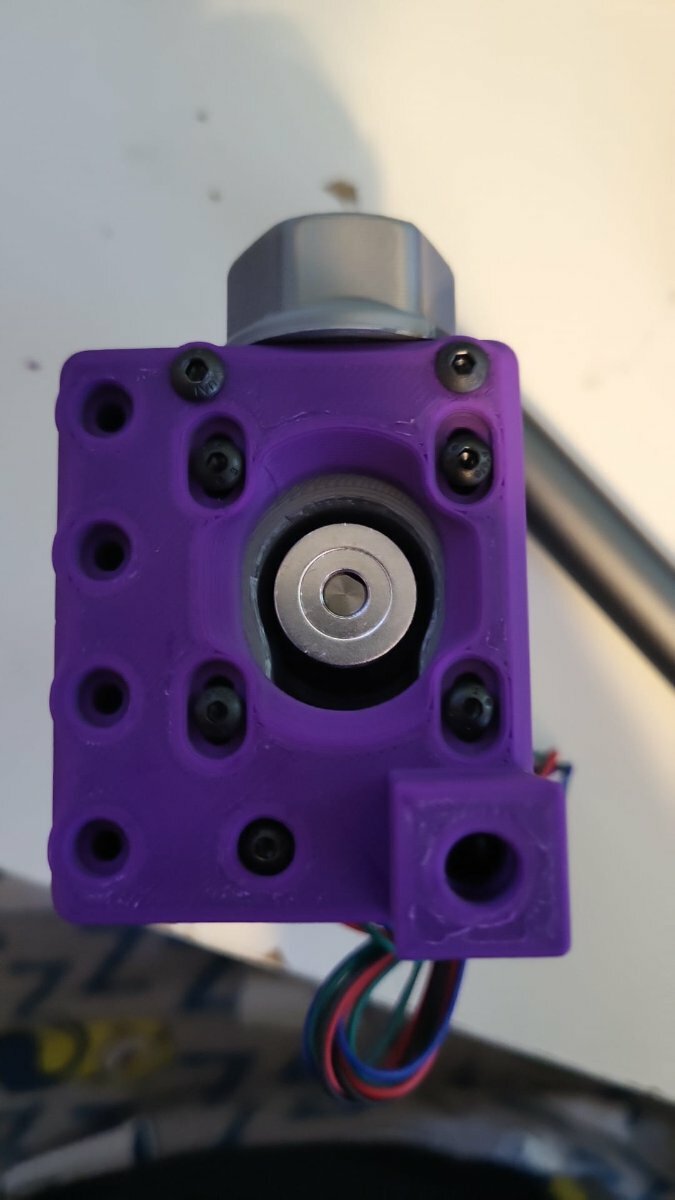
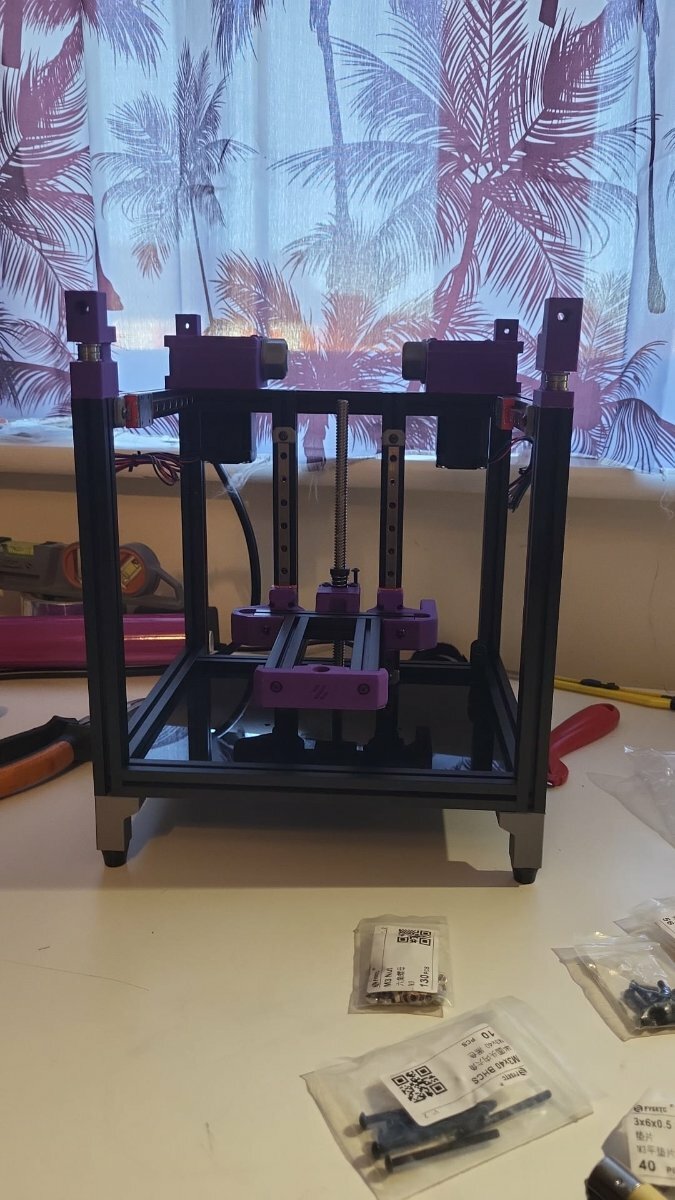
After receiving my Formbot Voron V0.2r1 kit in two parcels, the kit from Czech Republic warehouse and the printed parts from China, I started building the kit last week. Extrusions looked very good, clean and straight cuts with the edges anodized. I wanted the M2 Nut Adapter and No_Drop_Nuts and other small prints to be printed in ABS instead of the regular PLA I printed so far, thus went with black eSun ABS+ printed on my Ender3 Pro. With change of a printer, wanted to have a try with a different slicer as well so changed from Cura to SuperSlicer. I went with the Voron PIF settings and standard ABS setting from SuperSlicer (245C extruder and 90C bed). I don't think my Ender 3 reached 245C because it stopped at 235C which I think is the maximum I specified in Marlin firmware. Still these small parts just printed fine, so did not bother changing anything else. Not sure if is really needed, but will apply some loctite on metal-metal connections. The PLTight (or Vibra Tite) VC-3 supposedly is safe to use on ABS as well and can be re-adjusted a couple of times! One linear rails in the kit is marked as pre-loaded and will be used on the X-axis. Plenty of preloaded nuts with the very handy No_Drop_Nuts. And we have a frame with Kirigami bed. Next step will be the A/B Drives and Idlers.

-
Version 2021.12.07
56 downloads
Voron v0.1 What is this? This modification keeps the umbilical and reverse bowden tube from rubbing against the motor belts. How do I use it? Replaces the Motor Panel and reuse the same M3x8 screws How should I print this? Same as any other Voron part. Printed with Polylite ASA -
Version 2022.10.13
42 downloads
Longer Thumb Nuts for Voron V0 After installing a Kirigami mount for my V0 bed, I found that the stock thumb nuts were too short, which made them very hard to adjust. I have also never been particularly fond of the shape of them and found them uncomfortable to adjust. Usage Print it, the standard Voron settings worked fine for me. Install 3mm heat set inserts to the bottom of the thumb nut (so that the tension will pull the heat set insert into the part, not out of it) Replace your stock thumb nuts Redo your bed leveling -
Version 2021.12.09
112 downloads
MiniAB_FanSaver A 3D-printable baffle to prevent Voron V0.1 Mini Afterburner blower fans from overheating Is your Mini Afterburner toolhead struggling to keep up with the part cooling you request? Are you running into weird overheating artifacts despite setting absurdly high part cooling speeds? Have you noticed your blower fans slowing down or audibly changing in pitch over the course of a print? You've come to the right place! There is an issue that has been cropping up in some Voron V0.1 printers where the combination of high chamber temperature and radiant heat from the hotend can cause the PWM smoothing chips inside your 3010 blower fans to overheat and, as a result, can cause the fans to slow down and speed up intermittently (sometimes even coming to a full stop). In particular, the GDSTime 3010 blower fan included in the LDO V0.1 kit and similar rebranded units have a max operating temperature between 60C-70C, which can easily be exceeded by a fully heatsoaked V0.1 at ABS printing temperatures. While there are a number of ways to overcome this issue, such as mini-heatsink installation, reflective tape, insulation, or high-temp fans, every other fix I came across was either an incomplete solution or required specialty parts / fabrication that were difficult to source or cumbersome to prepare. The goal of this project was to make an all-in-one heat-deflecting solution that could be printed on any ABS-capable printer and installed without disassembly of your Mini Afterburner, while still requiring no additional materials or reprints / replacements of existing parts. The result is the MiniAB FanSaver: a combination air dam and heat barrier that keeps your blower fans cool with minimal time and material investment. The print itself should only take around 20-25 minutes at moderate printing speeds and consumes approximately 3g of material. The installation is fairly straightforward and only requires cutting your two cable management zipties on the sides of the toolhead to slip the FanSaver in underneath. The installation process can be made easier by removing the toolhead from the X-carriage so you don't have to work upside-down inside your printer, but it will fit comfortably without doing so. Before starting with this modification, it is recommended to have two new zipties, a pair of flush cutters / wire cutters, a small hex key or other skinny blunt object for moving the wires around inside the toolhead, and a dental pick, needle, or similar pointy tool for removing your blower fan stickers. The installation process is as follows: Your hotend should be COLD for this process! Please don't try this at 245C and burn yourself. I recommend moving your toolhead to 60,0, dropping your build plate down 75-100mm, and then turning off and unplugging your machine for safety. Depending on the specific geometry of your hotend and associated silicone sock, you may have an easier time installing if you remove the silicone sock first and re-attach it after the FanSaver is in place. (Optional) Clip all toolhead zipties, remove strain relief & stepper screws, unscrew all 5 toolhead mounting bolts, and lay toolhead face down on print surface. Using a dental pick, needle, X-acto knife, or other pointy tool, get under the edge of the stickers on the backs of your two blower fans and peel the stickers off completely. These insulate the PWM chip from the airflow we're about to provide it, but still let through enough radiant heat that they're not providing any substantial protection in their default state. Be careful not to stab into the wiring cavities that the sticker covers. Clip left and right cable management zip ties and pull heater and thermistor wires toward the back of the toolhead shroud. Begin installation of FanSaver with the flat base facing down (same orientation relative to toolhead as it was printed). The semicircular scoops should be facing toward the front of the shroud / hotend fan and the rear rectangular crossbar with external tabs should face the rear of the shroud. Press your heater and thermistor wires close to the hotend so they're between the two vertical FanSaver panels (this may require more or less wrangling with your hex key or other skinny blunt tool depending on the specific heater and thermistor you have installed and the relative thickness / stiffness of their wires). Ride the rear crossbar's external tabs on the flat backs of the shroud like rails and slide the FanSaver into the shroud while guiding the heater and thermistor wires into the cable management channels. Once you hit the "ceiling" of the shroud with the pointy tops of the rear columns, check for left/right alignment and then gently press the front crossbar upward and forward to lock the FanSaver into place. (If you removed your toolhead, take this opportunity to reassemble the 5 main bolts before continuing) Pull your heater and thermistor wires taut through the cable management channels and zip tie them to the X-carriage. You don't have to go nuts here, but the presence of these wires is what locks the FanSaver in place and prevents the rear crossbar tabs from coming out of their mounting points. You've successfully installed your FanSaver! It's tested to be compatible with both Dragon and Dragonfly BMO hotend mounts of Mini Afterburner and Mini Aftersherpa, though likely will not fit the legacy Slice Mosquito variant of the toolhead without modification. NOTE: Due to its proximity to the hotend, this component is a prime candidate to be printed in something more heat-resistant than ABS such as PC-ABS, CF-Nylon, or any number of more exotic plastics. Otherwise, it probably doesn't hurt to print off one or two extras to swap in if the original part ever gets melty. None of the beta testers thus far have experienced a melting or softening of the FanSaver, but that doesn't mean it can't happen down the road. -
Version 2023.03.01
822 downloads
V0.2 Stealth Skirts Shout out to hartk for iniating this project and to meteyou for putting the final touches on it. All skirt parts are single bodies - to achieve the look below, use of color swap is needed. There are two versions of the side fan grills - one for 4010 fans and one for 3510 fans. 4010 fan version does not allow the use of an electronics bay panel, while the 3510 version does. No additional hardware (outside of your choice of fans) is necessary. -
Version 1.0.0
147 downloads
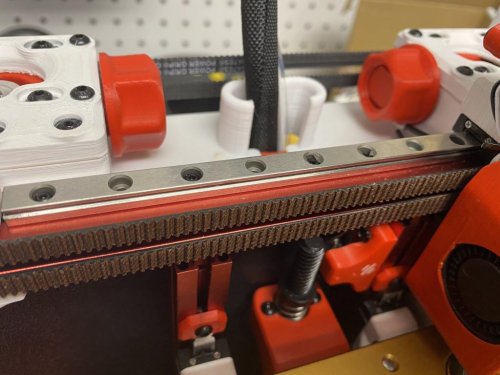
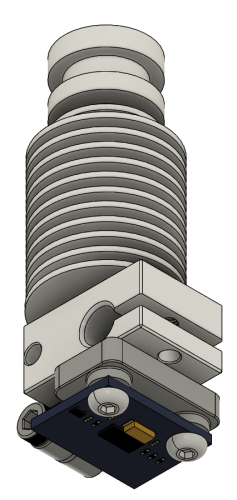
I was shocked to see a significant difference between the results measured with the built-in accelerometer on the EBB36 board and those obtained using this nozzle mount. Here are the results: the sensor built into the EBB36 board X-axis shaper type: mzv, frequency: 62.4 Y-axis shaper type: mzv, frequency: 43.6 with this nozzle mount X-axis shaper type: 2hump_ei, frequency: 99.4 Y-axis shaper type: 2hump_ei, frequency: 87.8 What are your thoughts on this? Are these measured values really necessary for my printer? Required Qty 1 - M3 insert nuts Qty 1 - M3 x 10 socket head screw Qty 2 - M3 x 6 socket/button head screw- 1 comment
-
- 3
-

-
- voron
- stealthburner
- (and 2 more)
-
Version 1.0.0
178 downloads
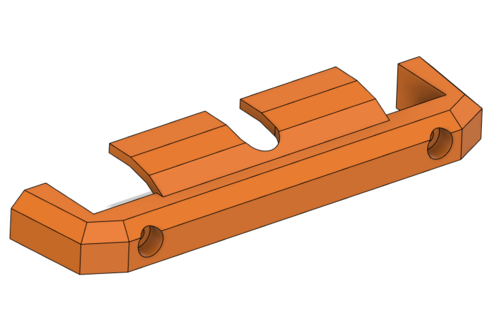
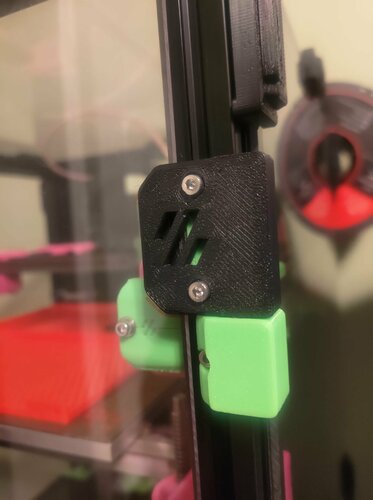
I created this as a way to prevent filament from getting into the electronics bay via the space around the z-rod. This screws in place of the two z liner rail stops so you can use the existing nuts to mount it. per design, it is a snug fit, but allows for clearance around the z-rod so as not to hinder its movement. The face of this should be printed down and I only allowed supports for the holes. Please let me know what you think about this or if you'd like to see any changes.- 3 comments
-
- 12
-
-
Version 2022.01.18
2,092 downloads
Cable Management Duct Little cable duct for hiding the cable. Can print with your desired color to match with your build. Integrated with zip tie mounts. For the cable management manual, I refer to: LDO here. Printed parts There are two version: Standard size: if you have a large size printer I refer this. Small size: can print on Voron V0 bed size. Print recommended: ABS No support needed -
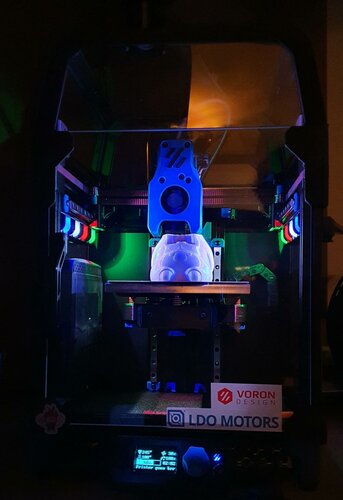
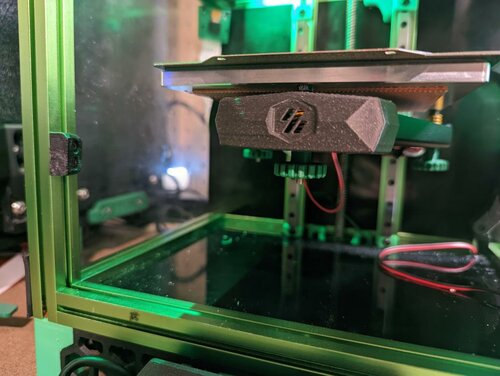
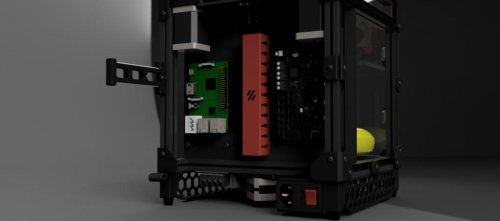
So... here I am. I´ve sadly discovered this forum after finishing my build... I´m not sure is fair I introduce myself in the build subforum, as is already done... but Hey ho. This is Maurici. Automotive design/development engineer, and a fully 3D printing nerd... While I didn´t need a voron, as ALL my needs are plenty covered with a 400X400 bed slinger and a 220x220 also slinger, both custom build from Ender frames, that currently are Polycarbonate beasts (real stratasys polycarbonate... not the user friendly blends available out there)... Ok, then won´t go over 130mm/s but still good printers, I was in love with the Zero since I saw the project almost... 3 years ago? So... last month decided to bite the bullet and try a budget-aliexpress special-cheap ass self sourced Zero... Oh god. Why didn´t I do it sooner! what an ABSOLUTE joy has it been to build! I was expecting a long, difficult and frustrating experience after seeing some youtuber videos about parts not fitting ok, unclear instructions, people having to join livestreams in discord to understand the problems... and all was really straightforward and put toguether in a long day from 7.30am to 3am (till the first benchy actually finished) so take roughly 40 minutes of the first print and lunch... yeah, ok, nearly 20 hours. 4 of them fighting a bug in Klipper as I was pretty tired and missing obvious stuff... indeed all the parts were printed prior in my other printers. If not is undoable. Of course, as it won´t be my real workhorse, but more like a toy, I´ve decided to make the colours childish and toy-like... Anyway. After my introduction, find some pictures and videos of the build!! (at the end... as always happens, It wasn´t that budget friendly, nor that cheap ass. Ended with LDO motors, posh-Ish rails, proper belts and so... and only skimmed out on the board, the Pi (that I already had) and the extrusion kit, that was cheap as peanuts, but surprisingly accurate, and the hot end, that is a chinesium special clone that works frikingly well to be fair... As you can see in the pictures, I´ve gone for a very practical approach. Even in the cable management, while tidy, I´m not one to do "wiring porn" but to be practical. The thing has to be easy to service and mantain... I´ve enjoyed it that much that I have it for sale already, to build another one. and when the second is build, I may do the same again. Is like a grown ups lego. What a MEGA design this thing is. Should i sell the slingers and build a 2.4? oh. Excuse the RGB... I reused some fans from my old gaming station... and well. They had light... why not switch it on?
-
Version 2023.01.20
116 downloads
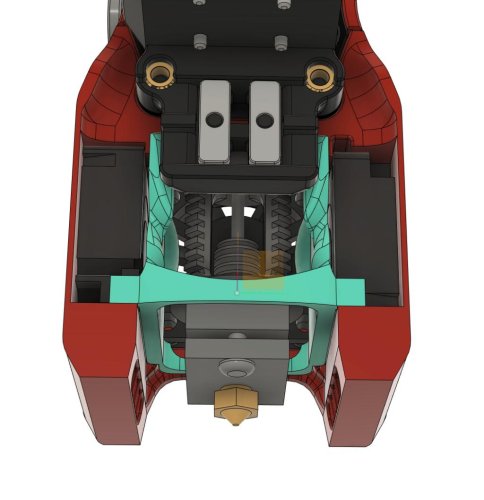
MiniSB Sharkfin Modified the MiniSB toolhead to accomodate the Sharkfin extruder. -
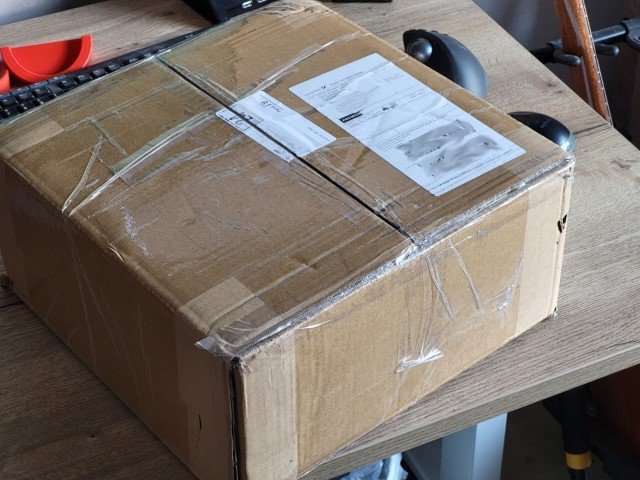
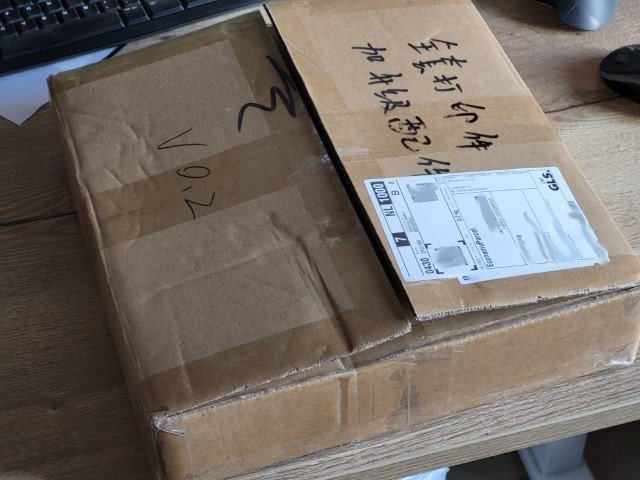
Received by Formbot3d Voron V0.1 BOM in a box today which I had ordered on January 14th. Other than assembling a Creality CR-10 I have no other 3d printer experience. I was so eagerly wanting a Voron I bought two kits the V0.1 and the V2.4. I think I have bitten off more than I can chew..... I'll be lucky if I get the V0.1 built and working. Though I suspect I will learn lots along the way. I am still waiting on my printed parts so in the meantime I did the unboxing to just document what I got from Formbot and how it matched up to their website advertisement. I welcome any words of wisdom or guidance to help me along with this build.
-
Version 2021.09.25
6,109 downloads
Cricut_Voron_Logos This repository contains vector files I have created for the Voron community and for my own Voron builds. Purpose of this repository The purpose of this repository is to share vector files that I have created for my Voron Builds. For "Voron 2.4 Build with 1 Color" Link to Cricut Design Space for "Voron 2.4 1_Color_Layer": https://design.cricut.com/landing/project-detail/6137795f68f6f90001d7abfd Link to my Repository on Github that contains all files I used to produce the "Voron 2.4 1_Color_Layer" .svg file: https://github.com/GadgetAngel/Cricut_Voron_Logos/tree/main/Voron_2.4_Logo/1_Color_Layer/Current_Design_Files For "Voron 2.4 Build with 1 Color and Without LOGO outline" with a Silhouette Layer Link to Cricut Design Space for "Voron 2.4 1_Color_Layer_WithOut_Logo_Outline_With_Silhouette": https://design.cricut.com/landing/project-detail/614501c2623cde00018a4fe6 Link to my Repository on Github that contains all files I used to produce the "Voron 2.4 1_Color_Layer_WithOut_Logo_Outline_With_Silhouette" .svg file: https://github.com/GadgetAngel/Cricut_Voron_Logos/tree/main/Voron_2.4_Logo/1_Color_Layer_WithOut_Logo_Outline/Current_Design_Files For "Voron 2.4 Build with 1 Color and Without LOGO outline" WITHOUT the Silhouette Layer Link to Cricut Design Space for "Voron 2.4 1_Color_Layer_WithOut_Logo_Outline_WithOut_Silhouette": https://design.cricut.com/landing/project-detail/614502f434e2330001c7de37 Link to my Repository on Github that contains all files I used to produce the "Voron 2.4 1_Color_Layer_WithOut_Logo_Outline_WithOut_Silhouette" .svg file: https://github.com/GadgetAngel/Cricut_Voron_Logos/tree/main/Voron_2.4_Logo/1_Color_Layer_WithOut_Logo_Outline/Current_Design_Files For "Voron 2.4 Build with 3 Colors" Link to Cricut Design Space for "Voron 2.4 3_Color_Layer": https://design.cricut.com/landing/project-detail/6137b53b0b4942000143ea8c Link to my Repository on Github that contains all files I used to produce the "Voron 2.4 3_Color_Layers" .svg file: https://github.com/GadgetAngel/Cricut_Voron_Logos/tree/main/Voron_2.4_Logo/3_Color_Layers/Current_Design_Files For "Voron 0.1 Build with 1 Color" Link Cricut Design Space for "Voron 0.1 1_Color_Layer": https://design.cricut.com/landing/project-detail/613569712ecf490001974996 Link to my Repository on Github that contains all files I used to produce the "Voron 0.1 1_Color_Layer" .svg file: https://github.com/GadgetAngel/Cricut_Voron_Logos/tree/main/Voron_0.1_Logo/1_Color_Layer/Current_Design_Files For "Voron 0.1 Build with 1 Color and without LOGO Outline" with a Silhouette Layer Link for "Voron 0.1 1Color_WithOut_Logo_Outline_With_Silhouette": https://design.cricut.com/landing/project-detail/6147bad19e2fcb000119bb71 Link to my Repository on Github that contains all files I used to produce the "Voron 0.1 1Color_WithOut_Logo_Outline_With_Silhouette" .svg file: https://github.com/GadgetAngel/Cricut_Voron_Logos/tree/main/Voron_0.1_Logo/1_Color_Layer_WithOut_Logo_Outline/Current_Design_Files For "Voron 0.1 Build with 1 Color and without LOGO Outline" WITHOUT the Silhouette Layer Link for "Voron 0.1 1Color_WithOut_Logo_Outline_WithOut_Silhouette": https://design.cricut.com/landing/project-detail/6147bc71d61aad00013c14f6 Link to my Repository on Github that contains all files I used to produce the "Voron 0.1 1Color_WithOut_Logo_Outline_WithOut_Silhouette" .svg file: https://github.com/GadgetAngel/Cricut_Voron_Logos/tree/main/Voron_0.1_Logo/1_Color_Layer_WithOut_Logo_Outline/Current_Design_Files For "Voron Switch Wire Build with 1 Color" Link Cricut Design Space for "Voron Switch Wire 1_Color_Layer": https://design.cricut.com/landing/project-detail/613bf24c5dddf60001c14fbb Link to my Repository on Github that contains all files I used to produce the "Voron Switch Wire 1_Color_Layer" .svg file: https://github.com/GadgetAngel/Cricut_Voron_Logos/tree/main/Voron_SW_Logo/1_Color_Layer/Current_Design_Files For "Voron Switch Wire Build with 1 Color and without LOGO Outline" with a Silhouette Layer Link for "Voron Switch Wire 1Color_WithOut_Logo_Outline_With_Silhouette": https://design.cricut.com/landing/project-detail/6147c7da7e75d400012c4684 Link to my Repository on Github that contains all files I used to produce the "Voron Switch Wire 1Color_WithOut_Logo_Outline_With_Silhouette" .svg file: https://github.com/GadgetAngel/Cricut_Voron_Logos/tree/main/Voron_SW_Logo/1_Color_Layer_WithOut_Logo_Outline/Current_Design_Files For "Voron Switch Wire Build with 1 Color and without LOGO Outline" WITHOUT the Silhouette Layer Link for "Voron Switch Wire 1Color_WithOut_Logo_Outline_WithOut_Silhouette": https://design.cricut.com/landing/project-detail/6147c95a2a3d570001fae277 Link to my Repository on Github that contains all files I used to produce the "Voron Switch Wire 1Color_WithOut_Logo_Outline_WithOut_Silhouette" .svg file: https://github.com/GadgetAngel/Cricut_Voron_Logos/tree/main/Voron_SW_Logo/1_Color_Layer_WithOut_Logo_Outline/Current_Design_Files For "Voron Plain Logo with 1 Color" to be used by ANY Voron Build Link Cricut Design Space for "Voron Plain Logo 1_Color_Layer": https://design.cricut.com/landing/project-detail/6137b8cce6ad93000134232e Link to my Repository on Github that contains all files I used to produce the "Voron Plain Logo 1_Color_Layer" .svg file: https://github.com/GadgetAngel/Cricut_Voron_Logos/tree/main/Voron_Plain_Logo/1_Color_Layer/Current_Design_Files For MY OWN Voron 2.4 Build Link Cricut Design Space for "Voron 2.4 QueenWithPlainVoronLogo2": https://design.cricut.com/landing/project-detail/6137e15bd254460001dad096 Link to my Repository on Github that contains all files I used to produce the "Voron 2.4 QueenWithPlainVoronLogo2" .svg file: https://github.com/GadgetAngel/Cricut_Voron_Logos/tree/main/Voron_2.4_Queen_Logo/QueenWithPlainVoronLogo2/Current_Design_Files- 3 comments
-
- 13
-
-

-
- gadgetangel
- v0
- (and 3 more)
-
Version 2023.01.20
133 downloads
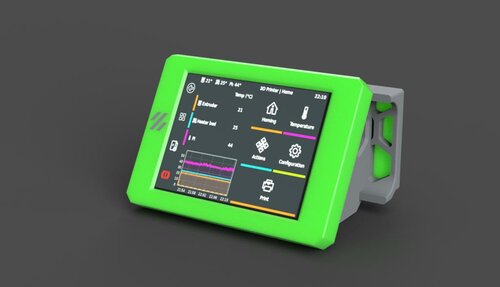
Voron 0.2 Waveshare 2.8 DSI Display BOM Waveshare Display DSI Cable This display mount attaches using stock hardware on the V0.2 as well as the hardware that is included with the display Thanks DragonKitty! for testing the display mount To install the display follow the driver installation procedure on waveshares website here if you find that the drivers that you need are not included in the waveshare repo, they removed older versions but i have zipped and uploaded those here along with the old instructions from waveshare After the drivers are installed run the following command to open up the config.txt for the raspberry pi cd ~ sudo nano /boot/config.txt This line you added in the driver installation dtoverlay=WS_xinchDSI_Touch,invertedy,swappedxy,I2C_bus=10 Needs to be changed to dtoverlay=WS_xinchDSI_Touch,invertedy,invertedx,I2C_bus=10 save and exit that file then while still ssh into the pi you will need to place this file in the following directory, you may have to create that directory if it is not already created /usr/share/X11/xorg.conf.d/ now you can proceed with installing klipperscreen as normal i typically use kiauh to do that as it makes it that much easier -
Version 2023.01.20
28 downloads
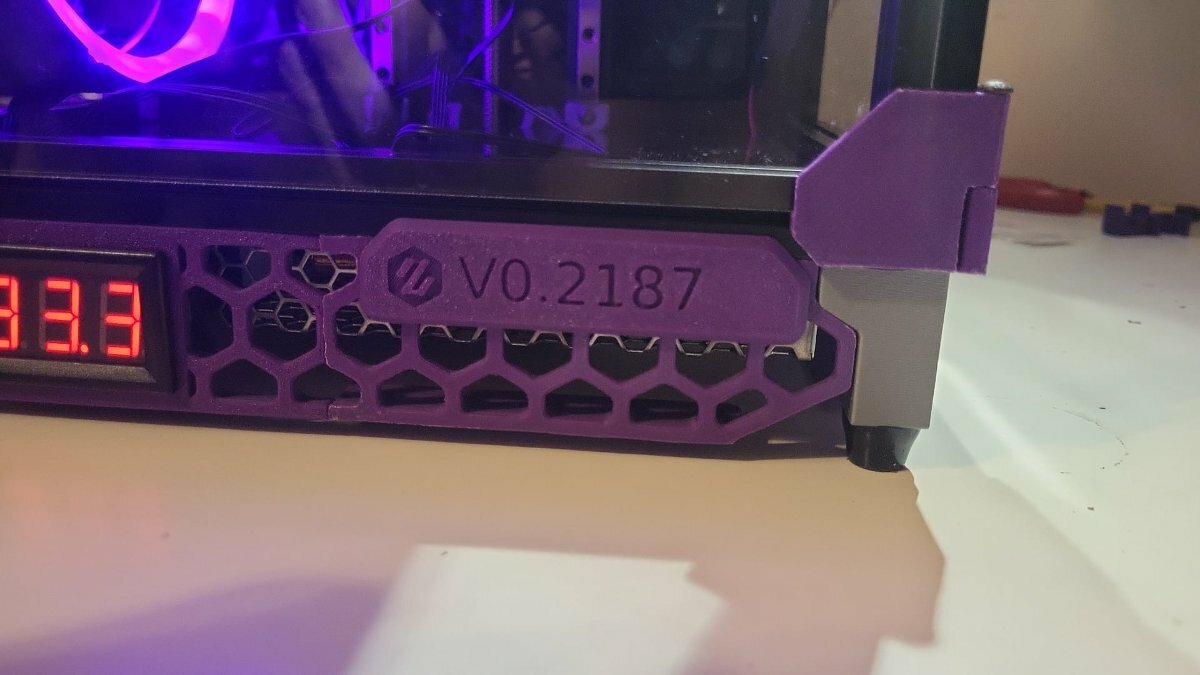
V0.2 Rear keystone skirt -
Version 2023.01.09
187 downloads
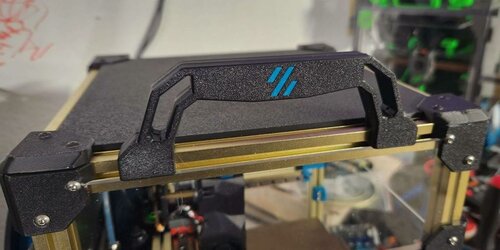
V0.2 Handles Add handles to the extrusion tophat so you can sling that thing around. Easy to install, just follow the below steps. NOTE - remove the top panel before you proceed. Replace panel once install is complete. Step 1 Insert -
-
Version 2023.01.19
159 downloads
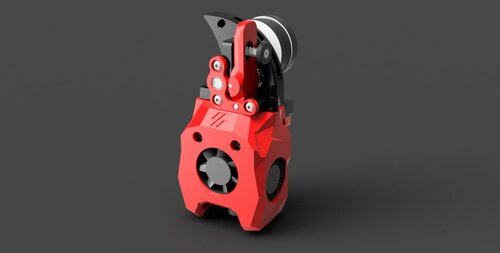
MiniSB LGX Lite A Bondtech LGX Lite variant of the MiniSB -

Version 1.0.0
715 downloads
This is a hybrid of two excellent hinge mods that I very haphazardly slicer-spliced together. I have zero CAD skill, all credit for the design of the originals goes to their respective owners. I'm just a lazy dude that wanted a little bit of each of these hinge designs for my V0, and I couldn't find it online. So I took these two great ideas and frankenstein'd them together in superslicer to make this ugly abomination that I find quite useful and painfully easy to assemble. It's Alexander T. Moss's brilliant clamping hinge idea combined with this amazing removable doors mod by ElPoPo. I literally just swapped the hinge attachment points of either part and merged them in my slicer before re-exporting. I did the same to the hinge mounts, but with the slot-in tabs for a 1515 extrusion. The only reason I even bothered to post this is for the odd chance that someone is less motivated than myself and also looking for something similar. Alas, this is now the path of least resistence. I recommend using double-sided VHB tape on the smaller back half of the clamps to get a more reliable grip on your panel. If you don't add that, you'll spend more time fussing with it to stay put than you will care to, I learned this from personal experience. The "click and print" files are pre-arranged build plates of the parts you need. The v0 version has all 6 parts layed out so they can fit on a 120mm v0 build plate. The V2.4/Trident version has the minimum 12 parts layed out and pre-mirrored for a left and right door on a larger printer. They should all fit on a 180mm buildplate if you want to DIY-print these parts the hard way: you will need 2x V0 door mounts and hinge assemblies for the V0 you will need 4x door hinge mounts for the 2020 extrusion. If you use ElPoPo's original 2020 door mounts (which I have included here purely for convenience) then these spliced clamp hinges will also work on the trident or V2.4, the front part of the hinge will need to be mirrored to mount the doors on the left side of a larger printer. you'll need at least 2x hinges for each door. https://mods.vorondesign.com/detail/uS9PdDxZtFj4MWLRzNXUyA https://mods.vorondesign.com/detail/WqhhKrXksAZ4omhHS1RY4Q- 2 comments
-
- 10
-
-
-
Version 1.0.0
1,152 downloads
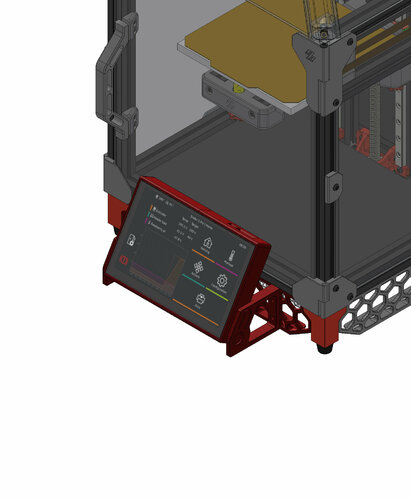
This is a flip down TFT50 screen mount for the Voron V0.1. It's still a work in progress but it works and allows the screen to fold down so the door can be opened.- 3 comments
-
- 16
-
-
-
- xxroboduck
- v0.1
- (and 3 more)
-
Version 2022.05.09
1,035 downloads
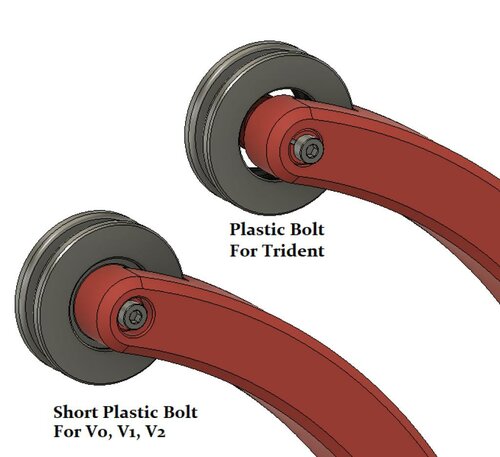
Horseshoe Spool Holder This is a method to mount the filament spool inside the enclosure of a Voron Trident 3d printer, or outside a V0, V1 or V2 printer. It works with 200mm, 1kg spools only. For mounting internally in the Trident, the ptfe tube is installed as shown: up through the gap in the side of the rear extrusion. Alternately you could drill a 4mm hole though the B stepper mount top and bottom parts. To install the spool: Feed the filament through the ptfe first, then align the spool into the front and top bearing rings, and pull forward to spring the frame and drop into the rear bearing ring. BOM: 3 608 bearings (any type) 2 M5-8mm (pan/socket) head bolts and 2 M5-Tnuts for 2020 extrusion only OR 4 M3-8mm (pan/socket) head bolts and 4 M3-Tnuts for 1515 extrusion 3 - M3-8mm bolts (pan/socket) Internal Version for Trident only Print PlasticBolt(x3) and use a m3-8mm PH or SH bolt to secure the pin in place. External version for V0, V1, V2 Print ShortPlasticBolt(3x) and use a m3-8mm PH or SH bolt to secure the pin in place. Please provide feedback for issues/suggestions to #Logan2225 on VoronDesign Discord. Thanks!- 9 comments
-
- 15
-
-

-
- LoganFraser
- v0
- (and 3 more)
-
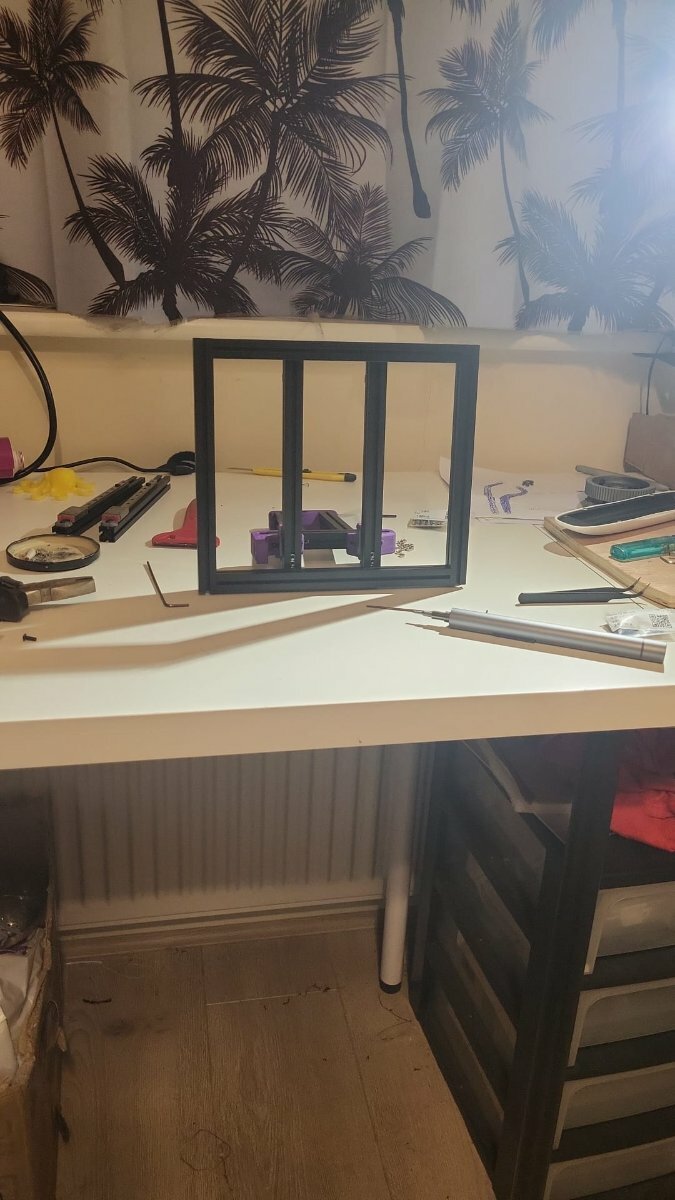
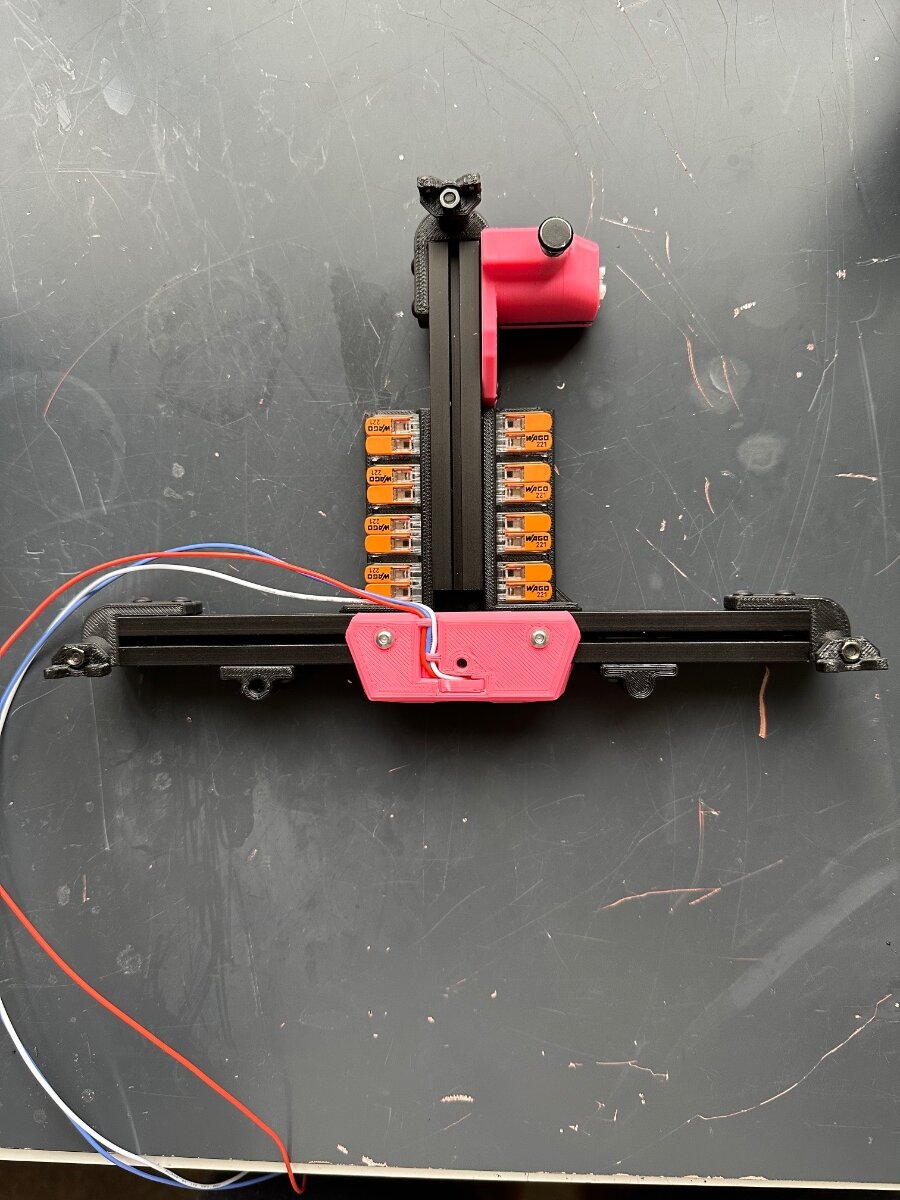
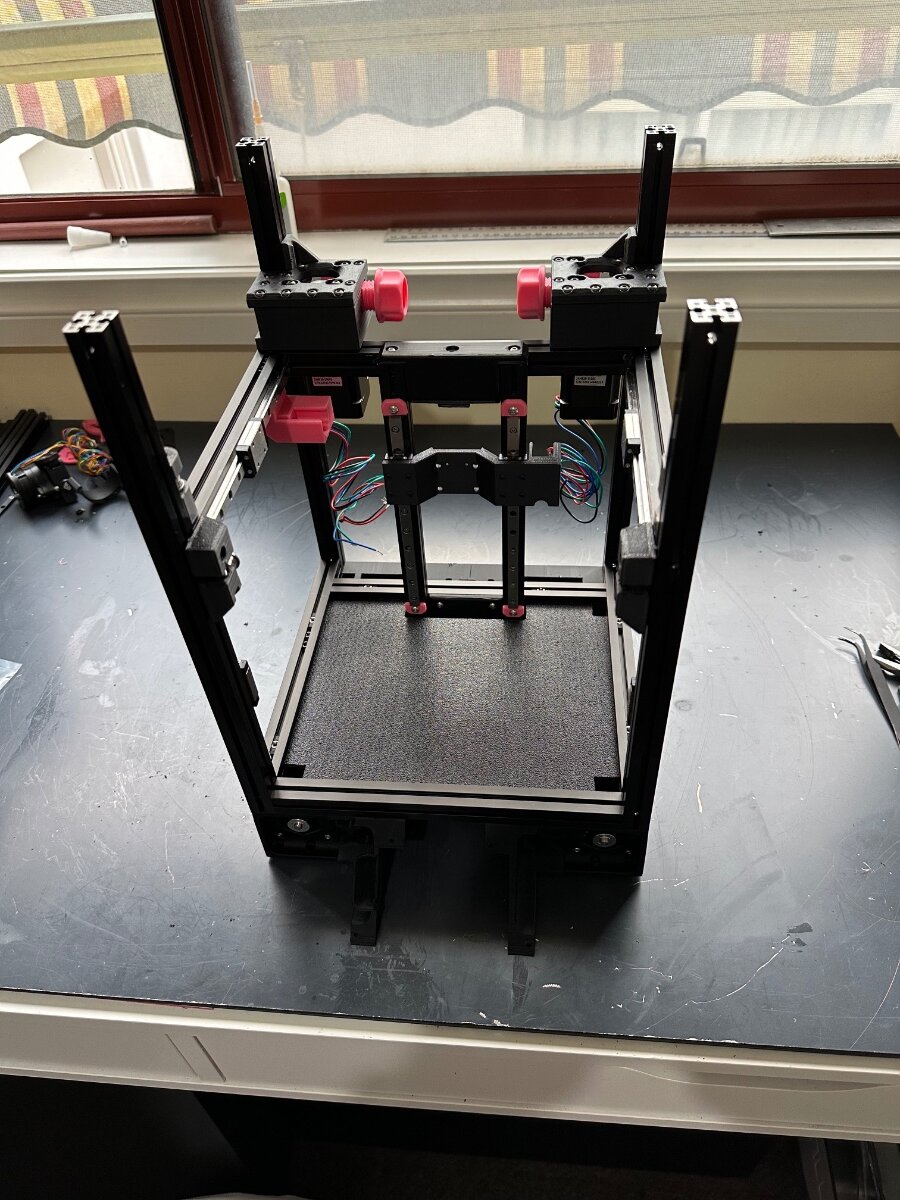
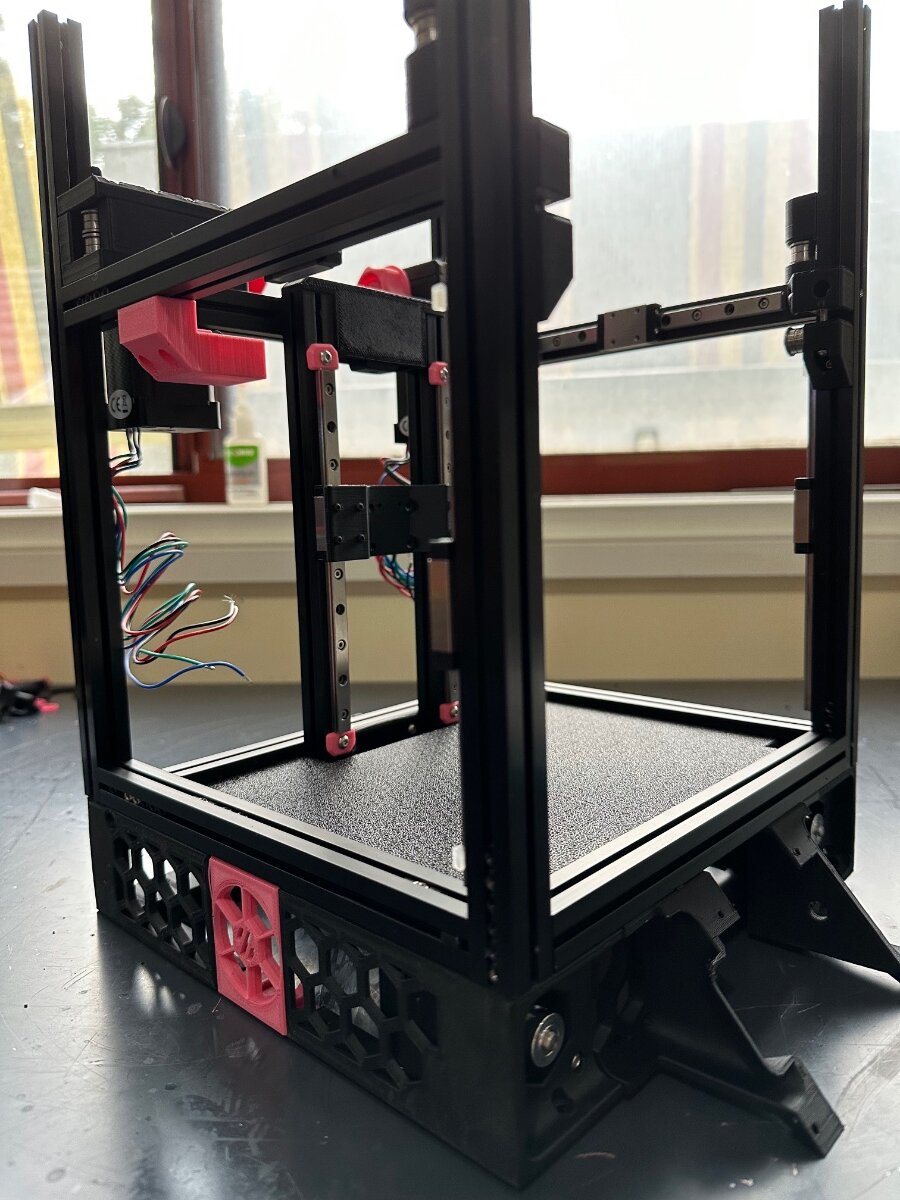
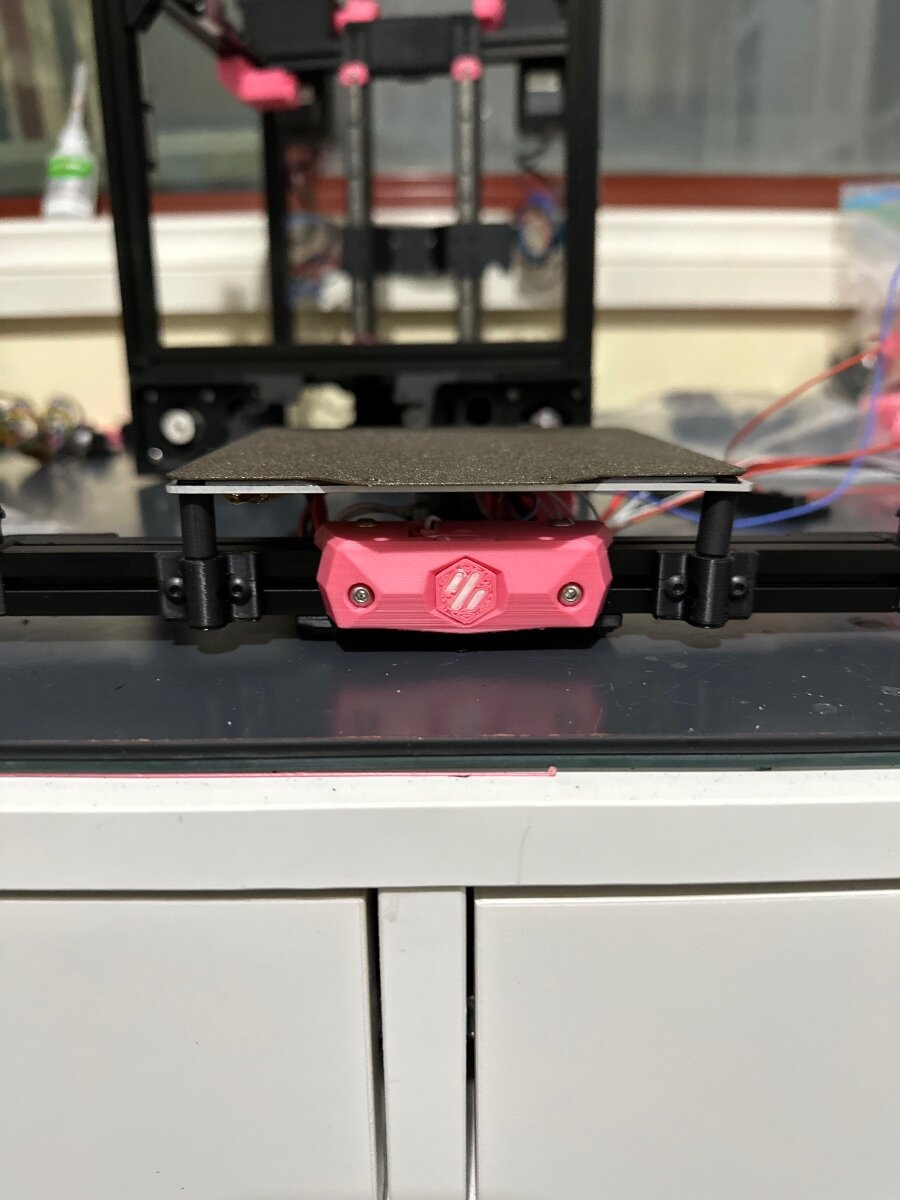
Was going to keep this one quiet, but then asking for others to do a build diary and me not - how did @smirk put it: pot; kettle;black - point taken. How did this start? Well I ordered some 300mm extrusions for the previous tri-zero build (Voron with a twist). However living where I do, postage can be an issue and I got tired of waiting for the parts to arrive, so I finished the previous build without the longer extrusions. Since then they have arrived, and having build two previous V0's, I had plenty of spare parts. And as the members of the forum has come to know, I have plenty of extra's for those "rainy days" or "just in case days" - again not hoarding, just forward planning. Also loved the way the TriZero prints - auto bed levelling, auto Z-calibration, etc. Thus - another Vo build. As you know, I cannot seem to build a stock standard Voron - thus decided to to the Box Zero, but wait there is more - the TriZero needs to be incorporated, as well as auto Z calibration, and I need the unofficial Mini-stealthburner from @atrushing but wait there is more - why only have LED's on the toolhead - modified the bed log - put an LED in there as well. And Who mounts for the bed.... Enough of my rambling - some pictures - don't have many as I was not going to do a build diary.
-
Version 4.2.2022
1,713 downloads
DooMini This is Voron 0.1 mod that improves the insulation of the printer by using double glazed panels and minimal hardware. The New planes help you print full bed size ABS without ever worrying about warping. I get almost 60c chamber temperature with DooMini. (The temperatures are measured at the base of the chamber which is usually the coldest area). Almost forgot ... it looks way Cooler For All STL file as we as manual and instructions visit https://github.com/TigranDesigner/Voron-Mods/tree/main/DooMini or download directly here.- 8 comments
-
- 13
-
-
-
-
Version 2022.03.16
495 downloads
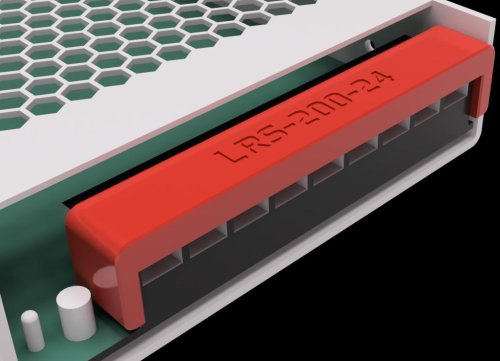
LRS Screw Terminal Cover Designed to cover the screw terminals for several LRS style PSUs. Other Meanwell PSU may work. Feel free to ping me in discord to add to the compatibility list below. Pro tip: These are very snug to the point it will bow. This is intentional as it was designed to take some effort to take off. Printing Default voron settings No supports needed Compatibility List LRS-50 LRS-200 -
Version 2022.11.18
80 downloads
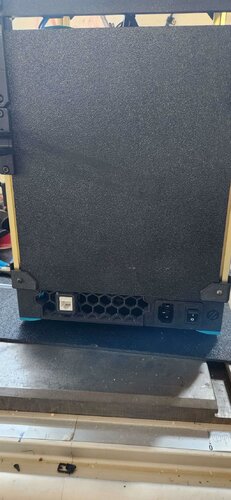
Voron V0.1 Tophat Extractor Tophat Exhaust Fan with activated carbon and HEPA filters. BOM (the BOM is for upgrading from an existing Tophat) 1 pc. 60x60x25 Fan (preferably without -
Version 2022.10.13
86 downloads
Snap in 1515 LED mount for WS2812B led strips. BOM: WS2812BECO Black PCB - 5m 60 IP30 Some cables A soldering iron and some solder JST-XH Crimps Notes about the WS2812: 30 leds per meter fits, but you will only have a led in every second diffuser. 60leds per meter is the perfect fit. Print guide: Print 9 left and 9 right. Preparation: I use 9 led's on each side. Solder the cables. Now it's a good idea to test and configure the neopixels too, so you don't have to take it out again after you've mounted it, in case something is wrong. Just hang them over the spool holder and make sure nothing can short circuit while testing. Mounting: Guide the cables through the 1515 extrusion over the mid-panel. Push one diffuser in. (Do this in the front with the led strip as far back as possible) Slide the diffuser back while guiding the led strip through it. One by one. When you get to the last diffuser on either side, you have to partially insert the strip into the diffuser. Then carefully try to bend/align it with the 1515 slot and carefully pop it into place. Having it all the way to the front gives you more leeway to bend without damaging the strip. Do the same on the other side. After you can wire them in parallel and connect them to the BTT SKR Mini E3 V2 neopixel slot. Klipper config for BTT SKR Mini E3 V2: [neopixel case_lights] ## Chamber Lighting - In 5V-RGB Position pin: PA8 chain_count: 9 initial_RED: 1 initial_GREEN: 1 initial_BLUE: 1 If this looks familiar contact me so i can credit you. This is based on some other 1515 mount. I just remade the rest. Heavily based on eddie's misumi holders.

.jpg.26081af1442786b38c8b3d70fd8d78ac.jpg)
.jpg.395aaacea0a1a3df1252d76e75770b2b.jpg)
.jpg.52d082b6a4ed5241bb22919c0ce40181.jpg)
.jpg.78db5010090144c653a47788d307a704.jpg)
.jpg.e363cfcf7450891f07927e5beed7b472.jpg)


.jpeg.f3aabba3b4eaac63006c41ad2f728856.jpeg)
.jpeg.ba57a70969c9b24e3c5c6eacd3b99b80.jpeg)
.jpeg.bdceece0b5bde512906858c00beaef44.jpeg)
.jpeg.668b6fc9a3562b0f062316fccc0106da.jpeg)
.jpeg.0268cdcb0adbfaa3b7e7549588c6121a.jpeg)
.jpeg.019db55df3dc660420bcc85399c1c55e.jpeg)
.jpeg.97bd1ab4975f5f17cf3a508aa50b0dd2.jpeg)
.jpeg.e7e1a15ded7be7bdef4347767edaa1dc.jpeg)


.thumb.jpg.1e67bb19045c04050d6d61c111a85fd2.jpg)