Search the Community
Showing results for tags 'consibonsi'.
Found 1 result
-

Version 2021.03.26
293 downloads
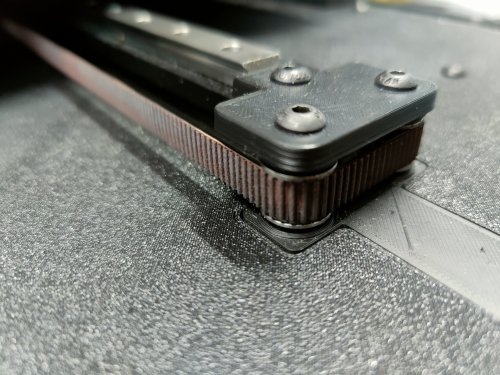
BOM: 2x M5x25 BHCS 2x M5x30 BHCS 1x M3x25 SHCS 8x M5x1 Spacer 8x F695 Bearing with flange (from the SW BOM) 4x 695 2RS 5x13x4 Bearing without flange 1x GT2 20T Pulley (5mm B, 9mm W) 1x 1m GT2 Belt (9mm W) 3x M3 Heat inserts (from the SW BOM) Slicer Settings: Mainly this should be printed with the Voron PIF settings (4P, 40% Infill etc.) But i recommend to print the panels and "Motor Top Mount" with 100% infill. The panels will bent less and the section of the motor mount where you screw it to the 2020 extrusion is more stable. Notes regarding the Belt Anchor: The limit switch is only held by one screw instead of two screws like in the original design, otherwise the screw would hit the belt. Notes regarding the Deckpanels: For the "Bottom Y Idler" you will need 2 small cutouts on your panels (see pictures). You can drill it out, or print the panels. The files for the panels are orientated like the name of the files. If you want a nice finish i recommend to flip them upside down in slicer and print on a textured pei sheet. If you want a smooth finish you can try "ironing" the toplayer, then leave the files at the current orientation. You can glue the panels together where the front and back snaps together if you want. I just pushed them together and didnt glue them, works great and sits tight. Lay both on a flat surface, snap them together and press with something heavy at the connection points. The panels also tend to bent at cooldown after printing, a good tip is to remove the panel with the pei sheet from the printbed immediately(!) after printing and quickly place it on a flat surface (for example on the floor), then quickly place a thick book on top and weigh it down properly. I just stood on it for 10 minutes, worked great. This step is important, otherwise the panel will bent and the belt anchor will hit the panel when traveling.