Search the Community
Showing results for tags 'klipper'.
-
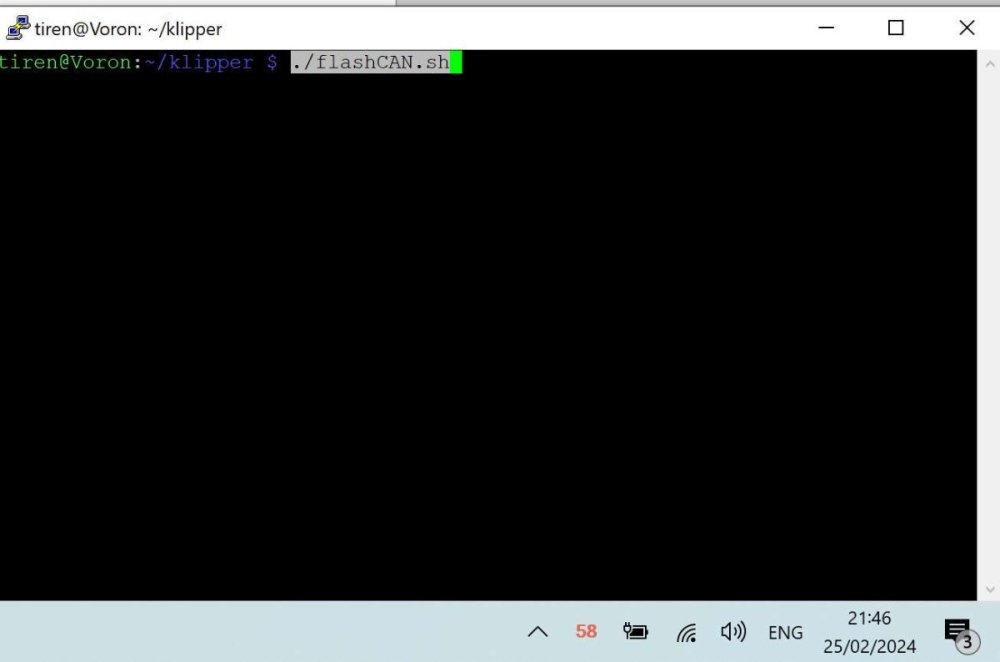
I have been converting my Voron 2.4 from many-cables-to-the-toolhead, into a single can-cable (4 wires) system. Even though I saw here that many people really did not like the CAN bus on their printers, mainly because it was new and unknown. The problem of the web is and always has been, that you never hear the 'satisfied' people. Only the very unhappy, the very happy and the sales-people. I hope this script will make it easier for some to make the step to the 'new'. I have never been afraid of new things. The problem was finding a way to find the set up I needed. From one came the other and what happened was, that I was able to combine information from a few sites / github pages I visited, and was able to write a simple script that did all the work. Actually very much like every software / game in the pre-windows 95 era, came with its own 'set-up' disk, with config.bat / setup.bat files. As long as I do not have a Klipper '95, I think this script will do for me. I tested it, and it takes 3 to 4 minutes to update the mainboard and toolhead PCB. Faster than 5 minutes I heard mentioned before. I will paste the script down here, with all the comments and the instructions. and attach as an attachment also. If there is a better way, let me know. It is information gathered mainly from Esoterical's guide. You will need information from this guide to set up your own script. -------------------------------- SCRIPT flashCAN.sh ------------------------------------------------------------------ #!/bin/bash ### without the extensive documentation and work of Esoterical, this would never have been possible. ### Besides Esoterical, this script builds standing on shoulders of: ### Eddie the engineer. https://www.youtube.com/watch?v=1P4UrJxChL8 Thanks! ### cruiten https://github.com/cruiten/Voron-Related/blob/main/CANbus/Documentation/SB2040_CAN/flash_klipper_script.md Thanks! ### uses # https://docs.kernel.org/kbuild/kconfig.html KCONFIG_CONFIG is used to define an alternative config file... ### to define a separate config file for mainboard (eg Octopus) or for a canbus toolhead PCB. For both cases one for katapult and one for klipper. ### the make menuconfig commands use the Esoterical github provided 'mainboard/common_hardware and toolhead_flashing/common_hardware maps provided image options ### https://canbus.esoterical.online/mainboard_flashing/common_hardware.html ### https://canbus.esoterical.online/toolhead_flashing/common_hardware.html ### HOW TO USE: Follow Esotericals guide, starting at the begin: https://canbus.esoterical.online/Getting_Started.html ### it will lead you through setting up a can network on your Klipper running os. ### I skipped the part about dedicated can_boards, and continued with the klipper USB 2 CAN bridge provided by my mainboard: https://canbus.esoterical.online/mainboard_flashing ### will go through flashing your mainboard for CAN. go through EVERY step. and DO NOT skip the STOP warnings. This will install katapult. USB2CANbus bridge ### afterwards it will assist you through flashing your toolhead: https://canbus.esoterical.online/toolhead_flashing ### like with the mainboard, you will install katapult and then the klipper can interface on it. ### when you are finished, you get advise on how to finish it: https://canbus.esoterical.online/Final_Steps.html ## You are happy and you see an update from Klipper in mainsail. You push the update button and your whole system is unaccessable, ## because your hardware is no more up to date with the latest klipper... ## in that case you can follow the "so you clicked the update button???" : https://canbus.esoterical.online/Updating.html ## because I did not want to go through the same repetitive steps, I made this below script. ## If I did not think this would be faster than the 5 minute update teamfdm.com @mvdveer needs to update his printers, I would have kept it to myself. ## -------------------------------------------------------- HOW TO USE ----------------------------------------------------------- ## save this document and copy to your klipper system into the /klipper directory. ## give it a name (eg. flashCAN.sh) ## ssh into your system. go to your klipper directory and run the command: sudo chmod +x flashCAN.sh ## now you can run the script by typing the following command in ssh ## ~/klipper/flashCAN.sh ## make sure to fill in your OWN values for ## - usb-katapult_your_mainboard_usb_id ## - yourmainboarduuid ## - yourtoolheaduuid # these are values for me! # yourmainboardUUID=403544310df5 # katapult_your_mainboard_usb_id = usb-katapult_stm32f446xx_200035000851313133353932-if00 # yourtoolheaduuid =21c36fa97c26 ## while installing CAN the first time, note your usb-katapult-mainboard-usb-id, mainboard UUID, toolhead UUID. ## or if you have a functioning CAN network, run ~/klippy-env/bin/python ~/klipper/scripts/canbus_query.py can0 to see a list of installed CAN devices. ## the UUID for mainboard and toolhead you need to put in your printer.cfg file, so you can retrieve it from there. ## But the USB serial ID you have to obtain after you put the mainboard into katapult boot flash mode (STEP 2 A below). ## after the command python3 ~/katapult/scripts/flashtool.py -i can0 -u yourmainboarduuid -r ## you will need to type: "ls /dev/serial/by-id" and it will give you your USB serial ID. ## once you have run through this script, comment out (put a # in front of the line) the line which has the "make menuconfig" in it. ## and the next time you have a klipper update that breaks your CAN, all you have to do, is to run this script once. #-------------------------------------FINAL WORDS-------------------------------------------------- # this script is for me and my set up. # HARDWARE # Raspberry Pi 4B, 8mb # Voron 2.4, 350 # Octopus Pro mainboard # SB2209 (RP2040) Big Tree Tech 2 part Toolhead PCB # Cartographer 3D Eddy Probe in CAN mode # with built in accelerometer / resonance tester # The Octopus functions as a CAN bridge. Cartographer 3D is connected to The SB2209 (RP2040). # The CAN bus is terminated at the Cartographer 3D probe. # SOFTWARE: # OS: Raspbian GNU/Linux 11 (bullseye) # Distro: MainsailOS 1.2.1 (bullseye) # klipper: v0.12.0-114-ga77d0790 # if you are not using this script on my system then anything can happen which I am not responsible for. echo "STEP 1 - UPDATE KATAPULT FROM GIT if needed" test -e ~/katapult && (cd ~/katapult && git pull) || (cd ~ && git clone https://github.com/Arksine/katapult) ; cd ~ echo "STEP 2a - FLASH MAINBOARD KATAPULT so we can flash it easily" cd ~/katapult make clean KCONFIG_CONFIG=config.mainboardKatapult # cleans old files make menuconfig KCONFIG_CONFIG=config.mainboardKatapult # this can be commented out for automation AFTER you have filled out correct fields for your card. or leave it in to have some control make KCONFIG_CONFIG=config.mainboardKatapult # this creates a deploy.bin python3 ~/katapult/scripts/flashtool.py -i can0 -u yourmainboarduuid -r # puts mainboard in katapult flash mode python3 ~/katapult/scripts/flashtool.py -f ~/katapult/out/deployer.bin -d /dev/serial/by-id/usb-katapult_your_mainboard_usb_id # flashes katapult to mainboard echo "STEP 2b - FLASH MAINBOARD so it works as a CAN BRIDGE, over KATAPULT" cd ~/klipper make clean KCONFIG_CONFIG=config.mainboardUSB2CANbb # cleans old files make menuconfig KCONFIG_CONFIG=config.mainboardUSB2CANbb # configuration for klipper-U2CBB. comment this line for automation make KCONFIG_CONFIG=config.mainboardUSB2CANbb # this creates klipper.bin sudo service klipper stop # mainboard still in katapult forced flash mode. so feel free to flash klipper can bridge on it! python3 ~/katapult/scripts/flashtool.py -f ~/klipper/out/klipper.bin -d /dev/serial/by-id/usb-katapult_yourmainboardusbid # flashes klipper-U2CBB to MAINBOARD sudo service klipper start echo "STEP 3a UPDATE TOOLHEAD KATAPULT so we can flash it easily" cd ~/katapult make clean KCONFIG_CONFIG=config.toolheadKatapult # clean old files make menuconfig KCONFIG_CONFIG=config.toolheadKatapult # comment out for full automation after once filled out! make KCONFIG_CONFIG=config.toolheadKatapult # build katapult deployer.bin python3 ~/katapult/scripts/flashtool.py -i can0 -u yourtoolheaduuid -r # put toolhead board into katapult flash mode python3 ~/katapult/scripts/flashtool.py -i can0 -u yourtoolheaduuid -f ~/katapult/out/deployer.bin # flash the katapult binary echo "STEP 3b UPDATING TOOLHEAD KLIPPER over KATAPULT" cd ~/klipper make clean KCONFIG_CONFIG=config.toolheadKlipper make menuconfig KCONFIG_CONFIG=config.toolheadKlipper make KCONFIG_CONFIG=config.toolheadKlipper sudo service klipper stop python3 ~/katapult/scripts/flashtool.py -i can0 -u yourtoolheaduuid -f ~/klipper/out/klipper.bin sudo service klipper start echo " The Klippper update flash script has finished. Hopefully all is working again :-)" flashCAN.sh
-
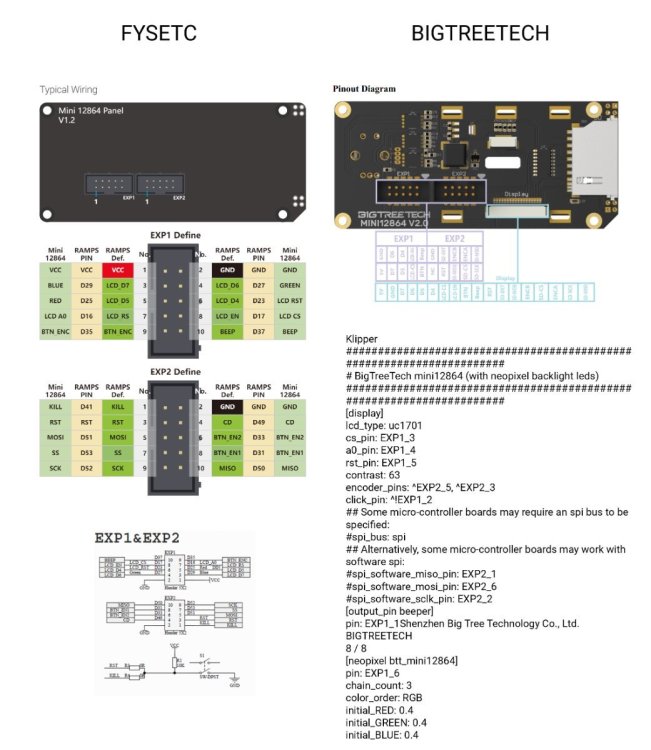
Hello Please help me to fix this problem. I need a long cable for display. Can't use EXP ports on main board with long cable bcs it produces error with registers in my SPI TMC2240. I bought such board STM32_Mini12864 https://github.com/VoronDesign/Voron-Hardware/tree/master/STM32_Mini12864/ It's for FYSETC Mini 12864 Display but pinout looks like my Bigtreetech mini 12864 v2 This board uses STM32F042F6 microcontroller. I flashed the STM32_Mini12864 board, wrote config for it (example) and successfully connected to it: My configuration for STM32_Mini12864: [mcu menu] # Uncomment serial and update with proper path # Find serial path by running terminal command: ls /dev/serial/by-id/* serial: /dev/serial/by-id/usb-Klipper_stm32f042x6_120008800543304846333520-if00 restart_method: command [display] lcd_type: uc1701 kill_pin: !menu:PF0 spi_bus: spi1 cs_pin: menu:PA4 a0_pin: menu:PA2 rst_pin: menu:PA3 contrast: 63 encoder_pins: ^menu:PA0, ^menu:PA1 click_pin: ^!menu:PB1 ## Alternatively, some micro-controller boards may work with software spi: # I found these pins in the STM32F042x6 datasheet! #spi_software_miso_pin: menu:PA6 #spi_software_mosi_pin: menu:PA7 #spi_software_sclk_pin: menu:PA5 [output_pin BEEPER_pin] pin: menu:PF1 pwm: True value: 0 shutdown_value: 0 cycle_time: 0.001 scale: 1000 [gcode_macro M300] gcode: # Use a default 1kHz tone if S is omitted. {% set S = params.S|default(1000)|int %} # Use a 10ms duration is P is omitted. {% set P = params.P|default(100)|int %} SET_PIN PIN=BEEPER_pin VALUE={S} CYCLE_TIME={ 1.0/S if S > 0 else 1 } G4 P{P} SET_PIN PIN=BEEPER_pin VALUE=0 # name of neopixel should match name referenced in printer.cfg # if there are other gcode_macros referencing the led display (e.g delayed gcode_macro) [neopixel fysetc_mini12864] pin: menu:PA13 chain_count: 3 color_order: RGB initial_RED: 1.0 initial_GREEN: 1.0 initial_BLUE: 1.0 But display doesn't work correctly: The display is black; Rotation or clicking the encoder kills printer (need to reboot) Only kill button works correctly. I added klippy.log after rotation of the encoder.
-
I am trying to set up the klipper_z_calibration plug in for the first time. On an LDO Voron 2.4 with Klicky Probe. Homing, QGL and bed mesh complete without any errors. When I run calibrate_z, the klicky probe is attached and then the probing with the nozzle to the z endstop starts. It always fails with “Probe samples exceed tolerance”. This is the console output: 12:24 PM Probe samples exceed tolerance 12:24 PM probe: TRIGGERED 12:24 PM probe at 202.800,297.600 is z=-0.737500 12:24 PM probe at 202.800,297.600 is z=-0.765000 12:24 PM probe at 202.800,297.600 is z=-0.765000 12:24 PM Probe samples exceed tolerance. Retrying... 12:24 PM probe at 202.800,297.600 is z=-0.738750 12:24 PM probe at 202.800,297.600 is z=-0.763750 12:24 PM probe at 202.800,297.600 is z=-0.763750 12:23 PM Probe samples exceed tolerance. Retrying... 12:23 PM probe at 202.800,297.600 is z=-0.740000 12:23 PM probe at 202.800,297.600 is z=-0.762500 12:23 PM Probe samples exceed tolerance. Retrying... 12:23 PM probe at 202.800,297.600 is z=-0.740000 12:23 PM probe at 202.800,297.600 is z=-0.762500 12:23 PM probe at 202.800,297.600 is z=-0.762500 12:23 PM probe: open 12:23 PM moving to a safe Z distance 12:23 PM Attaching Probe 12:23 PM calibrate_z
-
Region Exclude for Mainsail/Klipper?
Buurman posted a question in Slicers and Print Troubleshooting - Questions
More of a Klipper/Mainsail question than slicer, but hope its ok here.... I am really missing the Region Exclude plugin from Octoprint in Mainsail, they have a nice Gcode preview, but no way to exclude something there. This is of course very usefull with a full plate where one item fails (comes from plate, etc) so you can exclude it, and print can continue without printing filament in the air...and making a mess... maybe even failing everything. There is this dude here saying he is using in in beta and should be released, still cannot find it, not in release notes, anything. Is this guy full of bullshit, or am I just a freaking idiot and looking in the wrong places hahaha! Hope someone can help!- 32 replies
-
Hi, I've just decided to add a camera to my printer using Mainsail and Crowsnest, however, it shows as "No signal." Crowsnest config #### crowsnest.conf #### This is a typical default config. #### Also used as default in mainsail / MainsailOS #### See: #### https://github.com/mainsail-crew/crowsnest/blob/master/README.md #### for details to configure to your needs. ##################################################################### #### ##### #### Information about ports and according URL's ##### #### ##### ##################################################################### #### ##### #### Port 8080 equals /webcam/?action=[stream/snapshot] ##### #### Port 8081 equals /webcam2/?action=[stream/snapshot] ##### #### Port 8082 equals /webcam3/?action=[stream/snapshot] ##### #### Port 8083 equals /webcam4/?action=[stream/snapshot] ##### #### ##### ##################################################################### #### RTSP Stream URL: ( if enabled and supported ) ##### #### rtsp://<ip>:<rtsp_port>/stream.h264 ##### ##################################################################### [crowsnest] log_path: /home/ctn3770/printer_data/logs/crowsnest.log log_level: verbose # Valid Options are quiet/verbose/debug delete_log: true # Deletes log on every restart, if set to true no_proxy: false [cam 1] mode: mjpeg # ustreamer - Provides mjpg and snapshots. (All devices) # camera-streamer - Provides webrtc, mjpg and snapshots. (rpi + Raspi OS based only) enable_rtsp: true # If camera-streamer is used, this enables also usage of an rtsp server rtsp_port: 8554 # Set different ports for each device! port: 8080 # HTTP/MJPG Stream/Snapshot Port device: /dev/v41/by-id/usb-GENERAL_GENERAL_-_UVC-video-index0 # See Log for available ... resolution: 1280x720 # widthxheight format max_fps: 30 # If Hardware Supports this it will be forced, otherwise ignored/coerced. #custom_flags: # You can run the Stream Services with custom flags. #v4l2ctl: # Add v4l2-ctl parameters to setup your camera, see Log what your cam is capable of. Crowsnest Log [09/07/23 16:21:58] crowsnest: crowsnest - A webcam Service for multiple Cams and Stream Services. [09/07/23 16:21:58] crowsnest: Version: v4.0.4 [09/07/23 16:21:58] crowsnest: Prepare Startup ... [09/07/23 16:21:58] crowsnest: INFO: Host information: [09/07/23 16:21:58] crowsnest: Host Info: Distribution: Raspbian GNU/Linux 11 (bullseye) [09/07/23 16:21:58] crowsnest: Host Info: Release: MainsailOS release 1.2.1 (bullseye) [09/07/23 16:21:58] crowsnest: Host Info: Kernel: Linux 6.1.21-v8+ aarch64 [09/07/23 16:21:58] crowsnest: Host Info: Model: Raspberry Pi 4 Model B Rev 1.5 [09/07/23 16:21:58] crowsnest: Host Info: Available CPU Cores: 4 [09/07/23 16:21:58] crowsnest: Host Info: Available Memory: 3705536 kB [09/07/23 16:21:58] crowsnest: Host Info: Diskspace (avail. / total): 729M / 7.0G [09/07/23 16:21:58] crowsnest: INFO: Checking Dependencies [09/07/23 16:21:58] crowsnest: Dependency: 'crudini' found in /usr/bin/crudini. [09/07/23 16:21:58] crowsnest: Dependency: 'find' found in /usr/bin/find. [09/07/23 16:21:58] crowsnest: Dependency: 'xargs' found in /usr/bin/xargs. [09/07/23 16:21:58] crowsnest: Dependency: 'ustreamer' found in bin/ustreamer/ustreamer. [09/07/23 16:21:58] crowsnest: Dependency: 'camera-streamer' found in bin/camera-streamer/camera-streamer. [09/07/23 16:21:58] crowsnest: Version Control: ustreamer is up to date. (v5.42) [09/07/23 16:21:59] crowsnest: Version Control: camera-streamer is up to date. ((ef8f6a4)) [09/07/23 16:21:59] crowsnest: INFO: Print Configfile: '/home/ctn3770/printer_data/config/crowsnest.conf' [09/07/23 16:21:59] crowsnest: [crowsnest] [09/07/23 16:21:59] crowsnest: log_path: /home/ctn3770/printer_data/logs/crowsnest.log [09/07/23 16:21:59] crowsnest: log_level: verbose [09/07/23 16:21:59] crowsnest: delete_log: true [09/07/23 16:21:59] crowsnest: no_proxy: false [09/07/23 16:21:59] crowsnest: [09/07/23 16:21:59] crowsnest: [cam 1] [09/07/23 16:21:59] crowsnest: mode: mjpeg [09/07/23 16:21:59] crowsnest: [09/07/23 16:21:59] crowsnest: enable_rtsp: true [09/07/23 16:21:59] crowsnest: rtsp_port: 8554 [09/07/23 16:21:59] crowsnest: port: 8080 [09/07/23 16:21:59] crowsnest: device: /dev/v41/by-id/usb-GENERAL_GENERAL_-_UVC-video-index0 [09/07/23 16:21:59] crowsnest: resolution: 1280x720 [09/07/23 16:21:59] crowsnest: max_fps: 30 [09/07/23 16:21:59] crowsnest: INFO: Detect available Devices [09/07/23 16:21:59] crowsnest: INFO: Found 1 total available Device(s) [09/07/23 16:21:59] crowsnest: INFO: Found 1 available v4l2 (UVC) camera(s) [09/07/23 16:21:59] crowsnest: /dev/v4l/by-id/usb-GENERAL_GENERAL_-_UVC-video-index0 -> /dev/video0 [09/07/23 16:21:59] crowsnest: Supported Formats: [09/07/23 16:21:59] crowsnest: [0]: 'MJPG' (Motion-JPEG, compressed) [09/07/23 16:21:59] crowsnest: Size: Discrete 1280x720 [09/07/23 16:21:59] crowsnest: Interval: Stepwise 0.033s - 0.033s with step 0.000s (30.000-30.000 fps) [09/07/23 16:21:59] crowsnest: Supported Controls: [09/07/23 16:21:59] crowsnest: [09/07/23 16:21:59] crowsnest: User Controls [09/07/23 16:21:59] crowsnest: [09/07/23 16:21:59] crowsnest: brightness 0x00980900 (int) : min=1 max=255 step=1 default=48 value=48 [09/07/23 16:21:59] crowsnest: contrast 0x00980901 (int) : min=1 max=127 step=1 default=36 value=36 [09/07/23 16:21:59] crowsnest: saturation 0x00980902 (int) : min=1 max=127 step=1 default=64 value=64 [09/07/23 16:21:59] crowsnest: hue 0x00980903 (int) : min=-128 max=127 step=1 default=0 value=0 [09/07/23 16:21:59] crowsnest: gamma 0x00980910 (int) : min=0 max=20 step=1 default=0 value=10 [09/07/23 16:21:59] crowsnest: sharpness 0x0098091b (int) : min=0 max=3 step=1 default=3 value=3 [09/07/23 16:21:59] crowsnest: backlight_compensation 0x0098091c (int) : min=0 max=127 step=1 default=8 value=8 [09/07/23 16:21:59] crowsnest: Try to start configured Cams / Services... [09/07/23 16:22:00] crowsnest: INFO: Configuration of Section [cam 1] looks good. Continue ... [09/07/23 16:22:00] crowsnest: V4L2 Control: No parameters set for [cam 1]. Skipped. [09/07/23 16:22:02] crowsnest: Starting ustreamer with Device /dev/v41/by-id/usb-GENERAL_GENERAL_-_UVC-video-index0 ... [09/07/23 16:22:04] crowsnest: ... Done! [09/07/23 16:22:04] crowsnest: WATCHDOG: Lost Device: '/dev/v41/by-id/usb-GENERAL_GENERAL_-_UVC-video-index0'
-
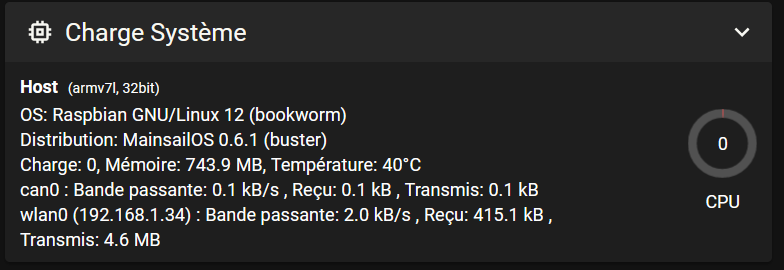
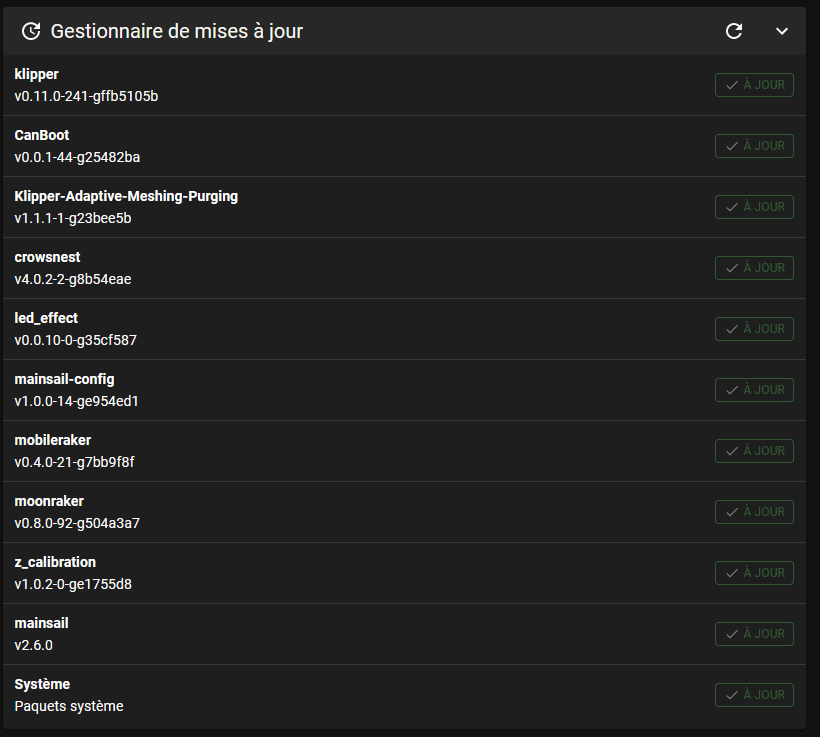
Hi everyone, I updated to Raspbian Linux 12 (Bookworm) because Crowsnest became incompatible with Linux 10 (buster). It seems that I've gone too far because now Klipper is unreachable. Again, I didn't respect the rule "if it work, don't touch it". Everything is up to date, except the distribution mainsailOS which seems to stay stuck to V0.6.1 (buster). On Github, the last version of MainsailOS seems to be v1.2.1 My questions : 1. Is there a way to directly update MainsailOS from the SSH connection or I have to flash the Raspberry ? (and I don't want to remove it from the printer). 2. Is there a way to switch to the test/bookworm branch of mainsailOS ? Is it even desirable ? I hope this manipulations will make klipper accessible again. Thank you for your help.
-
My Voron 2.4 running Klipper had been running great for a while but the afterburner assembly was starting to show weakness. I thought it was a good time for an upgrade so I installed a new Orbiter 2.0 with filament detector on my Voron 2.4 and the problems began...... witht he Orbiter 2.0 installed i have not been able to get my rotation distance anything like close to accurate. last print had massive over extrusion with lots of noise from the extruder. To statrt isolating the problem /as an experiment I ran 50mm (requested) filament through the extruder body only (no lower nozzle assempbly) and got about 250mm of filament instead. Fortunately the awful noise stopped. Ergo i think my initial problem is that the over extrusion i jsut discovered was overwhelming the nozzle and jamming. easy so far. On to the print config..... And incredible frustration as any and all changes to the print config file make no measurable difference in the amount of over feed. here is the code after a lot of trial and error and no change (i suspect there are a number of settings that i have turned off or on to see what if anything would happen- no change.). here is the code- ##################################################################### # Extruder ##################################################################### ## Connected to MOTOR_6 ## Heater - HE0 ## Thermistor - T0 [extruder] step_pin: PE2 dir_pin: PE3 enable_pin: !PD4 ## Update value below when you perform extruder calibration ## If you ask for 100mm of filament, but in reality it is 98mm: ## rotation_distance = <previous_rotation_distance> * <actual_extrude_distance> / 100 ## 22.6789511 is a good starting point #Bondtech 5mm Drive Gears AfterBurner ## 34.37086 for Bondtech 8mm gears (Galileo ## rotation_distance: 4.637 for Orbiter 2.0 rotation_distance: 4.637 ## Update Gear Ratio depending on your Extruder Type ## Use 50:17 for Afterburner/Clockwork (BMG Gear Ratio) ## Use 80:20 for M4, M3.1 # orbiter motor LDO-36STH20-1004AHG(XH) # gear_ratio: 7:1 microsteps: 16 full_steps_per_rotation: 200 #200 for 1.8 degree, 400 for 0.9 degree # max_extrude_only_distance: 500 # max_extrude_only_velocity: 120 # <- for orbiter motor LDO-36STH20-1004AHG(XH) # max_extrude_only_accel: 800 # <- for orbiter motor LDO-36STH20-1004AHG(XH) nozzle_diameter: 0.400 filament_diameter: 1.75 heater_pin: PA2 ## Validate the following thermistor type to make sure it is correct ## See https://www.klipper3d.org/Config_Reference.html#common-thermistors for additional options sensor_type: SliceEngineering 450 sensor_pin: PF4 min_temp: 10 max_temp: 270 max_power: 1.0 min_extrude_temp: 170 # control = pid # pid_kp = 26.213 # pid_ki = 1.304 # pid_kd = 131.721 ## Try to keep pressure_advance below 1.0 pressure_advance: 0.025 ## Default is 0.040, leave stock pressure_advance_smooth_time: 0.030 ## E0 on MOTOR6 ## Make sure to update below for your relevant driver (2208 or 2209) [tmc2209 extruder] uart_pin: PE1 interpolate: False run_current: 0.85 hold_current: 0.100 sense_resistor: 0.11 stealthchop_threshold: 0 # driver_TBL: 0 # driver_HEND: 6 # driver_HSTRT: 7 # driver_TOFF: 4 ###################################################################################################### ## I haven't made any changes above or below these lines so i the problem MAY be in here################################## ###################################################################################################### All of which leads me to my theory - incorrect wiring of the ldo-36st17-1004ahg to the tcm2209. Now i am very new to electronics and the instructions for wiring the Orbiter 2.0 to the V2.4 are yet to be found by me (if anybody has them, please share) so it would be an easy mistake. i feel like this is some sort of reversed polarity issue and leaves me with no idea where to begin with figuring this out. anybody got any ideas?
-
- 1 comment
-
- 3
-

-
- klipper
- calibration
-
(and 3 more)
Tagged with:
-
Don't know if it's allowed to link to the official Voron-Forum, but I think this is a very useful hint in regarding of Printer security: pls. delete the Link if not allowed: https://forum.vorondesign.com/threads/psa-gpio-pins-to-set-at-micro-controller-startup.169/ On my Octopus1.1 the hotend fan pin is PE5. I went for this and it works great
-
I have the Stealthburner beta(0) running, but I've run into a problem. When I include the klipper macro cfg file into printer.cfg in Klipper, Klipper throws an error "Section 'sb_led.cfg' is not a valid config section". I don't follow everything that's going on in the cfg file, but I don't see anything that looks structurally different from other included cfg files that are not causing problems. The contents of the file were copy/pasted from the file in the "klipper macros" folder inside the Stealthburner beta(0) file I downloaded (did change the pin to pin: PB0, using the neopixel connector on the BTT Octopus board). Also tried copy/pasting the macros from voron_2.4_klipper_config/stealthburner_leds.cfg at master · wuzefacke/voron_2.4_klipper_config · GitHub . Same result. Any ideas what I might be missing/doing wrong?
-

Klipper doesn't auto write the config after Save_config...
Pradit posted a question in Voron 2 - Questions
Whenever I test something like Z_endstop_calibrate or anything which after the end it mentioned to save_config. And we can expect the auto config in our printer.cfg at the bottom. However, this stop happen to me. I got the PID auto config but that's it. After I did 1st PID and it never write anything for me again. Anything to do with my klipper_firmware_dirty? Please help thanks. -
Hi. Do you know where should i look at my led problem It was on only logo when I first config the led in printer cfg. I was happy i didnt know what actual light should be on and when all LED will be on. Then sometime later along the building and fixing issue suddenly when power on the 2 part led on green while logo on and white. And sometime later i fixed things later the part led green off again. But logo LED still on normally. Then once i got everything and start initial tuning pid and stuff. Part led on again this time white same as logo. Logo has always been on. After i got klicky install and with led cfg. My logo start to have status color as macro in the config. But part led off again. Please tell me how yo debug. Thanks.
-
Klipper reports: ERROR Source contains parsing errors: '/home/pi/klipper_config/printer.cfg' [line 12]: 'tu\n' Once the underlying issue is corrected, use the "RESTART" command to reload the config and restart the host software. Printer is halted Specs: V2.4 running klipper and mainsail. Running a Pi4 and Octopus board. I'm new to this stuff, and not looking for a answer to just be dolled out, but kinda lost at this point. I had this error congruently, but have since fixed it I believe by removing that line from the mainsail config file. Source contains parsing errors: '/home/pi/klipper_config/mainsail.cfg' [line 18]: 'CANCEL_PRINT\n' Once the underlying issue is corrected, use the "RESTART" command to reload the config and restart the host software. Printer is halted
-
Caselights macro to turn lights off after a set time.
Mcrcheli posted a question in Frequently Asked Questions
I’m looking for a way to set the case light single color LED strip to go off after the printer starts or after the lights are turned on. I have searched and searched and can’t seem to find a way to do it. I have them set to turn on at start up then a macro to toggle on and off. Any help would be appreciated. Yes I am pretty new to Klipper but am catching on to the macros quickly after setting up my Euclid probe. -
I'm using Octoprint, Klipper, Canboot, EBB36 and Octoprint with my work in progress Voron 2.4. I have so many issue that make the klipper got disconnected or I fired firmware restart often. Most of the time klipper just doesn't reconnect. What happen? or are there any log file I can trace or look at the real problem?
-
Hi all, thanks in advance for any and all help and comments. This is my problem... I want to implement a LOAD_FILAMENT macro in my printer.cfg like the example below. [gcode_macro LOAD_FILAMENT] gcode: {% set speed = params.SPEED|default(300) %} {% set max_velocity = printer.configfile.settings['extruder'].max_extrude_only_velocity %} SAVE_GCODE_STATE NAME=load_state M300 # beep G91 G92 E0 G1 E350 F{max_velocity} # fast-load G1 E25 F{speed} # purge M300 M300 RESTORE_GCODE_STATE NAME=load_state My problem is... I keep getting this error. Extrude only move too long (350.000mm vs 50.000mm) Now, I understand what this error means, i.e. 50mm is the max allowable extrude distance and I also learned, based on my research, that the way to avoid this is to have a G92 E0 code before extruding but I still get the error. Any help will be greatly appreciated.
-
Presently building a 2.4 but I've also converted my Artillery X1s to Klipper/Mainsail. I use to monitor all of my printers and webcams thru one platform OctoFarm is there an equivalent platform available for Klipper?
-
Bonjour, ou le gcode_macro PRINT_START doit il ce trouver? je l'ai mis dans printer.cfg mais cela n'est pas pris en compte. Merci


