


-
 2
2
-
 1
1
About This File
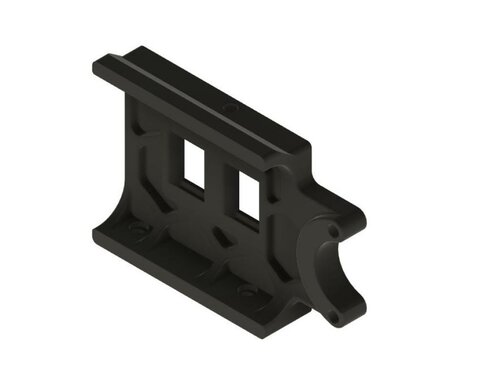
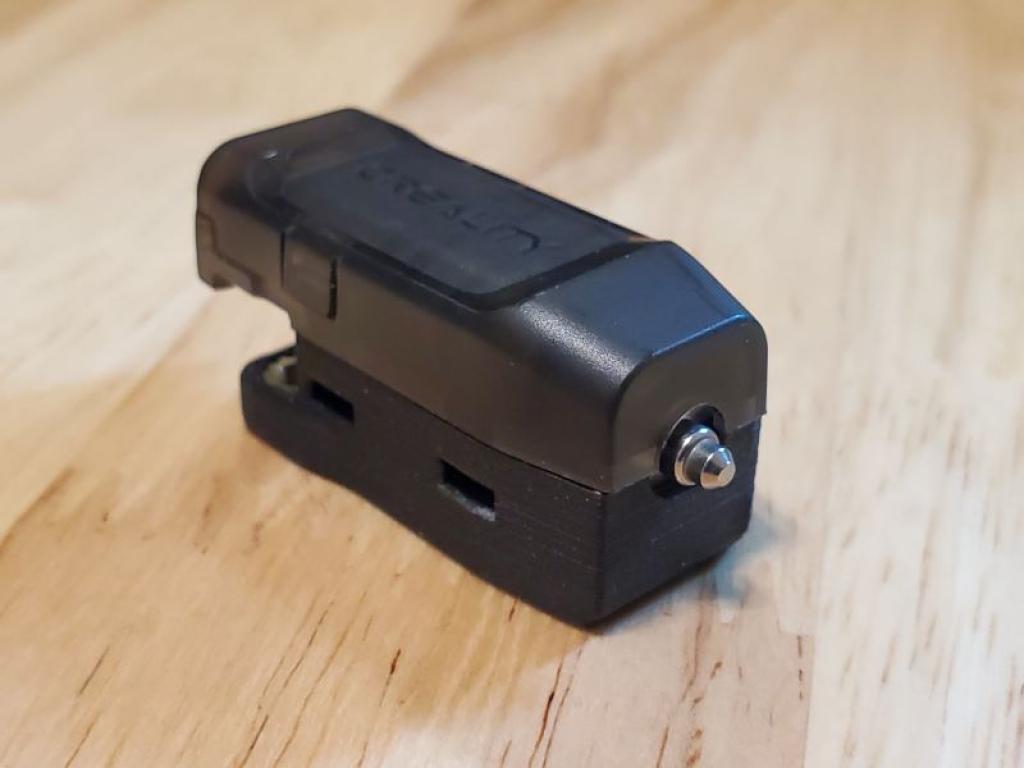
Voron 2.4 CR Touch Snap Mount (Beta)
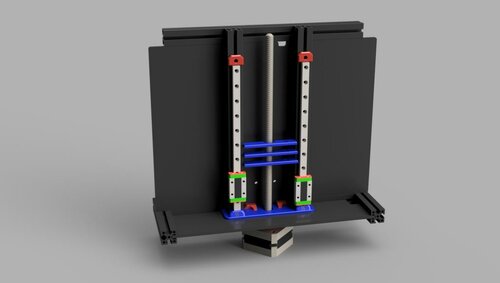
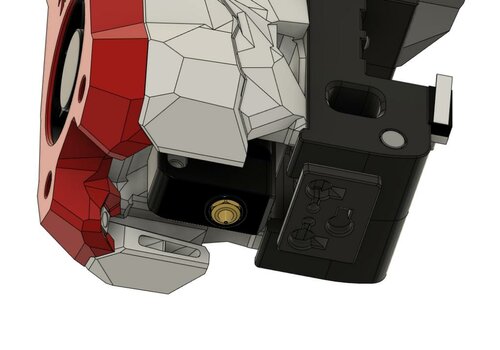
Drop-in Probe Replacement for v2.4 Using Single or Double MGN9 Rail(s).
Stealthburner Compatible but Will NOT Fit on MGN12 (Trident or V2.4r2)!
I've been looking for simpler alternatives to the common probe mods that is also compatible with the standard MGN9 mount. This requires no modification to the printer and uses existing mounting holes and routing. It does require part of the probe's shell be trimmed and must only be powered by 5V!
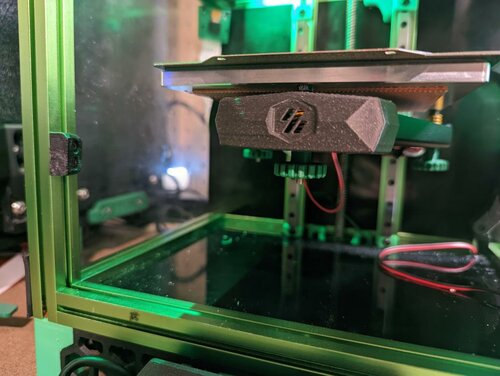
The big question is, are these even reliable on a Voron? Well, it is well known that BL Touch probes have issues with heat in closed chambers but the CR Touch photoelectric sensor and metal pin design seem to be better suited for this. I'm currently testing reliability but so far have had no significant issues inside an enclosure with temperatures ranging from ~45-60C. Creality lists a max operating temp of 65C but I haven't found much more information. I'm now testing on my v2.4 and will update with any issues.
I'd appreciate feedback from anyone who has used a CR Touch on their Voron or would like to help test. I suggest newer builders stay with the standard options or the well-tested clicky mod.
Finalized CAD files will be posted after beta.
BOM
| Size | Qty |
|---|---|
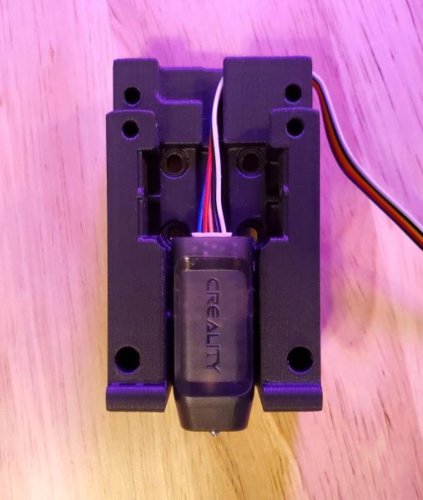
| Creality CR Touch | 1 |
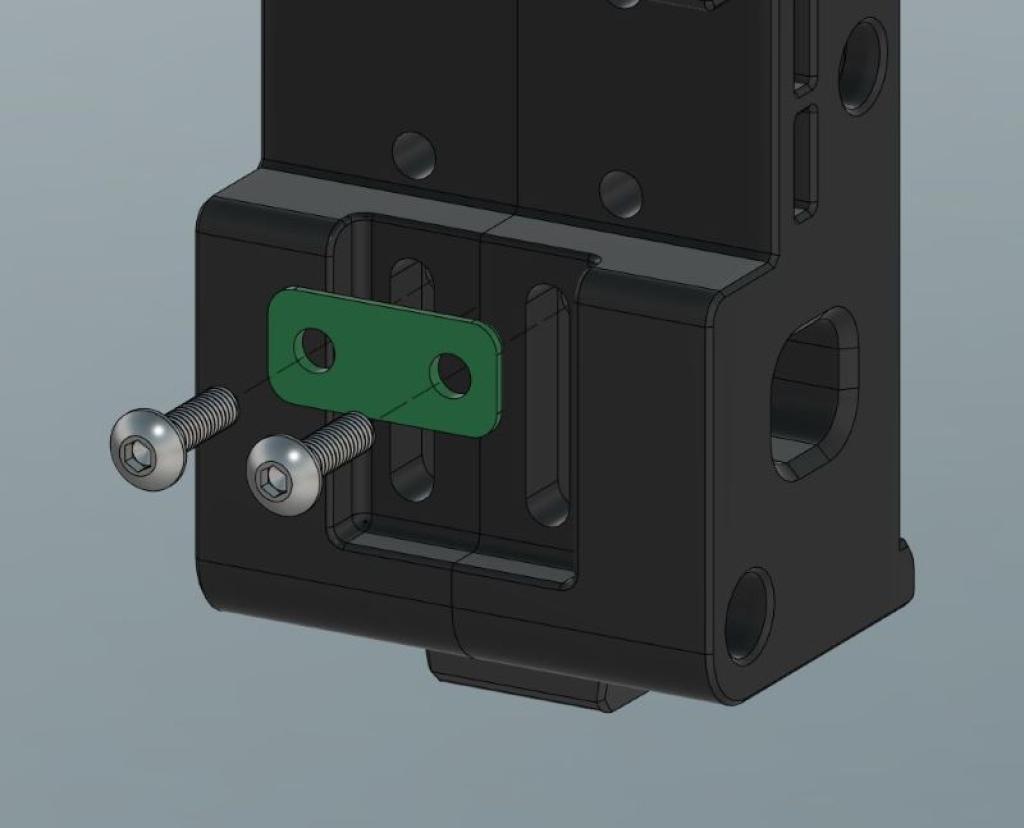
| M3x8 or M3x10 BHCS/SHCS | 2 |
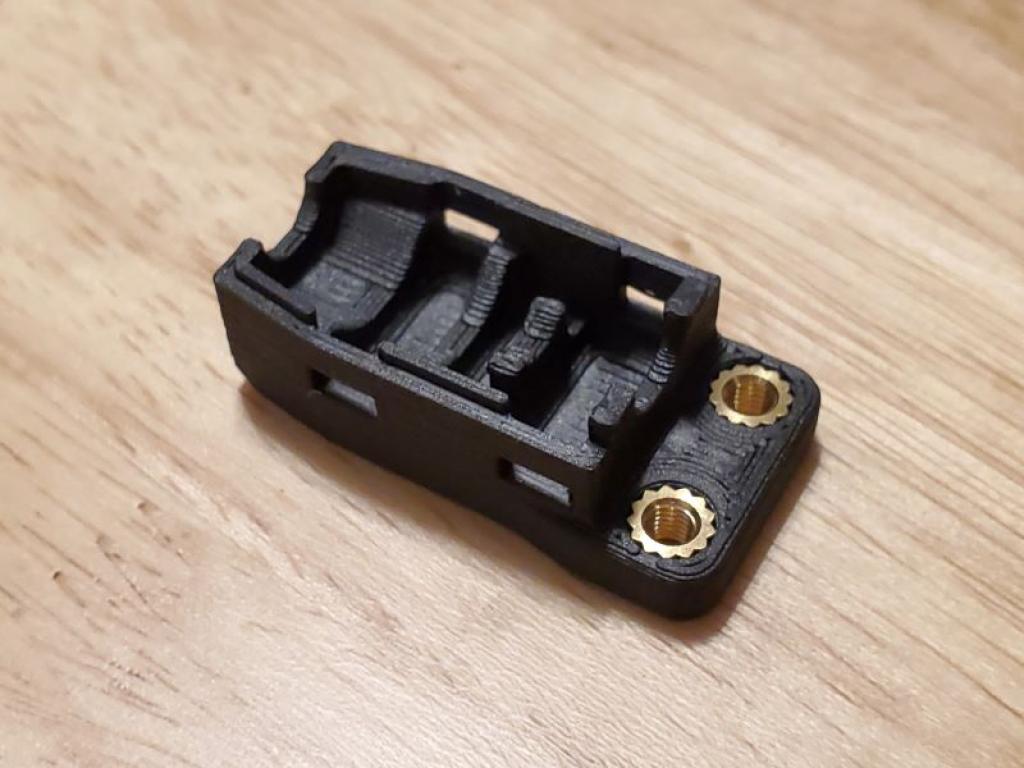
| M3x5 Heat-Set Insert | 2 |
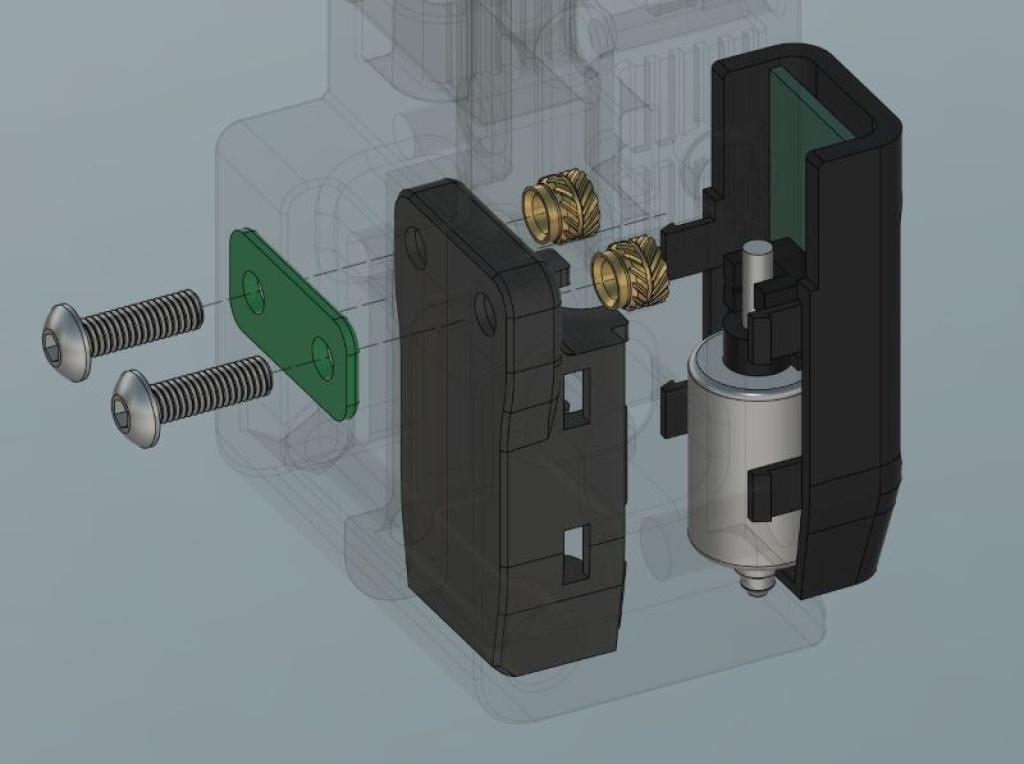
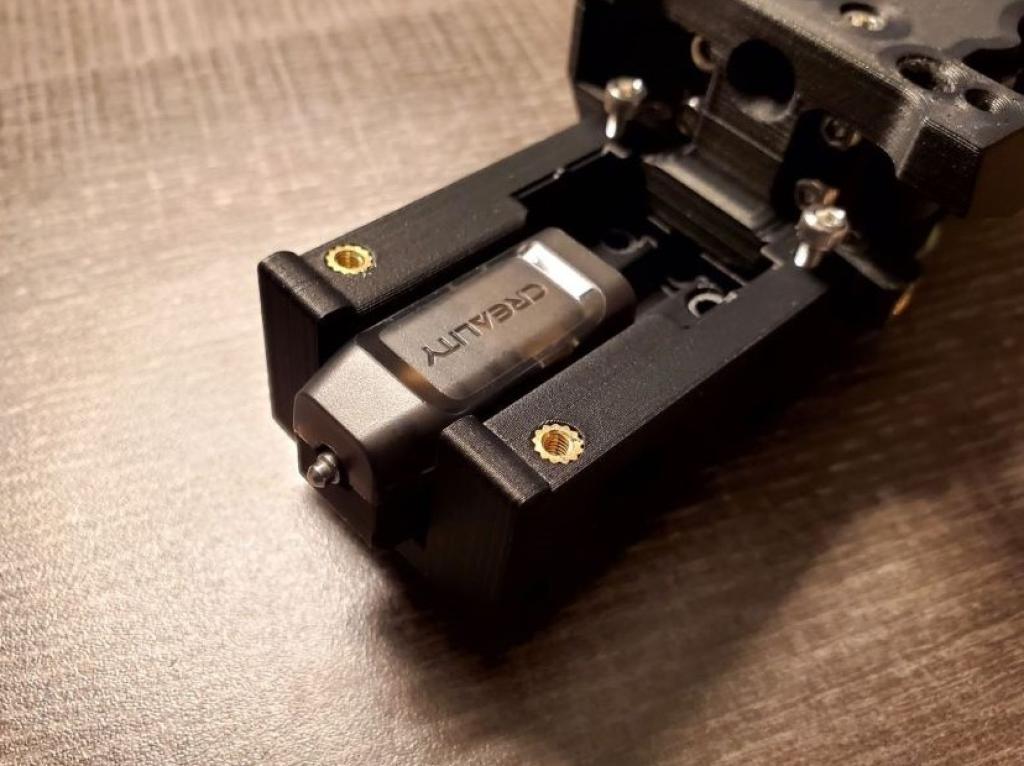
Rear Spacer is Optional
Instructions
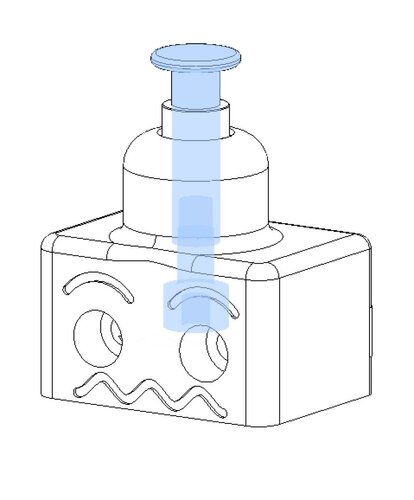
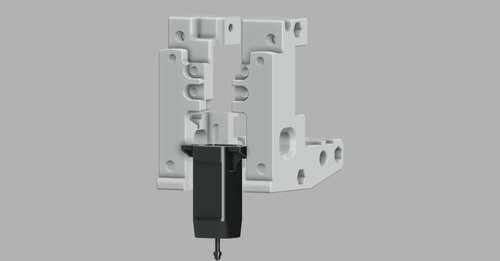
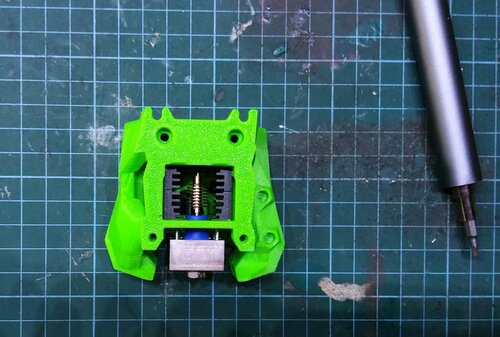
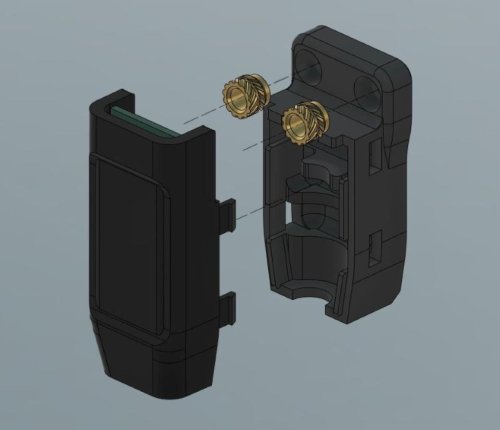
With the wiring detached, carefully seperate the 2 shell pieces by gently pressing the 2 clips on each side. Only the probe side will be used. Be very careful not to break the clips off.
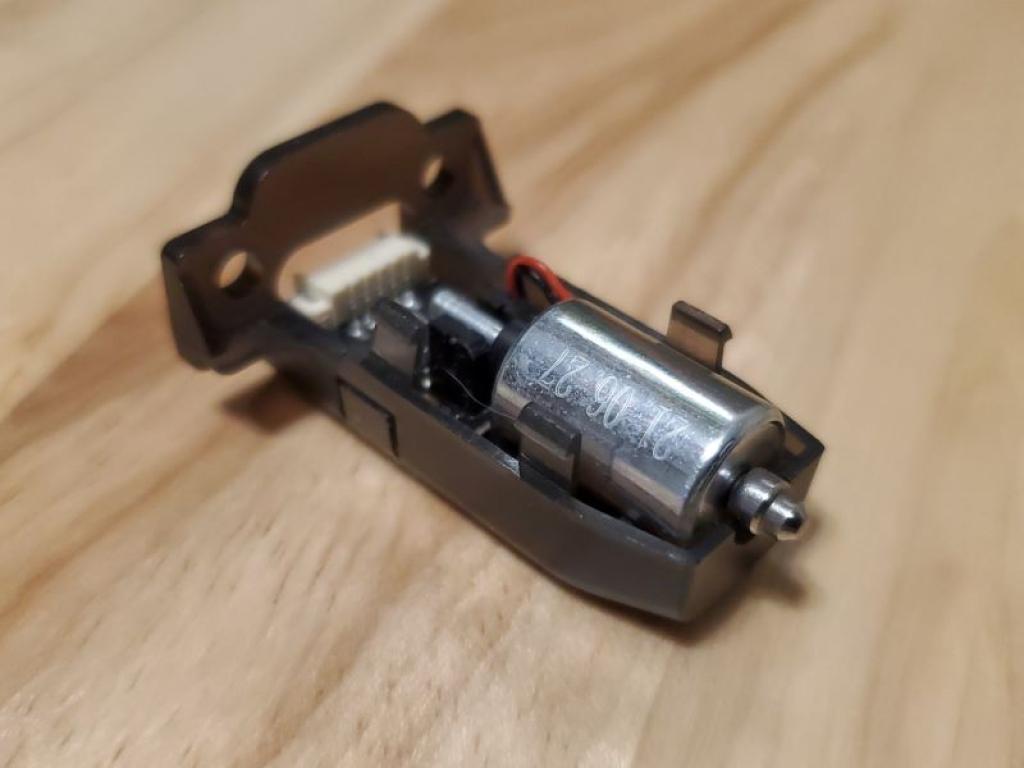
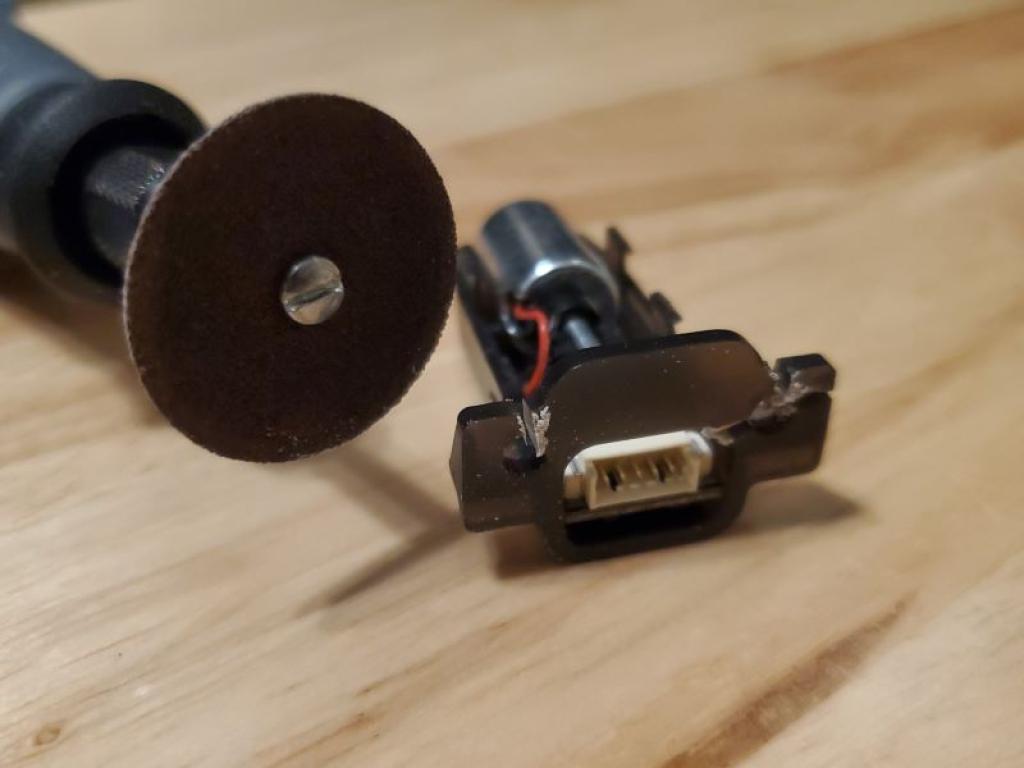
Cut off the top mounting tabs so nothing extends past the sides of the shell. I used a dremel finished off by a file in about 5 min. Careful not to damage the components and blow off any debris build up, especially near the sensor.
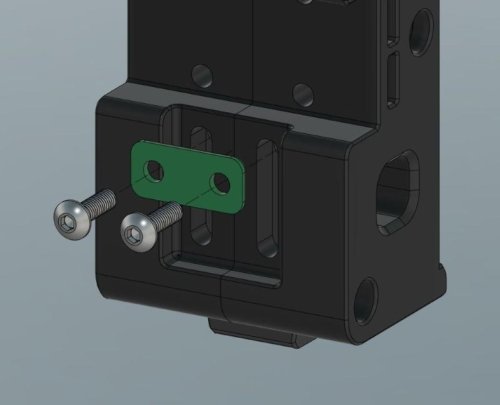
Press two M3 heat-set inserts into the printed mount then snap the shells together. Make sure all snaps are secured. Tolerances are intentionally tight. If multiple tabs are broken, a strip of electrical tape can be used.

Slide in the probe then attach it from the back with two M3x8 screws (M3x10 recommended with alignment spacer). Longer screws could be used but be careful not to hit the PCB.

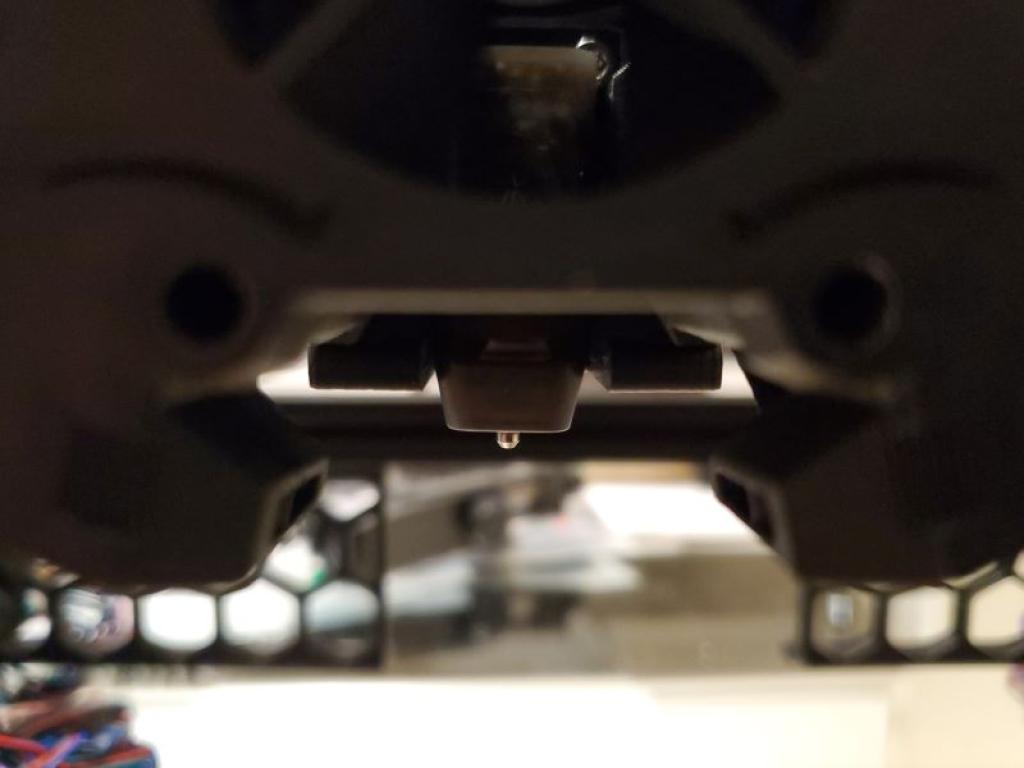
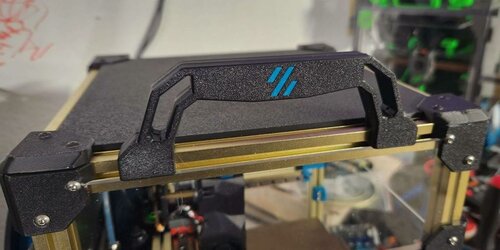
Examples shown are on a single MGN9 rail mod
Please contact [email protected] to report issues or suggestions.