Search the Community
Showing results for tags 'voron2.4'.
Found 16 results
-
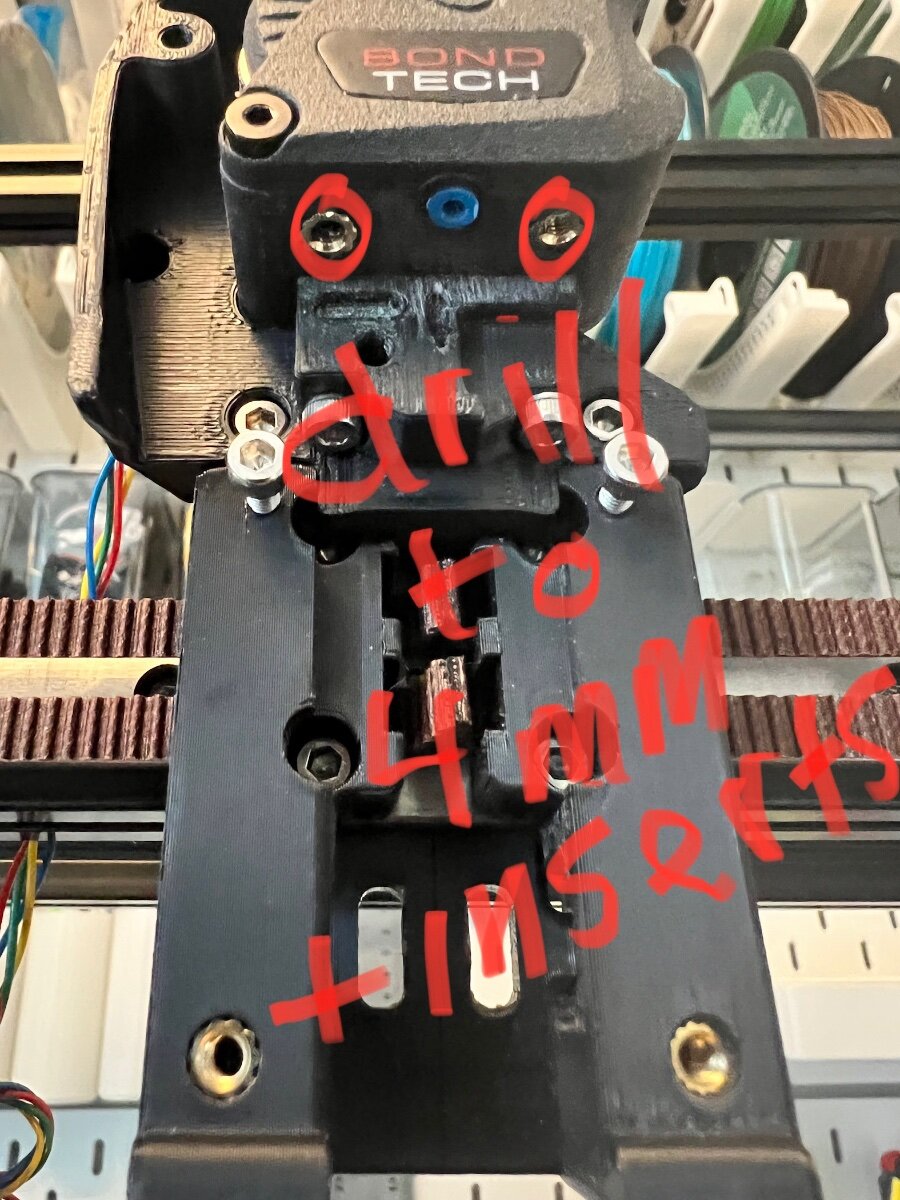
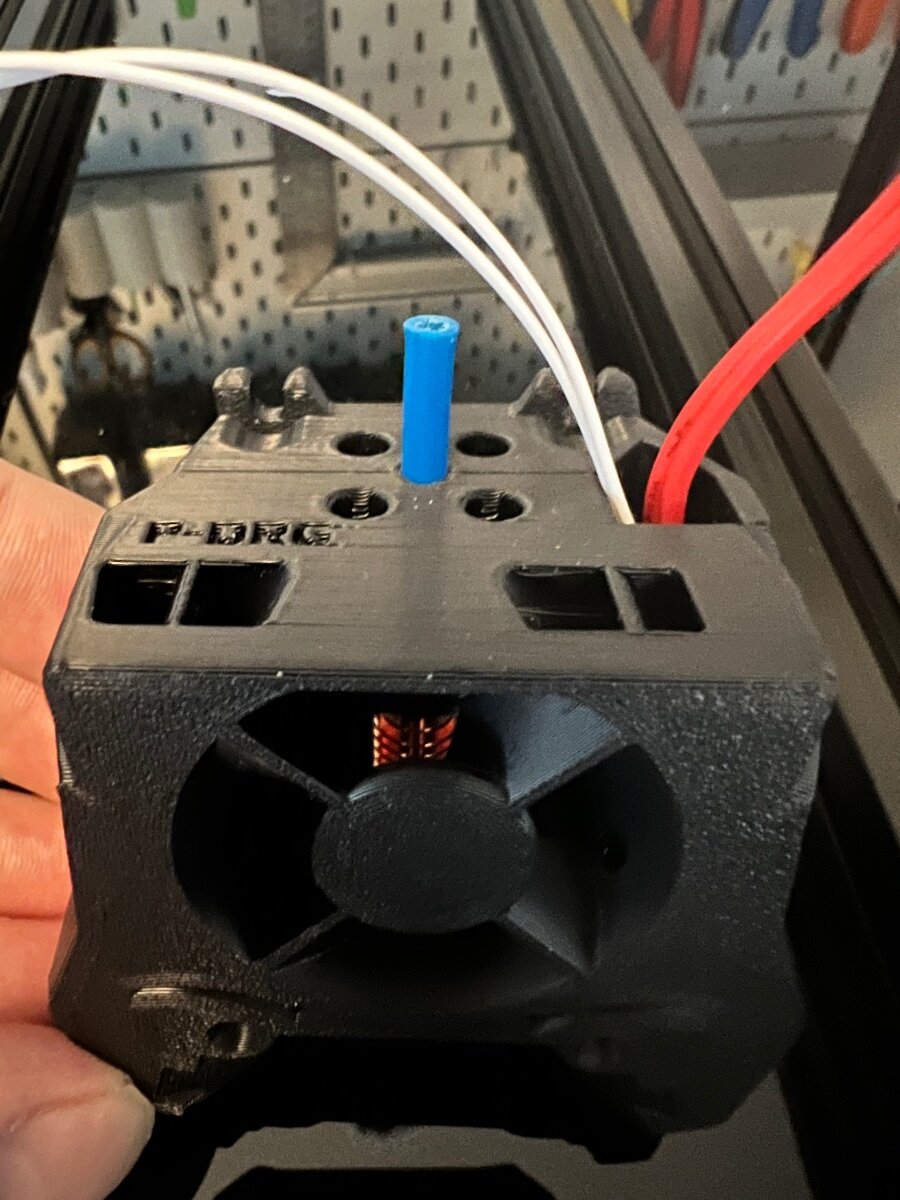
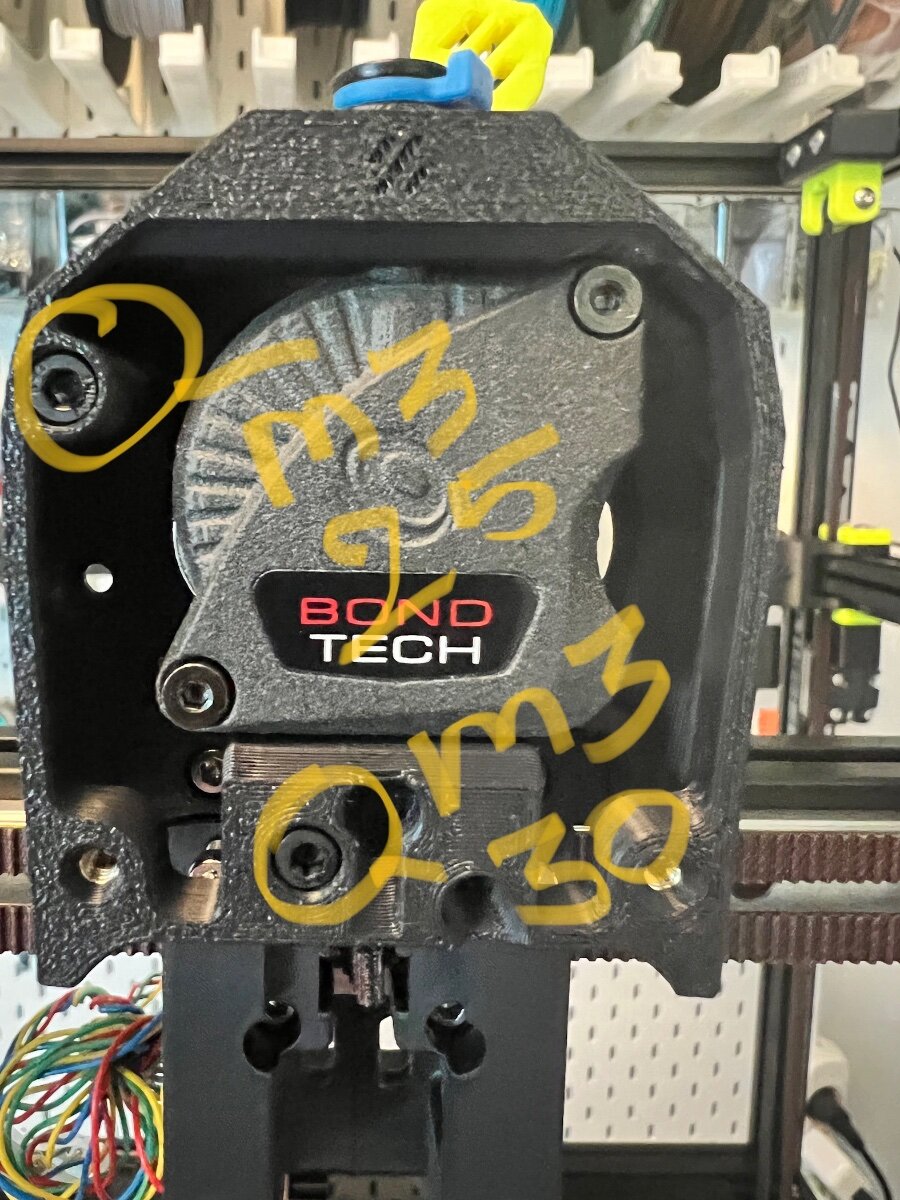
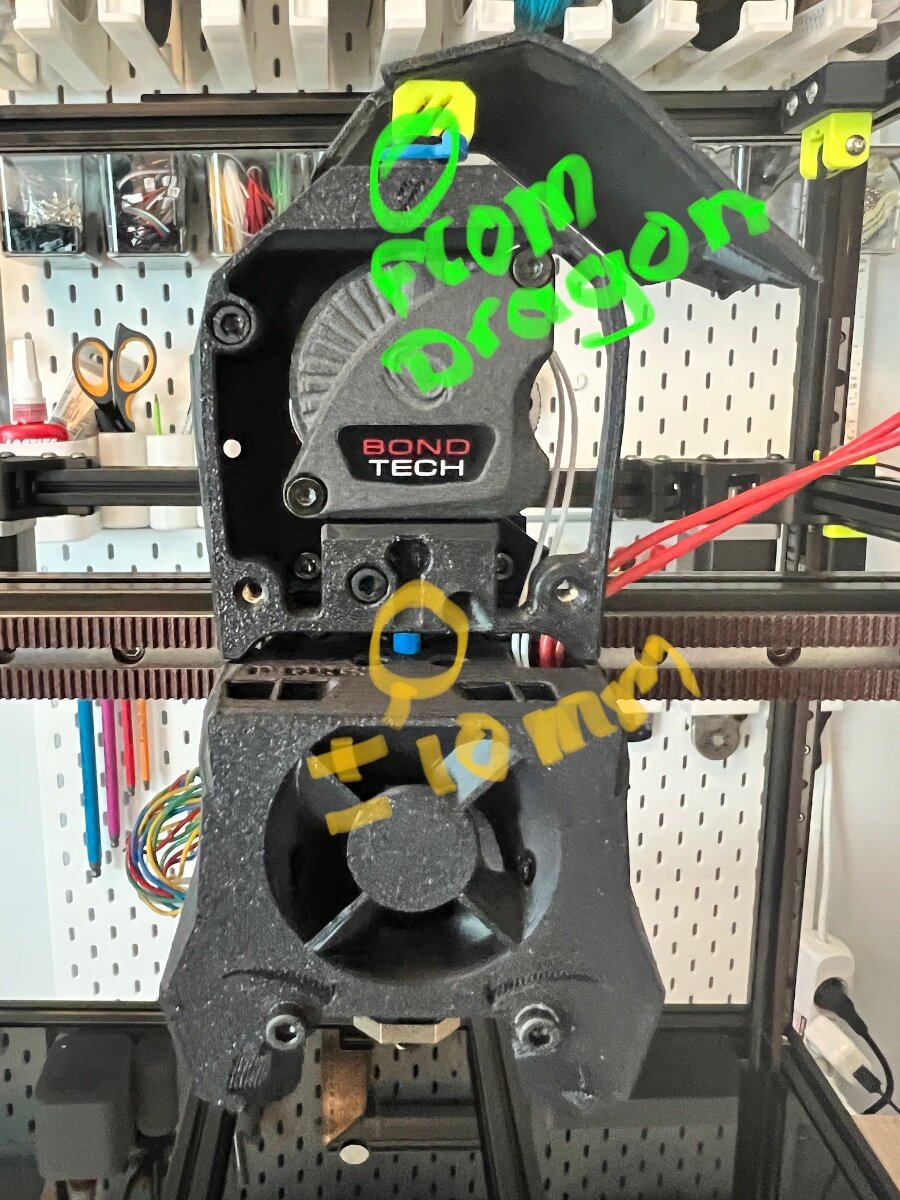
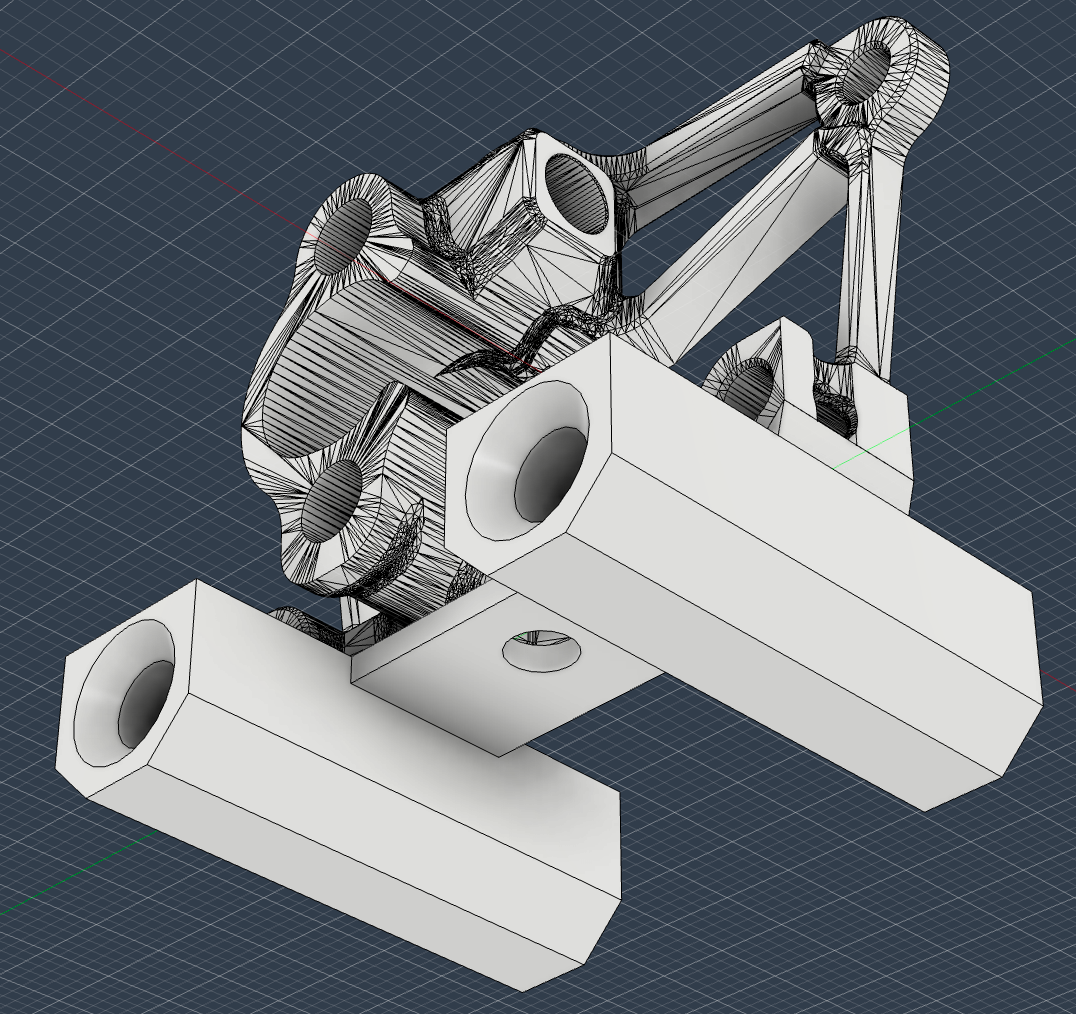
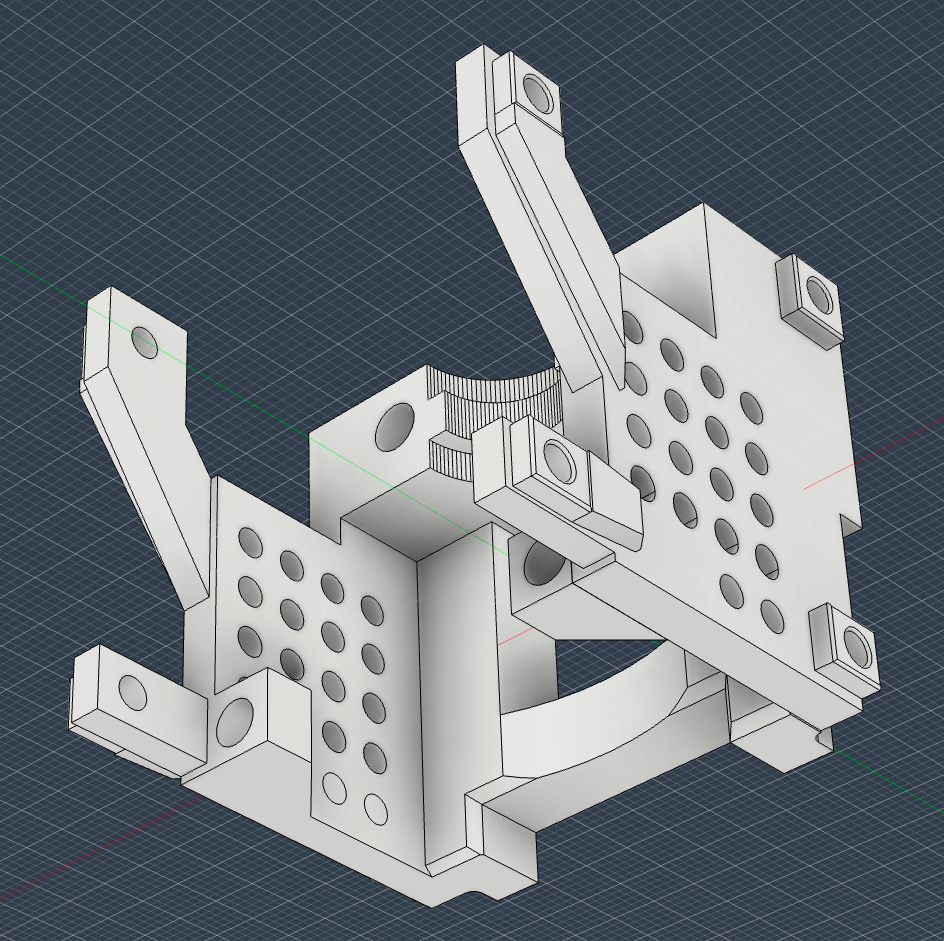
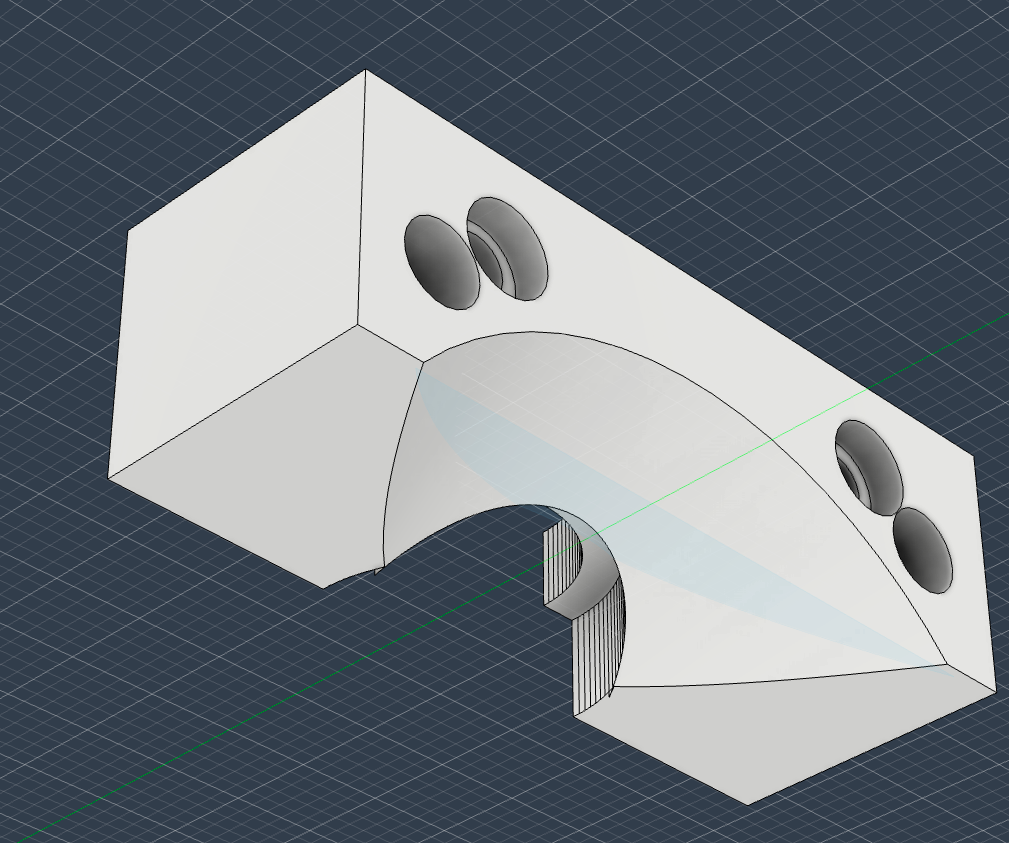
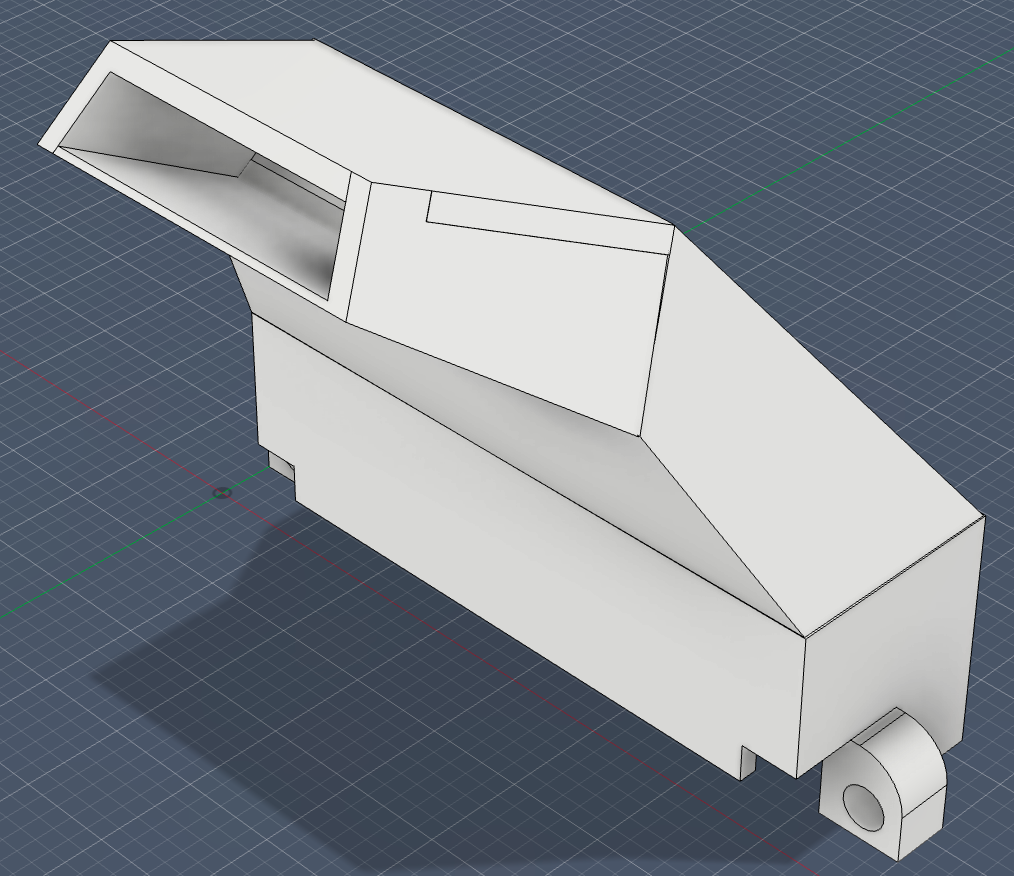
This is the start of my build log for a 400mm x 400mm x 480mm Voron 2.4-inspired 3d Printer. I have been looking at various designs around the interwebs and have decided that this build will incorporate the components from various mods and adaptations of the 2.4R2 that I have run across. There are a few key "Sources" for the design, so I thought I would highlight those to start. The toolchanging mechanism is the Funnsor clone of E3D's now defunct toolchanger design. It is available on AliExpress and during a sale some time ago, I picked up the toolchanger and 6 tool plates for what I felt was a fair price. I got the older version, before they added an optional Orbiter clone pre-installed. So, I have stripped the toolplates and modified the Mini-Sherpa to accomdate my needs. The motion system is based on this project for an AWD Voron-2.4 design: https://github.com/CloakedWayne/Monolith_Gantry_V2-VT. I will be making modifications to my liking on a few items. I will not be using the Y-Axis in this design, which is more like a V-Core/RatRig/VZbot, but instead am going to work on modifying the Voron design to use MGN12Hs on the Y-Axis and a MGN9H on the X-Axis. The toolchanger is made for a top-mounted linear motion gantry design, so adjustments to the XY joints and tool mounting will be needed. Because I want more Z-Axis height, I have chosen to use MGN12Hs here as well. I am borrowing the Z-Axis Joints from the HEVO to Voron 2.4 Conversion design on Printables.com: https://www.printables.com/model/529700-vevo-hypercube-evolution-frame-conversion-to-voron. I started to work on a solution in CAD myself, then found this and decided the time savings was worth borrowing the components while crediting the source. These designs are my starting point. There will be some components I have to create, and others I will have to modify to suit my needs. I will be collecting everything once done and putting it in a public repo in my Github account with proper credit to the sources for what I do not model myself. The end goal is to have a fixed position bed with 400x400mm of usable surface and the ability to print up to 450mm in height. I have roughed a few sketches and am hoping to mount an extrusion on the front of the gantry to hold the tools that are not in use. If all goes well it will have 6 tools available, but I will be happy with 5 if that is what I can fit. I am probably not going to enclose this printer since I intend to primarily use it with PLA variants, so a heated chamber is of no great concern currently, though this could change as I continue down this path. I am also considering options for spool management/mounting and integrated, independent filament dryers. All structural components will be 3d printed except the toolchanger, plates, and mounts for extra tools. Here are some screenclips from Fusion of the tool mounting components I have modeled and tested so far: More to come soon! I am currently getting everything together to start the build. Hopefully I will be able to get all the extrusions cut and tapped this weekend. Everything is here except some Sunon 4010 cooling fans for the hotends. Electronics to be used: Triangle Labs Ceramic V6 CHT-Volcano Hotends BTT EBB36s - 1 per tool BTT U2C - 1 per 2 toolmounts/EBB36s BTT Octopus Max - I need 9 stepper controllers on the main controller (4 for Z, 4 for X and Y, and 1 for the toolchanger's motor) Mellow IR sensor for bed probing, mounted to the toolchanger, not the individual tool plates Meanwell 500 Watt 24v and 25W 5v power supplies OrangePi 5 with 5" touchscreen More to come as I progress, but it might be slow due to work travel. I already know I have to go to Boston this coming week, New York City two weeks later, and vacation starting April 19th... So, you get the idea... Thanks for following along! This will be a fun one!

- 18 replies
-
- 4
-

-

-
- toolchanger
- voron2.4
- (and 1 more)
-
 I replaced both side panels with foil-faced, 16mm thick styrofoam sheets from Home Depot. I have a thermistor attached to the cable chain in the back and in the front of the bed. I also have 2x 50x30mm bed fans blowing down the middle of the bed. The styrofoam panels are attached the with modified 16mm snap latches.
-
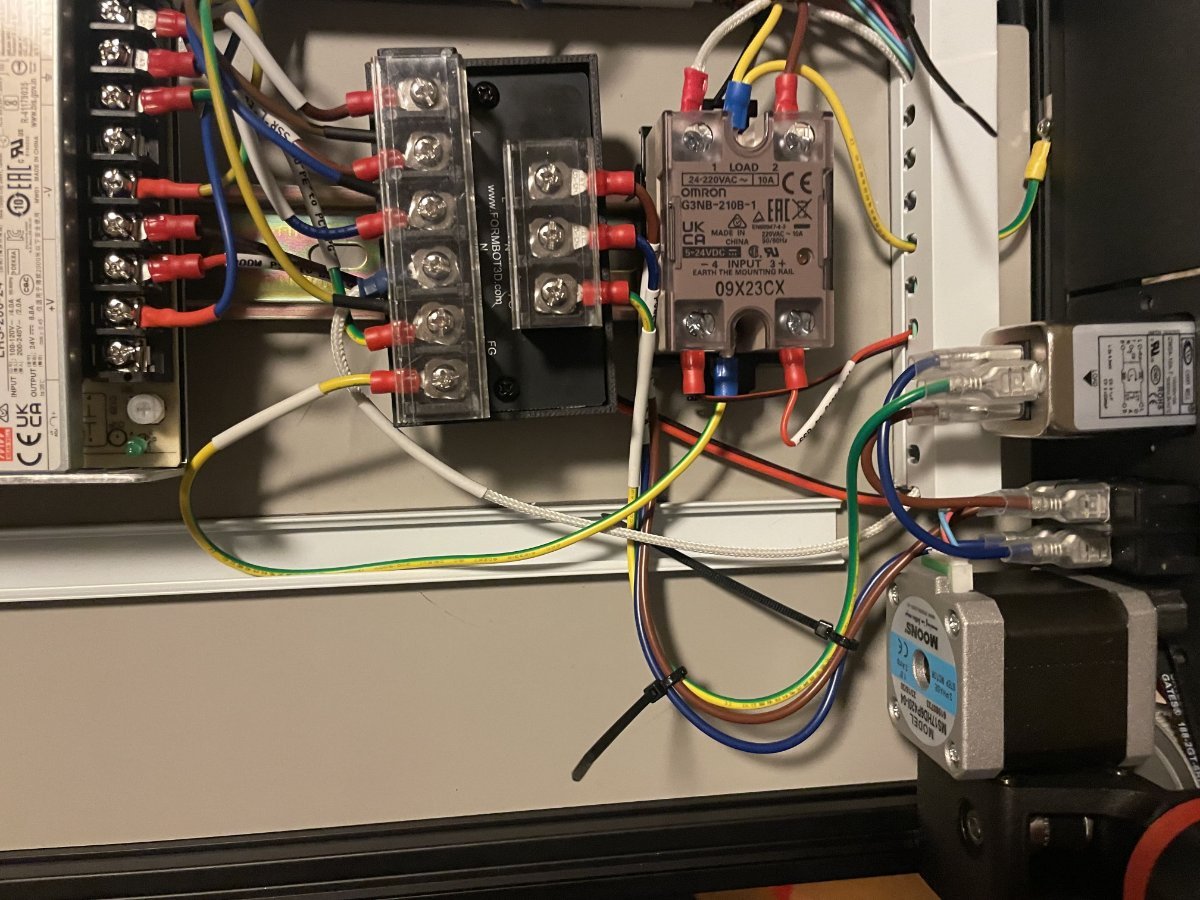
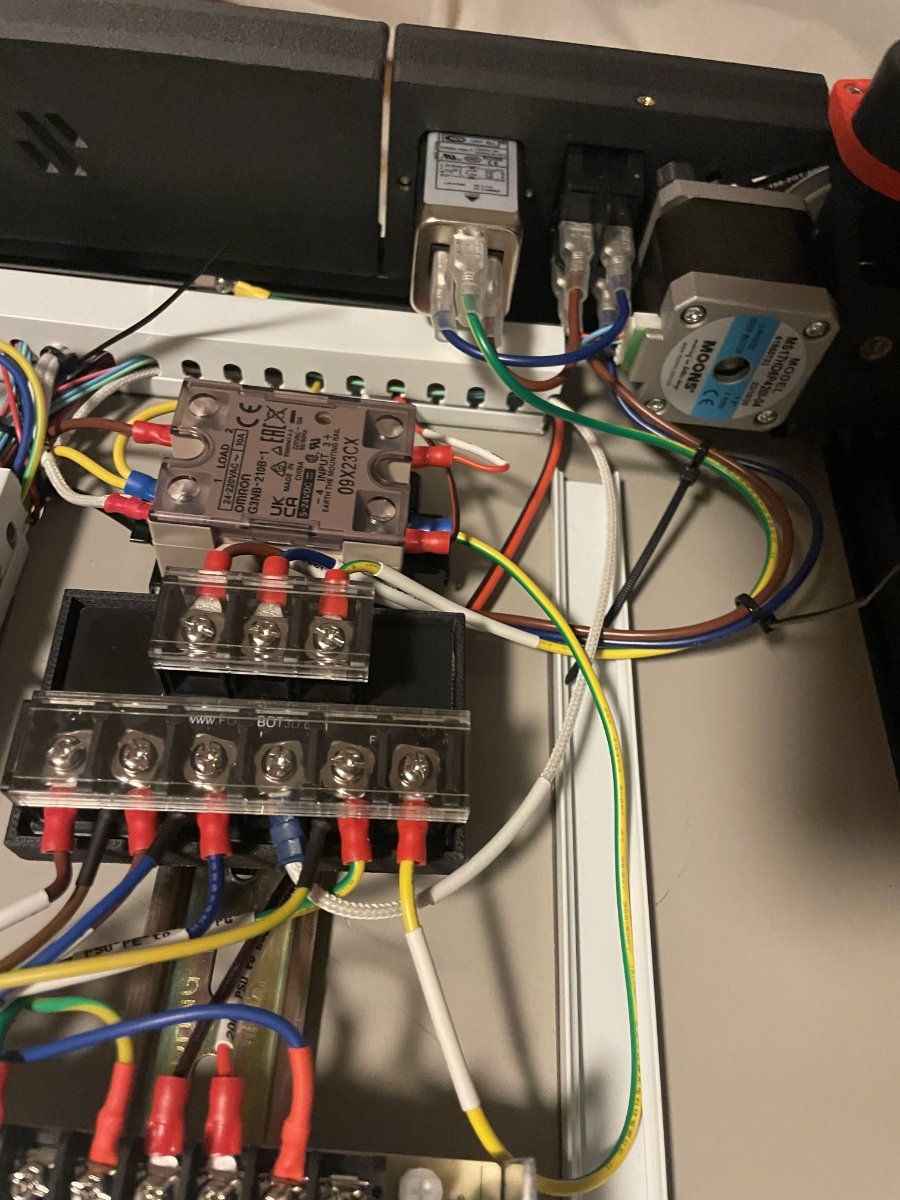
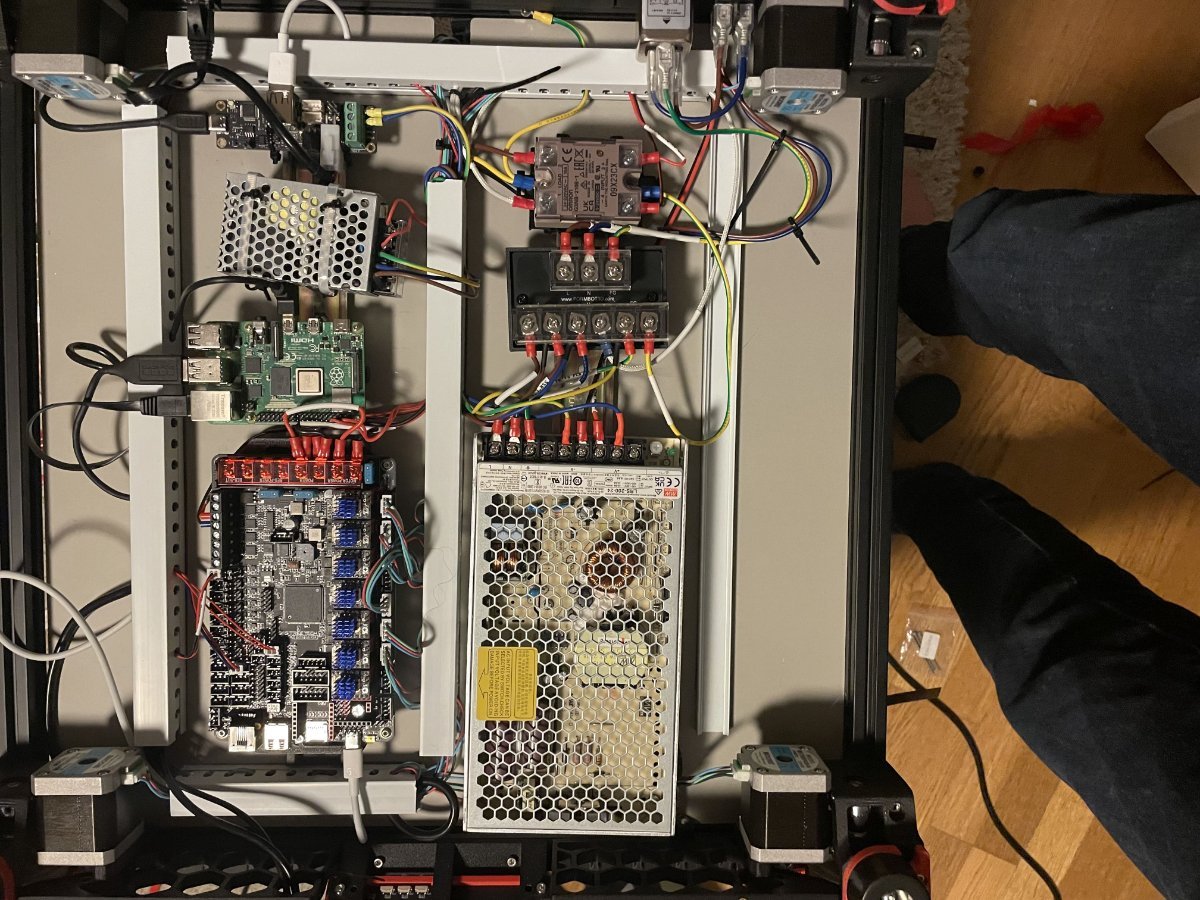
 I almost finished building my Voron 2.4 formbot kit. Just the sidepanels and exhaust fans are missing, I am using sb2240 on stealthburner wired to u2c. My question is, in the pictures below, is the wiring correct and also any tips of what I should unplug on first startup?
-
I've just started a Voron 2.4 r2 journey that is already not without issues I've been printing for a few years now. Starting with a self assembled AnyCubic Kossel and then I got a lucky deal on an UpBox+ and now it is time to replace both so naturally a Voron is the next phase. I also like to work with Arduino and ESP32s. Looking forward to the build. However part way through printing my parts, the upbox had a significant part break so if anyone knows a local who does partial parts kits I would like to get the remaining parts asap. Cheers!
-
Version 1.0.0
15 downloads
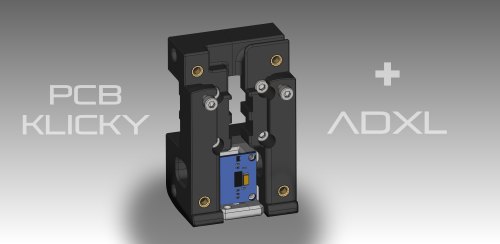
Probe Mount with ADXL for PCB Klicky Use the free space above the PCB Klicky Probe for an ADXL! This mount is a new variant of: https://github.com/tanaes/whopping_Voron_mods/tree/main/pcb_klicky ADXL345: https://amzn.eu/d/dJvU8Zh ADXL345 is attached with 2 M2.5 screws. I didn't solder the JST-XH 3 pin header to the PCB Klicky board, but soldered the cables directly to the board. There is not enough space for the header. happy printing! -
This is my first Voron build, got the email from Formbot saying the kit be being shipped (Whohooo!) I setup a ghetto enclosure with two cardboard boxes for my Artillery X1 to print parts. Also first time printing ABS so this will be interesting any help, suggestion, critic are welcome. Figured I'd start with electronic bay parts to tweak slicer setting (Cura 5.1.0) since parts will be hidden. Base colour Spartan Obsidian Black Sparkle ABS+, accent Spartan Cloud Grey Sparkle ABS+. Build will be in two week increment, I work and two weeks on two weeks off shift in Western Canada, almost at the end of my career I retire January 28th 2023 . I'm still browsing thru build, has anyone done the LDO electronic bay layout with the Formbot kit where the din rail run from front to back instead of side to side? I need to setup one of my Artillery X1 with Klipper so I can get familiar with the platform, presently using Octoprint so may go the Octoprint/Klipper route first then migrate to Mainsail. Print in the photo are 3D3 Sigma Prototype ABS.Printing at 235C/110C glass bed with PEI sheet is why I set it 10C higher. Use hairspray too help with adhesion clean with Isopropyl before re-applying hairspray seem to working for me. Titanium heat break with a Micro Swiss copper plated #4 nozzle.
-
Version 1.0.0
217 downloads
This is a remix of Hartk1213's Voron2.4 GE5C Z Joint. https://github.com/VoronDesign/VoronUsers/tree/master/printer_mods/hartk1213/Voron2.4_GE5C Update 5/27/2023: Thanks to the comments and concerns regarding this from reddit, especially the strength of the split joint, I redesigned this so it should be stronger (certainly feels stronger). To strengthen the split part, I moved the split up towards the top (instead of along the center of the bearing. I suggest using some superglue and it should be very strong (I had to cut the bearing out of one). Update 6/16/2023: After thinking about this a bit, I am not sure if this is an ideal solution since the joints need some x-y play in order to operate (think of it like a door swinging through it's arc, if you held the door at the door handle you would be pulled as it opened). Update 8/11/2023: My first idea to make a remix was not very good, so I'm looking to see if I can make a Z joint that won't use the GE5C bearings at all. That idea may or may not ever see the light of day, so if you like the idea of the GE5C mod, then this model is an option. The original design from Hartk1213 is great, and this is just a different take on it. The primary difference is that the bearing is moved up (higher than the MGN9 carriage), and back just a fraction of a mm (which would otherwise interfere with the carriage). The reason for moving it up and back was to keep it in alignment with the lower belt clip from Voron CAD file. With this design, I was also hoping to hold the bearing in place in all directions, and it seems to be very well held in the parts I printed (there is no play). But to allow for a printable part, I had to split the joint. The split is designed with a lot of surface area where glue can be applied, to better hold it together. This design is an almost ground up remix, so some dimensions are changed from the original model. I used the STEP file from the Voron Github to assist with setting up the alignment of the parts. There are two versions provided: The basic version has no locking tabs and can be assembled using glue. This version is named “Voron_GE5C Z joint_REMIX-4H.stl”. The other version is designed with locking clips (this is the version I used). It is named “Voron_GE5C Z joint_REMIX-4H-CLIPS.stl”, and is also designed to be glued. I feel this version will be a bit stronger, since it has a mechanical connection as well. The clip version will need a bit of persuasion to snap together (I just gave it a good couple of hits on the desktop, but closing it in a vice may also work). If you don't have luck snapping it together, try the basic version. BOM (for each z-joint) (1) M5x25mm BHCS (though other lengths will work with different spacers) (4) M3x16 SHCS to mount the joint to the Z-carriages (1) GE5C bearing (see note below about the cheap ones) (2-3) M5 1mm spacers (or washers if they are similar in size) Optionally you can use some M5 aluminum spacers instead of the washers, and different length M5 screws. In the parts pictured, I used M5x25mm screws, and some M5x8x5mm spacers (though I plan to swap them for M5x8x3mm spacers). Note that the number of spacers and length of screws will depend on the stack height of your lower belt clips + the thickness of the AB joints and the tensioners. So YMMV, and I recommend measuring your parts before deciding on a proper length of M5 screw, and how many spacers or washers will work in your particular application. I recommend printing these in ABS with 100% infill and supports touching the build plate. You may be able to get away with no supports if you have your settings tuned and your printer can print bridges without issues. Additionally, (in Cura) I used Slicing Tolerance “Exclusive” and set the Wall Ordering to “Outside to Inside", which helps to produce parts which are closer to the designed size. It is a good idea to run a flow calibration and horizontal expansion calibration prior to printing these, which will also help if you find the parts do not fit the bearing well. The parts should be oriented as shown. After printing, poke out the single layer of bridge material in the mounting holes to clear them for the M3 screws. The parts are not oriented for printing. As pictured, I am using M5x25 BHCS, as well as a 5mm M5 spacer (which I plan to swap for a 3mm M5 spacer). I also ordered some IGUS GE5C bearings since I found that more than half the bearings in the pack of no-spec GE5C bearings I got from Ali, have very noticeable play. I found 4 that were OK enough to install, but they will be replaced with the IGUS bearings at some point (the IGUS bearings have zero noticeable play). You can also find ABEC-7 rated GE5C bearings a bit cheaper on West3d.com (but for the price difference I'd just get the IGUS bearings). I'm still in the process of building my Voron 2.4 R2, which is slow going since I keep finding things to make or remix for it (that is not a complaint :D). So I have not fully tested this, but I did re-align the gantry after installing these and found no issues with interference. If you like this, please post a make over on Printables, which will get me a bit closer to my first spool of Prusament. Please also provide feedback which may help to improve the design if I have time to revisit it in the future. There is currently no hall effect (magnet) version of this model. The STEP file is included for easy remixing. You can see what other projects I have going on by checking out my blog here. I'm also documenting my Voron 2.4 R2 build here (but it's been a slow going process). -
Version 2.0.0
26 downloads
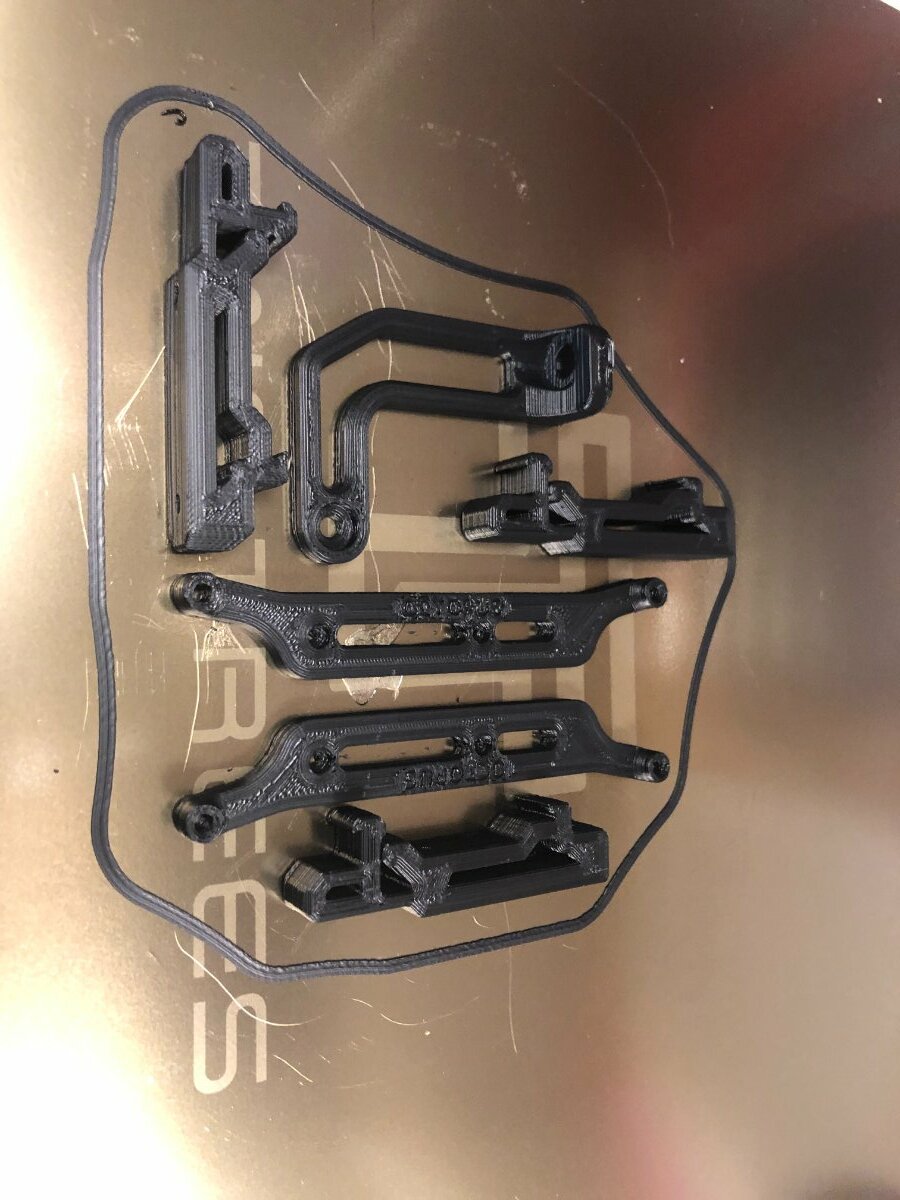
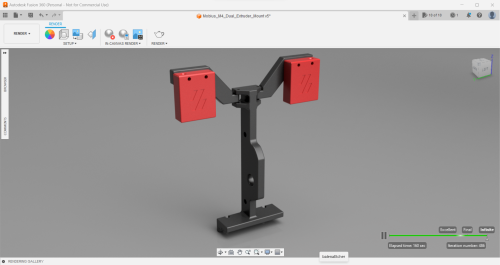
Hey guys, So! I'm going dual (and triple) extrusion on my printers and didn't want to fuss with the ERCF for my smaller ones, so I bring to you the Mobius M4 dual extruder mount for the Voron 2.4 / Voron Trident. Tested as working - All fits together, all fits on to the voron, extruders attach easily. This is (kind of) a remix of the following: Elegoo Neptune 2-2S-2D Dual M4 Extruder Mount by mlee12382 | Download free STL model | Printables.com I got the original idea from the linked file above, I imported it into fusion 360 and sketched around it (getting rid of the unnecessary holes where they've obviously used tinkercad and the M4 baseplate. Instead of the silly (weak looking) cylinders that have been merged to some other blocks, I sketched out a stronger join and inserted the holes through that - also got rid of the stupid hole sizes that were used and made these 3.2mm in diameter for the M3 screws and 5.2 for the M5 screws - this means your screws should slide in nicely even if your settings are off. With the Filament Runout Sensor mounts, so far I have just copied the original, but again made the joints stronger and the holes a decent size - I'm not sure if this will work with the sensors I want to use so will report back later - the way these are designed means you can print them flat instead of upright, saving time! On top of this, I have added fillets to any stress points I considered to be weak - this should improve longevity of the mount. To mount it on to the printer I have just used the Voron spool holder mounting technique - it is designed to sit into the 2020 extrusion and grip over the top panel. -
Version 1.0.2
228 downloads
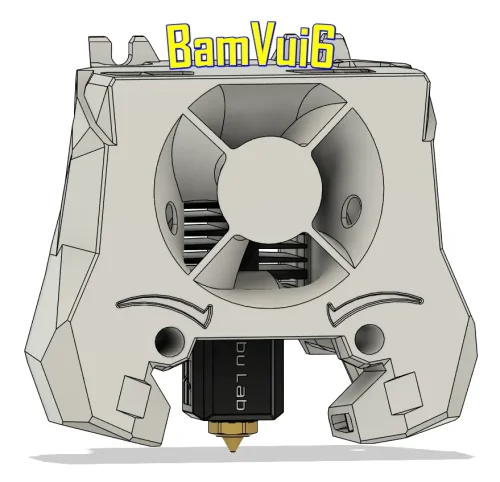
This mod allows you to mount the Bambulab clone hotend with a V6 nozzle onto the Stealth Burner. -
Version 1.0.0
6 downloads
I know some might feel this is a dumb design but as a tester, I prefer it goes. Just in case things went south Print as standard instruction. Use M3 8mm to mount (You might want to use heat inserts) PETG/ABS is good enough -

Version 1.0.0
60 downloads
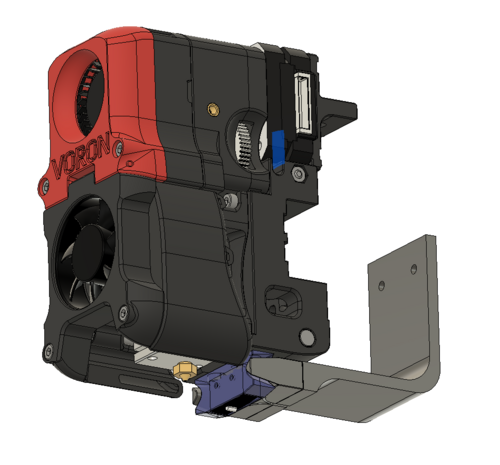
One of my goal was to print Polycarbonate (PC) as smoothly as possible. Unfortunately, PC is notorious for heavy warping. A possible countermeasure is to raise the chamber temp - in my case to around 60°C. (Be sure, that every component within your chamber can take the heat.) Around that temperature I found that the magnetic probe and the regular Micro-Switch probe aren't reliable anymore. So, I switched to a SSG-5P Micro-Switch, which is heat-resistant up to 120°C. The magnetic probe is a bit wider than the regular probe. Therefore, you have to reprint the X-Carriage. As of now, I redesigned the X-Carriage for CW1 - not CW2. Original probe made by Annex: https://github.com/Annex-Engineering/Quickdraw_Probe -
Version 1.0.0
25 downloads
One of my goal was to print Polycarbonate (PC) as smoothly as possible. Unfortunately, PC is notorious for heavy warping. A possible countermeasure is to raise the chamber temp - in my case to around 60°C. (Be sure, that every component within your chamber can take the heat.) Around that temperature I found that the magnetic probe and the regular Micro-Switch probe aren't reliable anymore. So, I switched to a SSG-5P Micro-Switch, which is heat-resistant up to 120°C. BOM: SSG-5P GT2 20T 6mm JST 3Pin -
Version 1.0.0
932 downloads
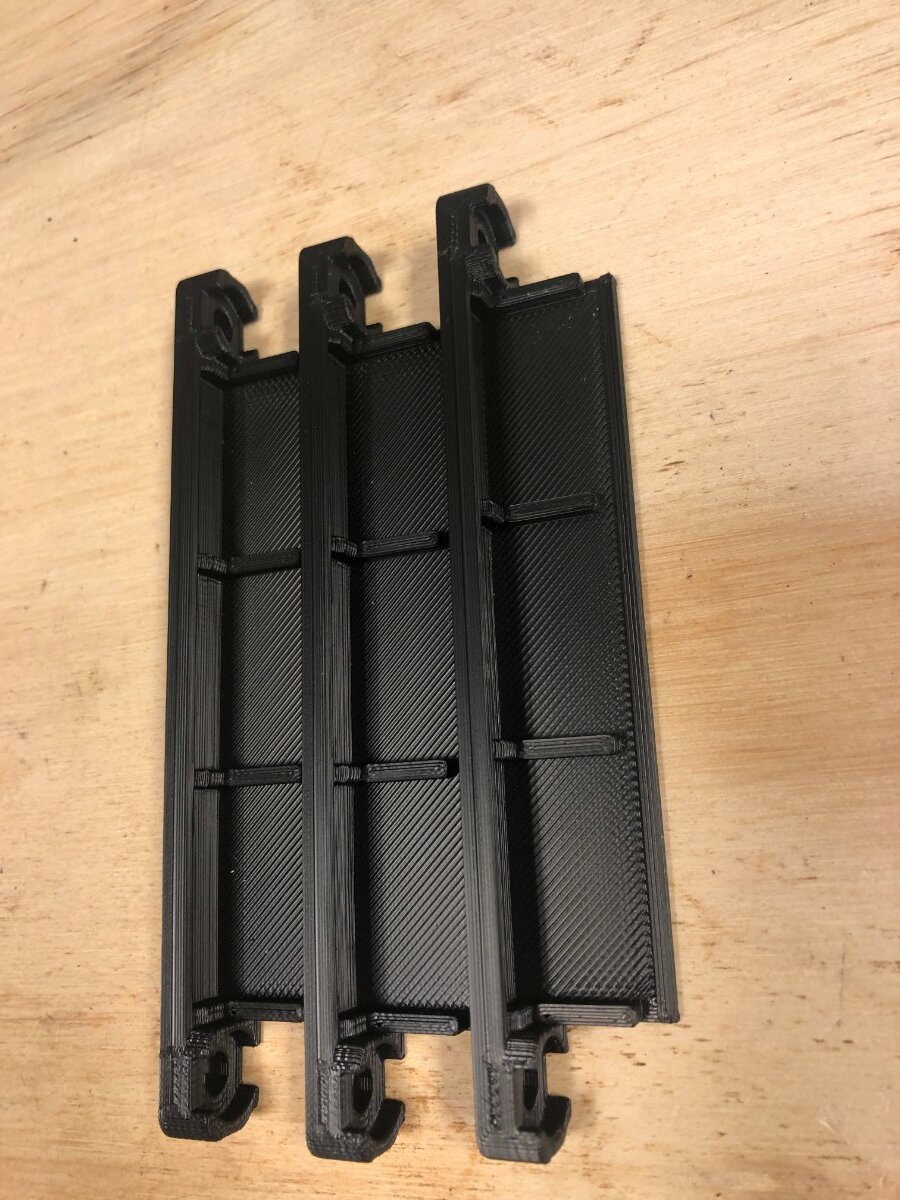
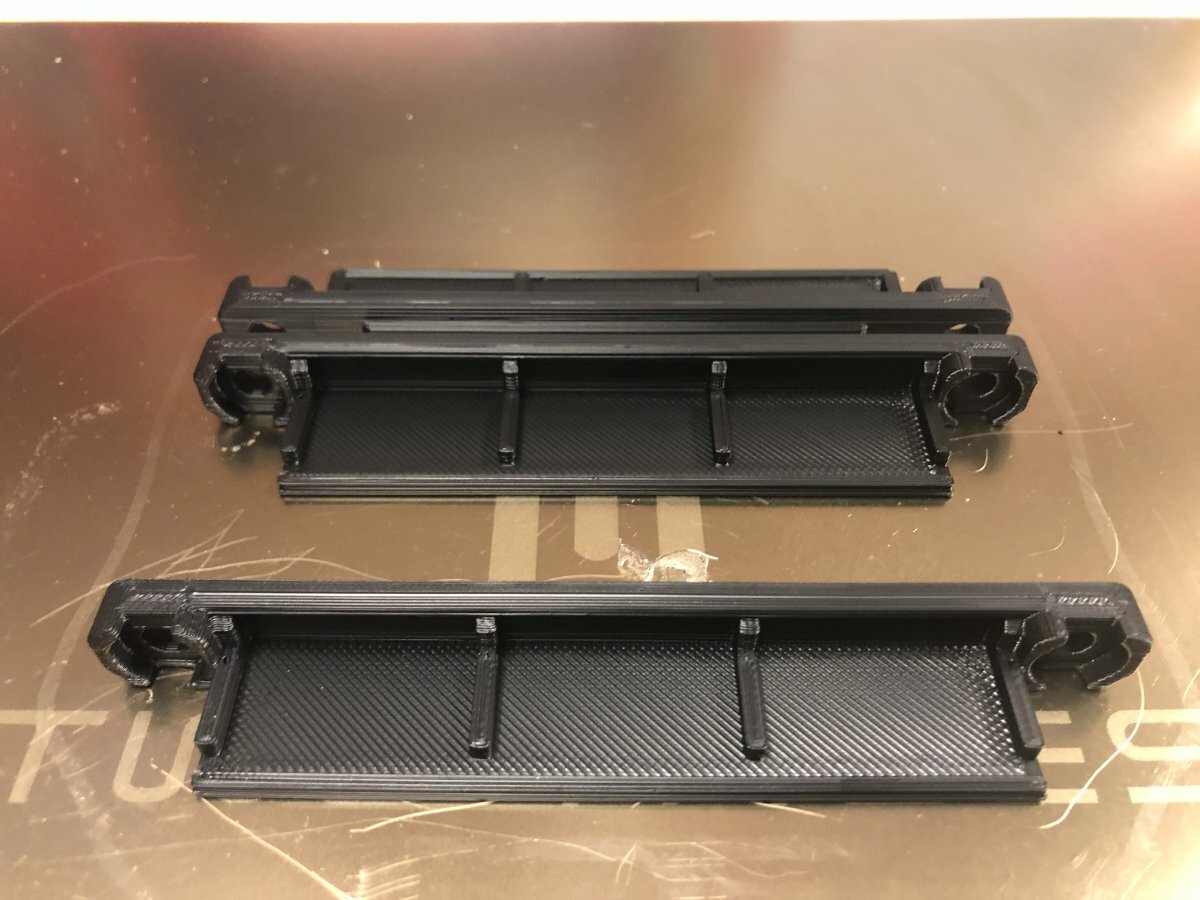
This belt clip is designed for the 9mm Z belt. -
Building my third voron 2.4 and won’t go into details but am trying out some mods, that I will write up my experiences about. lets start with the best part: Stealthburner with LGX Lite extruder I will send the link to the mod for this later, it’s not perfect but you can make it work without too much hassle. will describe the things that are not mentioned on GitHub so it may help someone. let me start by saying, if it prints as good as it feels, my future builds will all have this extruder.
- 19 replies
-
- 2
-
-
-
- voron2.4
- stealthburner
- (and 1 more)
-
Version 1.0.0
100 downloads
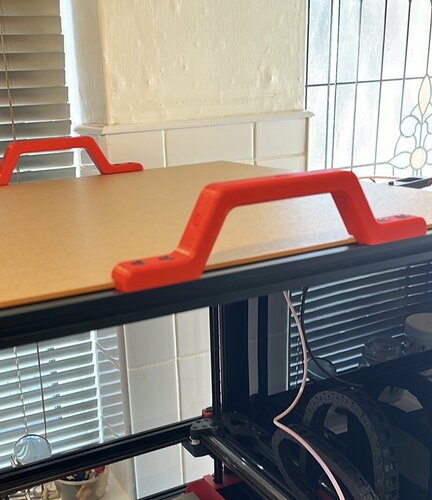
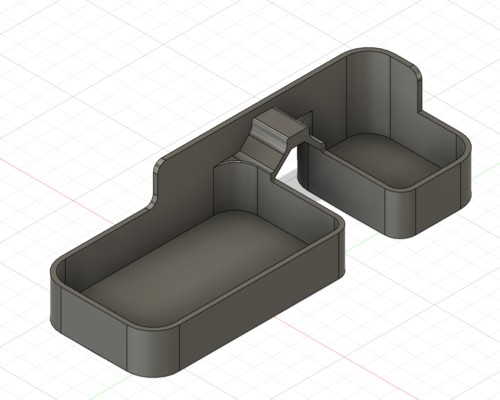
I needed Sturdy Handles for my heavy voron2.4 350 so i could move it and turn it on its side/back to facilitate maintenance but as the enclosure limits where you can hold it and also due to the enclosure creating a step over the aluminium extrusion (3mm plexi and 1mm foam tape) normal handles wouldn't work so i designed this handle to fit the top framing, i can now carry the whole thing to another room if needed.... parts used: 2x M5x15mm BHSC 2x M5 Tnuts Printed with standard voron specs -

Version 1.0.0
251 downloads
This is my solution to the klicky probe far left mount and purge bucket mod. where the probe arm would hit the purge bucket when moved on the Z axis. if there is any issue please comment and let me know Credits: @edwardyeeks: Decontaminator Purge Bucket & Nozzle Scrubber Printing: Default Voron settings, correct orientation, no supports needed!


.thumb.jpg.455d15673ede3fd647f42b97864bbce2.jpg)