Jump to content

Search the Community

Showing results for tags 'adxl345'.

  • Search By Tags

    Type tags separated by commas.
  • Search By Author

Content Type


Forums

  • TeamFDM
    • Site Updates and Announcements
    • Frequently Asked Questions
    • General Discussion
    • Voron User Mods
    • Filaments
    • Build Diaries
    • Introductions
    • Tutorials
  • Voron Build Support
    • Voron 0
    • Voron Trident
    • Voron 2
    • Voron Legacy
    • Voron Extruders
    • Voron Electronics
    • Slicers and Print Troubleshooting
  • Other FDM Printers
    • Ender 3 / Ender 3 Pro
    • Anet A8 / AM8
    • Prusa
    • Generic / Other
  • Marketplace
    • The Bazaar
  • Vendors
    • KB-3D
    • Voron Printed Parts Co.
    • Fabreeko
  • Off-Topic
    • Random
    • TeamFDM Member's Creative Collection

Categories

  • Non Printable Files
  • Printable Voron User Mods
  • Manuals and PDF Guides
  • Creative Collection
  • Tools and Calibration
  • Official Voron Releases

Categories

  • User Mod Installs
  • Build Techniques
  • Programming
  • Team FDM Site Tutorials
  • CAD / Fusion 360 Tutorials

Blogs

  • Voron General
  • Why we are the best digital marketing services in Chennai

Find results in...

Find results that contain...


Date Created

  • Start

    End


Last Updated

  • Start

    End


Filter by number of...

Joined

  • Start

    End


Group


About Me


Voron Serial #1


Voron Serial #2


Voron Serial #3


Voron Serial #4


Voron Serial #5


Voron Serial #6


Voron Serial #7

Found 3 results

  1. Version 1.0.0

    15 downloads

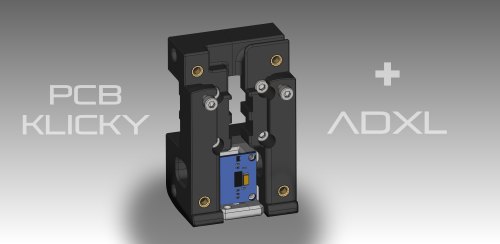
    Probe Mount with ADXL for PCB Klicky Use the free space above the PCB Klicky Probe for an ADXL! This mount is a new variant of: https://github.com/tanaes/whopping_Voron_mods/tree/main/pcb_klicky ADXL345: https://amzn.eu/d/dJvU8Zh ADXL345 is attached with 2 M2.5 screws. I didn't solder the JST-XH 3 pin header to the PCB Klicky board, but soldered the cables directly to the board. There is not enough space for the header. happy printing!
  2. Version 1.0.0

    65 downloads

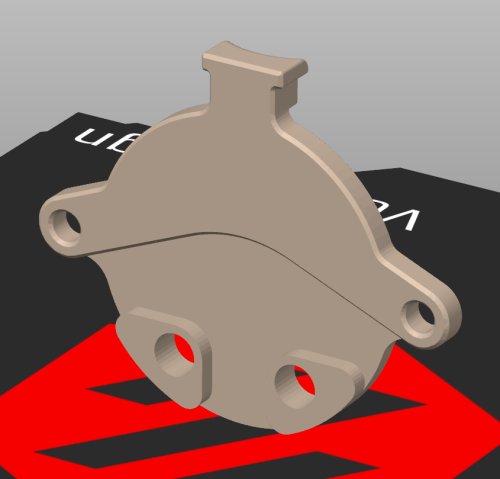
    This is a modified version of the strain relief for the mini AB, which provides a well-hidden permanent mount for a cheap Chinese ADXL345 module. You need 2x 4mm heat inserts as well as 2x M3 6mm screws to attach it.
  3. Version 1.0.0

    206 downloads

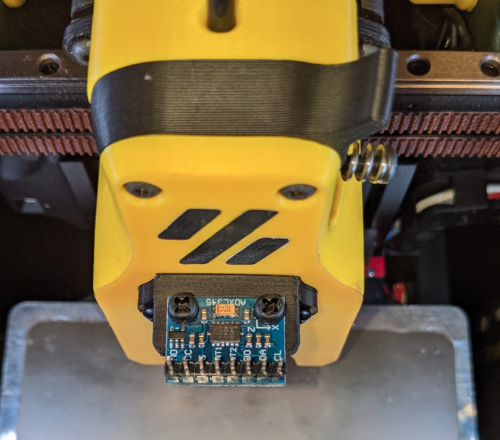
    A mount to attach an ADXL345 sensor to the Mini-Afterburner toolhead. BOM 2x M3x40 BHCS 2x M3 screws (at least 4mm, preferably nylon) 2x M3 heat-set insert. (3x5x4) Instructions Install the M3 heat-set inserts into the 2 larger holes on the part. Remove the lowest 2 M3x35 screws from the front of the MiniAfterburner Attach the mount using 2 M3x40 screws in the same holes. attach the ADXL345 to the top of the mount, using m3 screws, ensure axes are oriented correctly.
×
×
  • Create New...