Search the Community
Showing results for tags 'mods'.
Found 8 results
-
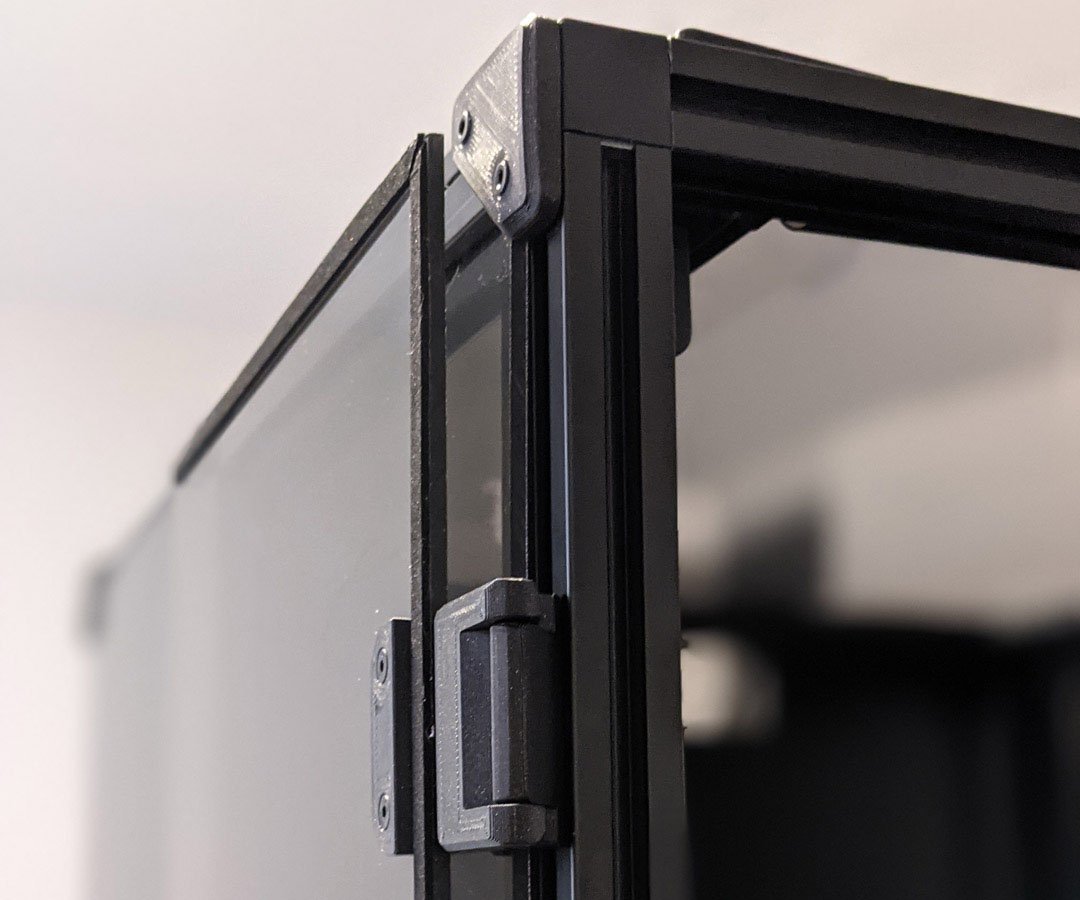
Have you got your new Voron 2.4 up and running and ready to continue tweaking and making this great printer even better? Below is a list of my "Must Have" Voron 2.4 upgrades. The "HartK" PCB Toolhead This "PCB" toolhead helps cleanup the installation of your Afterburner assembly and makes swapping hot-ends a breeze. This board was designed to make wiring the toolhead a bit easier, to help get rid of some of the crimps needs on these wires. While you can find the "Gerber" files and have your own PCB printed, this is such a popular mod that many Discord users and companies are selling fully built versions, or the parts to build them. https://github.com/hartk1213/Voron-Hardware/tree/hartk1213/Voron-Hardware/Afterburner_Toolhead_PCB Don't Forget an update Toolhead cover to support the extra size. https://github.com/craxoor/VoronMods/tree/master/PCB Cover Here is a list of known links to order the populated HARTK PCB tool-heads. https://www.fabreeko.com/products/voron-afterburner-toolhead-pcb-by-hartk - US - $22.00 https://www.onetwo3d.co.uk/product/voron-afterburner-tool-head-pcb/ - UK - £12.95 https://kb-3d.com/store/electronics/285-hartk-afterburner-toolhead-pcb-v32-complete.html - US - $16.99 You will also need to make sure you have the 14 Pin Microfit 3.0 for the main connector back to the MCU found here... "Male Molex MicroFit 3 Connector" Voron Nozzle Scrubber The Decontaminator Purge Bucket & Nozzle Scrubber, allows a V2.4 to purge/clean the nozzle automatically, increasing the quality of the first layer and allowing for fully unattended starts to your prints. The documentation on the Github page is very thorough and does a great job explaining the process to install and use the Voron Purge Bucket and Nozzle Scrubber https://github.com/VoronDesign/VoronUsers/tree/master/abandoned_mods/printer_mods/edwardyeeks/Decontaminator_Purge_Bucket_%26_Nozzle_Scrubber Needed Parts 1x brass brush or whatever you prefer (Generic Brass Brush on Amazon or TriangleLabs brass/copper brush and cut it down to length). For V2.1, 2.2 & 2.4: 2x M3x8mm SHCS (3x if you use the sheet stop option) 2~3x M2x10 (or longer)mm self tapping BHCS/SHCS (optional if you wish to use the sheet stop function). You should have these from the V1 and V2 BOM which are spec'ed for the microswitches. 2x 6x3mm round magnets Extra Swing 270 Degree Door Hinge The default Door hinges work just fine, but sometime when working on your printer the doors can just get in the way. The 270° Hinge - Parametric door hinges by ChrisGonzales was developed out of an effort of running into tolerance issues with the spec hinges not allowing much room if the two panel doors are used and are slightly cut larger by only 1 mm or so. He ran into issues closing and the doors hitting and needed something that allowed more horizontal movement. This is another well documented VoronUsers mod and everything for installation can be found in the GitHub Repo ReadMe. https://github.com/VoronDesign/VoronUsers/tree/master/printer_mods/chrisrgonzales/270_degree_hinge If you have another Must have mod, please let me know my responding to this topic and I will update the first post to reflect any other MUST haves!

-
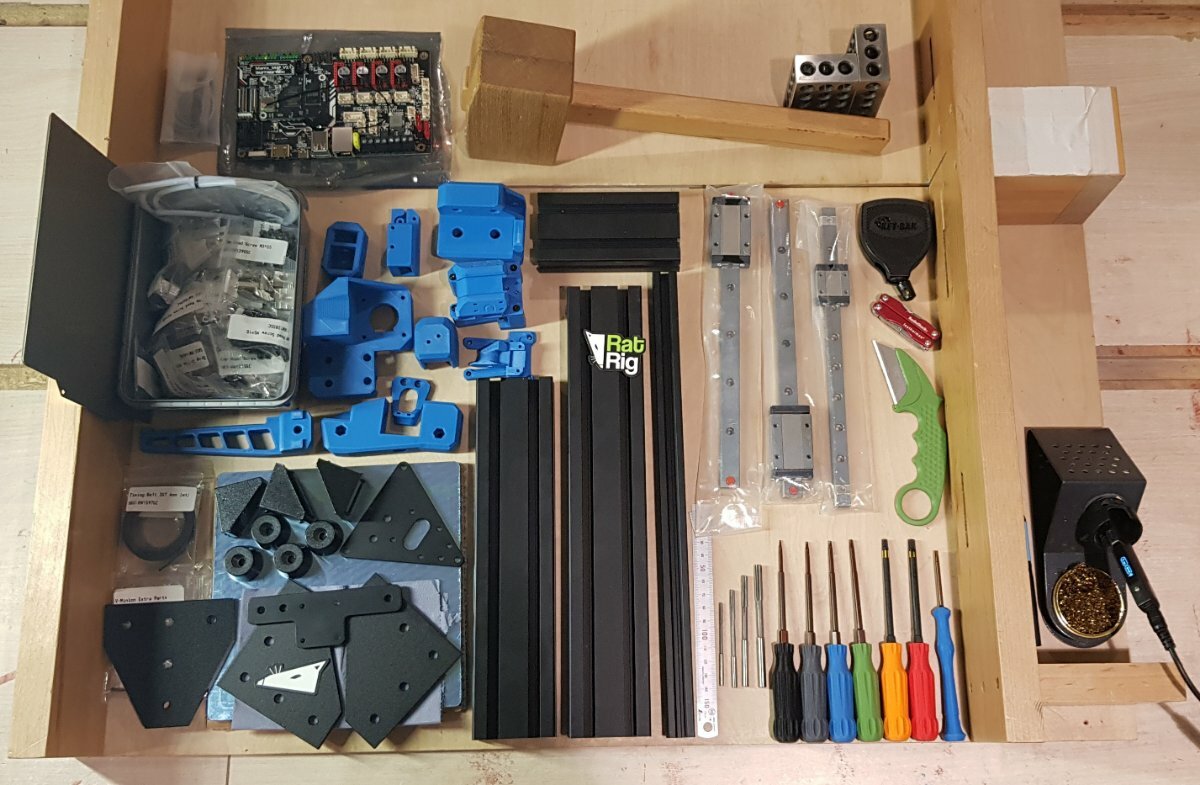
Q: How many printers do I need? A: YES I am starting my V-Minion with the Mechanical Kit and sourcing the rest from my stash and online as needed. This might be a slow build since I am designing as I go. Everything came well packed with some great surface finishes on the aluminum pieces. Compared to a V0.1, it is crazy how small the parts count is for this build. If I get around to designing an enclosure things might balance out a little.
-
 Planning Phase: Hello me again. Still have the one kit that has been lying in storage for quite some time and decided to get it out and buiild the printer. Due to time constraints this may be a much slower build than the others. Will follow the same structure as the Trident build with mods incorporated into the build as I go along. Having built a 2.4r2, I hope this build will be quite straightforward - but then there are the mods: Octopus Pro v1.1 with Canboot and canbus connection Mellow Fly SB2040 Canbus toolhead PCB install Stealthburner Cover with integrated fanmount Umbilical mod Voron TAP (I just love this thing!) Orbiter 2 with filament runout sensor in Stealthburner Toolhead e3d Revo Voron Hotend VFach Filter (Thanks @Buurman) Silicone Nozzle brush with purge bucket Voron Pin Mod for A/B motors Pin mod for Z-Idlers Nero3D idler bearing stack Ramalama2 Front idlers (pinned) PTFE Bowden Tube guide for Umbilicus Dual Nevermore filters Ellis Bed fan mod Single door with Voron 2.4 hinge mod Logitech C922 Camera mount BTT PiTFT50 with Klipperscreen mount Revo Nozzle Holder skirt mod Panzer ball feet Chamber LEDs mount Extrusion Profile covers Z-Belt Cover mod Deck Panel Supports Engaged Rabbit feeder - (This one I know is going to be a b.....) I think that is it, but with me ----- you never know As some of the mods (Silicone brush holder, Orbiter 2 Mellow Fly combination for e.g) will involve some Fusion 360 work, it may take a while. Though I followed @claudermilkadvise and watched all the lessons from Paul McWorther, I still struggle with the more intriquite designs in Fusion 360. Might call on @Penatr8tor for some advice when the time comes. Next - Color decisions.
 -
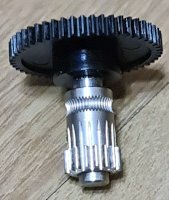
Well despite the tempting from certain members (you know who you are!) I decided to rebuild my partially buggered V0.1 rather than build my secret V2.4. I was never 100% happy with my first V0. Then the hot-end blocked (or so I thought) but on stripping down the mini-AB I discovered the gear is loose on the main drive shaft/gear: Sadly I cannot remove (or tighten) the grub screw holding the gear so I'm buggered. If I'd known that before destroying the upper section of the mini-AB I could have bodged it by supergluing the gear onto the shaft. I don't think I was so daft as to use superglue in the first place but I must've been overly generous with the locktite. None of the solvents I have on had seem to have any affect. Clearly a combination of masochism and stubbornness means the "only" option is to rebuild the machine, it would only niggle at me otherwise. All the wonderful experience I've gained from the first two V0 builds will make this time around a breeze.........(or possibly an icy-blast from the bowels of hell) Here's what the poor thing looks like at the moment since I've decapitated it: So in terms of mods.... Magnetic Panels. Klicky Probe. Orbiter 2 extruder. Belted Z. I will also replace the linear rails - when originally building this (and after throughly reading the manunal several times) I still managed to allow some of the carriages to slip off the rails (so I "think" I lost some balls). I will probably replace the acrylic panels with ACM ones. As I type this I realise it'll be a complete rebuild of the frame! The other thing I'm intrigued in is the Kirigami bed. I retrofitted the Kirigami bed to this machine and I do not remember the same level of hassle as I had with the "direct" fit on my second V0. Either this bed was better manufacturered or it's just not fitted properly (and I've not noticed?!) Last but not least I'm thinking about CANBUS, I definitely like fewer wires than more. The zillion wires makes the hotend messy. The reservations I have about the CANBUS is the implementation of the toolhead (especially the extruder motor driver) and how it will handle heat. Motor drivers (especially cheaply implemented ones) are extremely prone to overheating. Guess if it does not work out I can go for a toolhead PCB instead of having to splice wires. That's the rough plan. Beyond disassembly not a lot will happen until February as everything else is on a slow-boat from China.
-
 Hi! I'm a happy 2.4r2 user and was thinking about building a 0.1 (because, why not?) and I think it will use far less electricity than my 300mm 2.4 build. I think most of the things I'll print will fit within the 100mm limit, so that would be good as well. Plus, of course, it'll be fun! I'm debating on sourcing my own parts or buying a formbot kit. I'm comparing pricing and such. I have *some* parts left over from my 2.4 build but I'm not totally sure what I can reuse on the 0.1. Here's a breakdown of things I am pretty sure I'd like to do, and I'm open to ideas of other things that everyone would recommend. I like the idea of a better top-hat, like this thing I also think I'd like to use a metal under bed frame, like this Kirigami One thing I definitely want to try and figure out is how to use a BTT TFT43 touch screen with Klipperscreen with this, which would include trying to find a front angled mount for it. I took a quick look around and didn't find much in the way of making it work but I'm sure I can find something or model one in Blender. I'm also open to using a TFT50 but that might be too big for this printer. Maybe an externally mounted one in an enclosure? I have a TFT50 on my 2.4 and consider it very helpful when using the printer. The formbot kit includes Moon motors, which I've been happy with on my 2.4 build. Are there options for better part cooling? The two 3010s seem like they'd have troubles cooling during faster printing I'm probably going to get another DHF hotend (since that's what I'm using now and have parts) unless there's something better. Not looking for super high speed printing, I just like the flow rate of the DHF unit on my 2.4. Speaking of hot ends, is the stock printhead good enough or are there upgraded versions I should consider (esp. with the DHF hotend)? I used the ABBN modified AB head for my DHF on the 2.4 and it works well, even with PLA. I'm working on the SB/taptap upgrade for the 2.4 at the moment. Is that tiny SSR that comes standard OK for this setup? I would assume the bed heater is very low wattage so probably, but I've seen upgrades for the larger SSR like I use on the Voron 2.4, and I'd be happy with upgrading to that. I will make sure whatever I use is off by default, not on upon power up. I'm definitely going to use an umbilical with PCBs between the printhead and back of the printer, and the formbot kit includes that. Are there ACM panel upgrades I should do (rather than just acrylic) like I did for my 2.4? I don't want to deal with warping. I understand it's manual leveling, which I'm not a fan of, but if that's how it is and it's so small that it's easy I'll deal. But if there's a klicky/euclid or even TAPTAP option I'll explore that as I'm super happy with my Euclid setup on the 2.4 printer. And I'm sure some folks will ask what materials I am going to use it for -- so I'll say that I'm primarily going to use this printer for PLA, but also ABS and ASA. I don't print with PETG. And I'm going to get some sort of smooth buildplate for it as I'm not a fan of the textured PEI stuff that's commonly used. Thanks in advance for your time in reading over this and for any tips and advice you can recommend before I dive on in! Dennis
 -

Version 1.1.0
808 downloads
After a couple of chewed ab belts and finding that the r1 front idlers were the culprit i looked into r2 idlers but didn't like the screw going through the join/split and personally i think that is a bad design feature so i then looked at other idler mods but didn't like the look of those either because to me i didn't think they kept the look of the voron, i have nothing against those designs but wanted to keep the original look of the parts but with better functional integrity so i modified r1 idlers to 2 screws keeping the part join/seam in the middle facilitating the screws going through either side of solid media allowing for an even pull on the idler pulley and even slight alignment adjustments if needed, i have been running this mod now for over 80hrs printing and is working fantastically.... Print as per Voron Spec and only requires 2 extra heat sets and 2 extra m3 screws with washers...- 2 comments
-
- 14
-

-

-

Version 1.0.0
267 downloads
This is my solution to the klicky probe far left mount and purge bucket mod. where the probe arm would hit the purge bucket when moved on the Z axis. if there is any issue please comment and let me know Credits: @edwardyeeks: Decontaminator Purge Bucket & Nozzle Scrubber Printing: Default Voron settings, correct orientation, no supports needed! -
Version 1.0.0
17 downloads
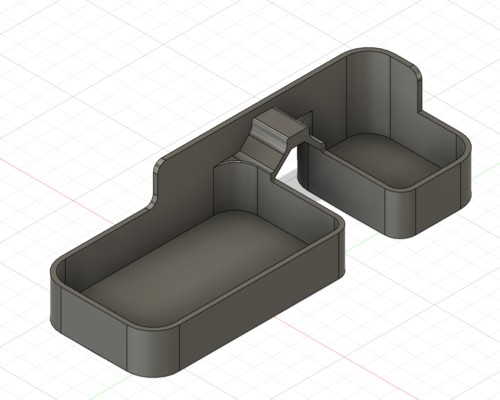
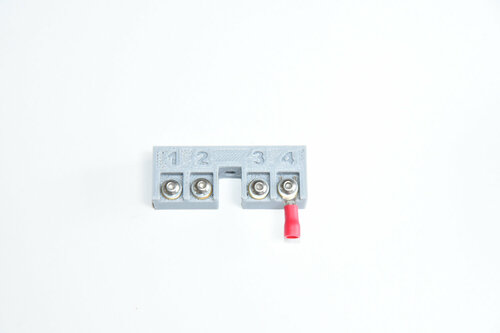
My designs I have done for high power rocketry bays led me to design connector blocks specialized for that environment. I have taken one of my older designs and remixed it to mount as a right angle four post block for signal and fan wiring. I do like the WAGOs but only for AC/Mains. This block gives you four isolated posts in a space that fits into a extrusion rail with a M3 hammerhead nut. Printed Part 4_post_Wiring_Block_M3_rail Other parts four M3 thermal inserts one M3x12 screw for mounting block one M3 hammerhead T-nut four M3x6 pan head or button head non-oxide screws (shiny) four M3 internal lock washers eight M3 brass washers You can use spade terminals or wrap a loop of wire between the brass washers. Personally, I would use a spade terminal for the controller connection and just strip off the ends of the fan wires, twist them together and wrap it around the post. When a fan goes bad, replacement would be the easist this way. Of note, I have the panels from Printed Solid shown in the picture. The block is only 12mm high, so it can fit against the panel for use in the electronic section.-
- 4
-
-
- eletronics
- mods
- (and 3 more)