Search the Community
Showing results for tags 'build'.
Found 4 results
-
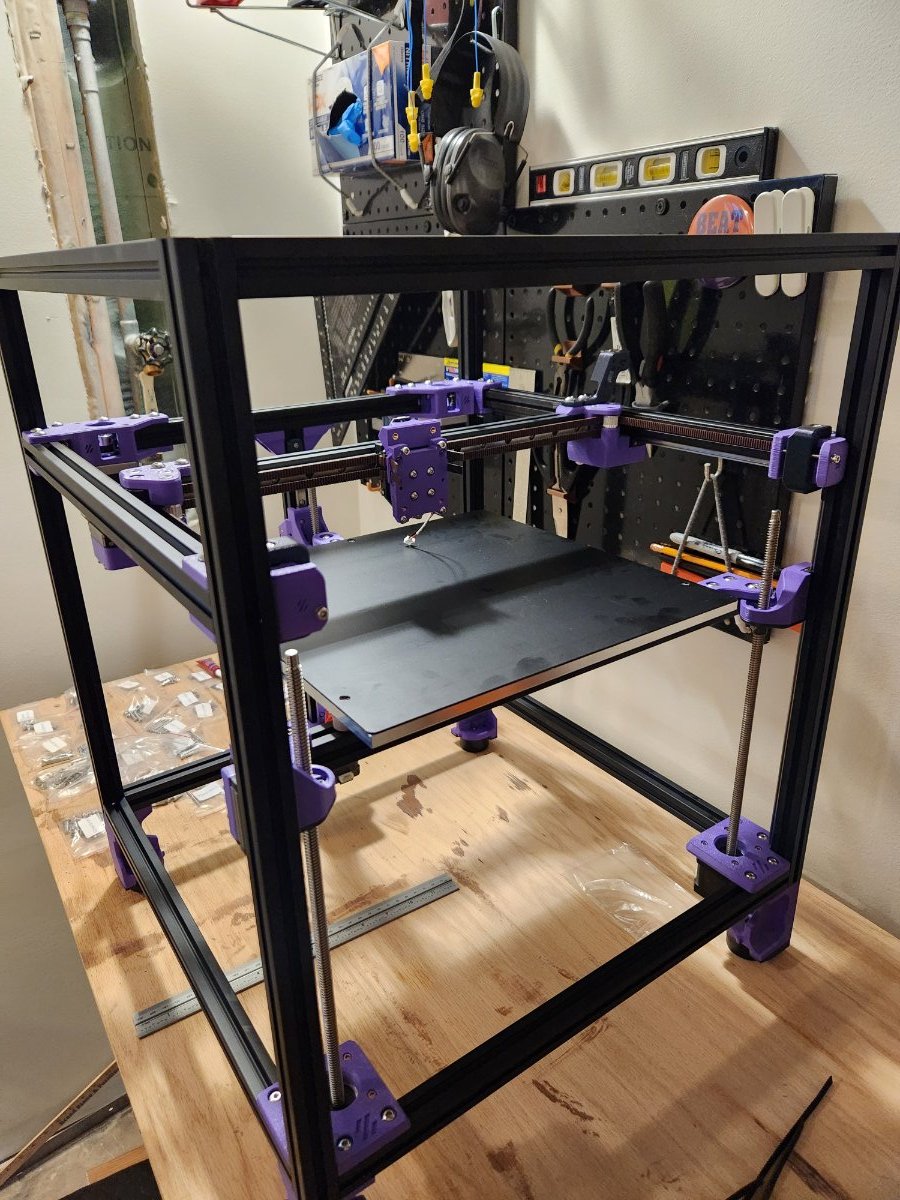
Hi everyone, I started my first ever build a few weeks ago that I'm hoping to chip away at as I have time. I chose the Formbot Trident 300 kit with the dragon uhf as a good balance of performance and price. My first post will be a bit of a dump of the progress made so far, and then I hope to do some more real time updates after that. I'm looking forward to sharing my progress with everyone and hearing what you have to say! As a sneak peek, here is where I am so far.

-
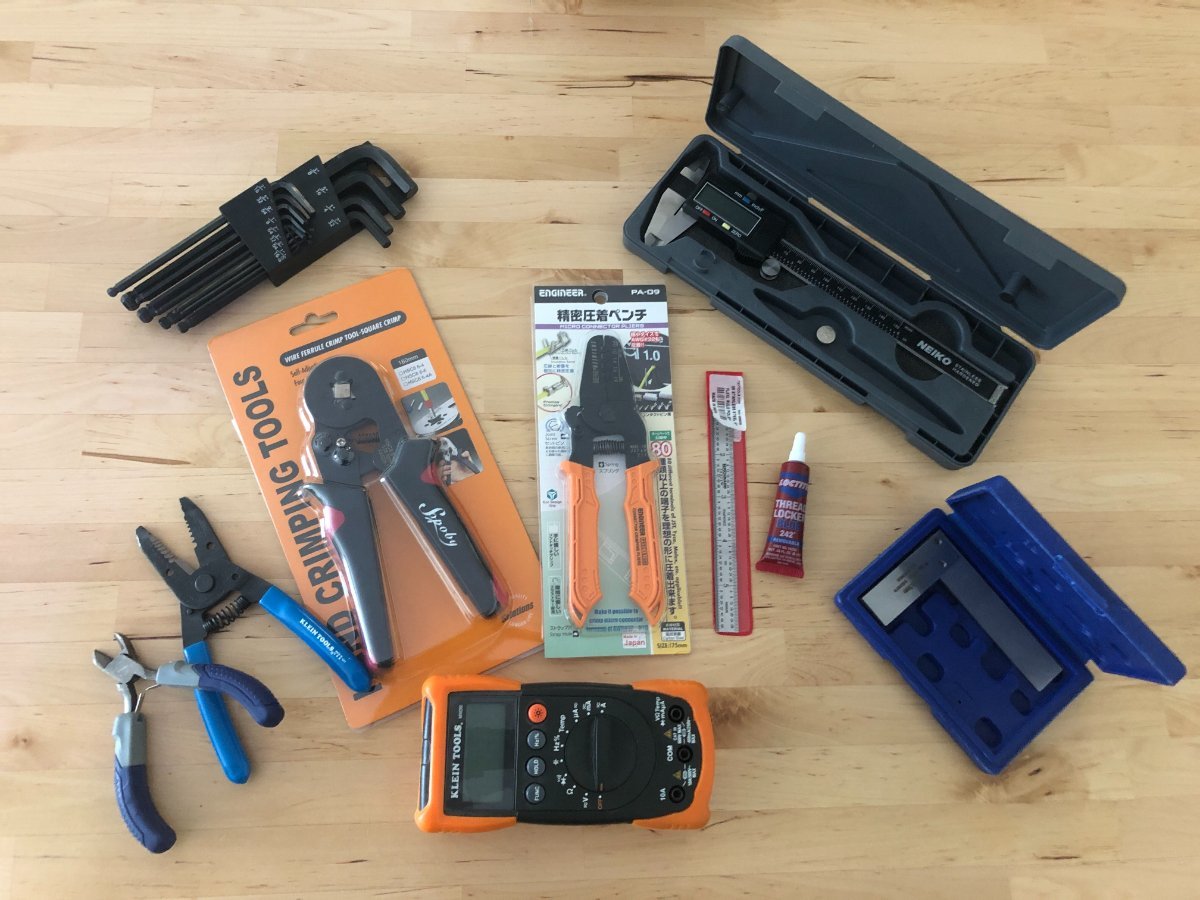
Same Thread: Updated for 2023! Researching, purchasing the printer parts of the build list and waiting for parts is only half of the battle. While many Voron builders have many of these tools on hand, and we hop most have familiarity with soldering, there are some tools that make the job MUCH easier, safer, and provide professional quality results. This is the Mega List for all the recommended or required tools for your Voron build. First and foremost, crimper are really important for your Voron build. With the amount of wiring required, you will thank yourself to invest in high quality crimping tools. Frequently users ask if tinning and soldering joints is an alternate option. While it may work short term, this is a much greater risk of the joint failing. Typically this is due to the stress of movement, or weakening from the heat created inside the enclosure and around the hot-end during printing. Wire Crimpers At least 1 Required Don't skimp if at all possible, the Voron build requires a bunch of crimping, this tool will last years! You will require at least one of these, if your doing only 1 build the 3220M will work - If you intend on doing anything more, the the general consensus in the community as a whole highly suggests the Engineer PA-09 as a great best value option. Molex Wire Crimper - $100 - Molex Wire Crimping Tool Engineer PA-09 - $55 - Molex Wire Crimper Tool <- Most Popular Option IWISS 3220M - $23 - Molex Wire Crimping Tool IWISS 2820M - $24 - Micro Connecter Crimping Tool IWISS SN-025 - Dupont Crimper Tool Ferrule Crimper Optional (This can be done with non-specific tools, but be prepared to damage end frequently, and spend time cutting and re-stripping wires) Ferrule Crimping Kit - $29 - Kit with ferrules and crimping tool Terminal Crimper Optional (This can be done with non-specific tools, but be prepared to damage end frequently, and spend time cutting and re-stripping wires - only 1 needed) IWISS 1442L - $33 - Open Barrel Terminal Crimping Tool Titan 11477 - $20 - Open Barrel Terminal Crimping Tool Wire Stripper At least 1 Required (Technically optional, but don't nick wires, or cut your thumb! ) For Voron Electronics and builds you will need a wire stripper capable of stripping 16-26 GA wire, make sure your stripper is capable of stripping thin 26 gauge wires. Engineer PA-07 - $26- Manual Wire Stripper Tool Ideal Industries 45-097 - $58 - Auto Wire Stripper Tool Screwdrivers / Allen Wrenches Allen Set and Screwdrivers are Required Metric Allen Wrench - $14 - Try to source with rounded tips, easier to reach some odd angles, from at least 1.5mm - 5mm Screwdriver "kit" - $14 - or small common screwdrivers Knippex Plier Wrench - $90 - Featured on "Steve builds", a fantastic tool! Soldering Iron / Heat Gun At least 1 Required A soldering iron is also required for the heatset inserts. Any soldering iron will work for the entire Voron build, you do not need to go overkill here. TS-100 - $72 - Portable Soldering Iron Solder Rework Station - $60 Great mid budget option for adjustable temps and a hot-air rework suitable for heat shrink duties Adjustable Iron - $15 Solder 6337 - $18 - Flux core solder Multi-Meter At least 1 required (Technically optional, but a multi-meter makes setup and troubleshooting MUCH easier! ) Fluke 117 - Professional Multimeter AstroAi - Basic Multimeter Measuring Tools Optional Metric Calipers - $15 Any Digital caliper should work Benchmark Tools 4666-06 - $7 - Machinists Scale A fancy accurate ruler, 6" or 12" Machinist Square - $13 Improves squaring up frames, don't drop this it could through it out of square! Specialty Tools Diagonal cutter required others optional Klein Tools D275-5 - $10 or Hakko-CHP-170 Micro Cutter - $8 - Diagonal Wire Cutter While the Klein tool is high quality, these are inexpensive and included with many commercial DIY printers 6" Mini Needle Nose Pliers - $9 Don't go overboard, just holding tiny parts where you fingers don't fit! Milwaukee 48-22-9215 4 PC Hook & Pick Set - $17 Great for managing and pushing wires and parts in tight spaces. Printable Tools Optional Nozzle Torque Wrench - https://www.thingiverse.com/thing:4738816 Tape Optional Kapton Tape - $8 - Optional, protects electronics for accidental shots, heat resistant Spectape ST501 - $15 - Double Sided Tape (Door mounting) Grease Optional (Highly recommended to preserve accuracy and increase longevity of your printer) Super Lube 92003 - $11 - PTFE Grease for plastic on plastic parts MG Chemical 8461-85ML - $10 - White Lithium grease for metal on metal parts If you have any recommendations or if I missed a few required items, please post below and I will update the list to include other options!
-
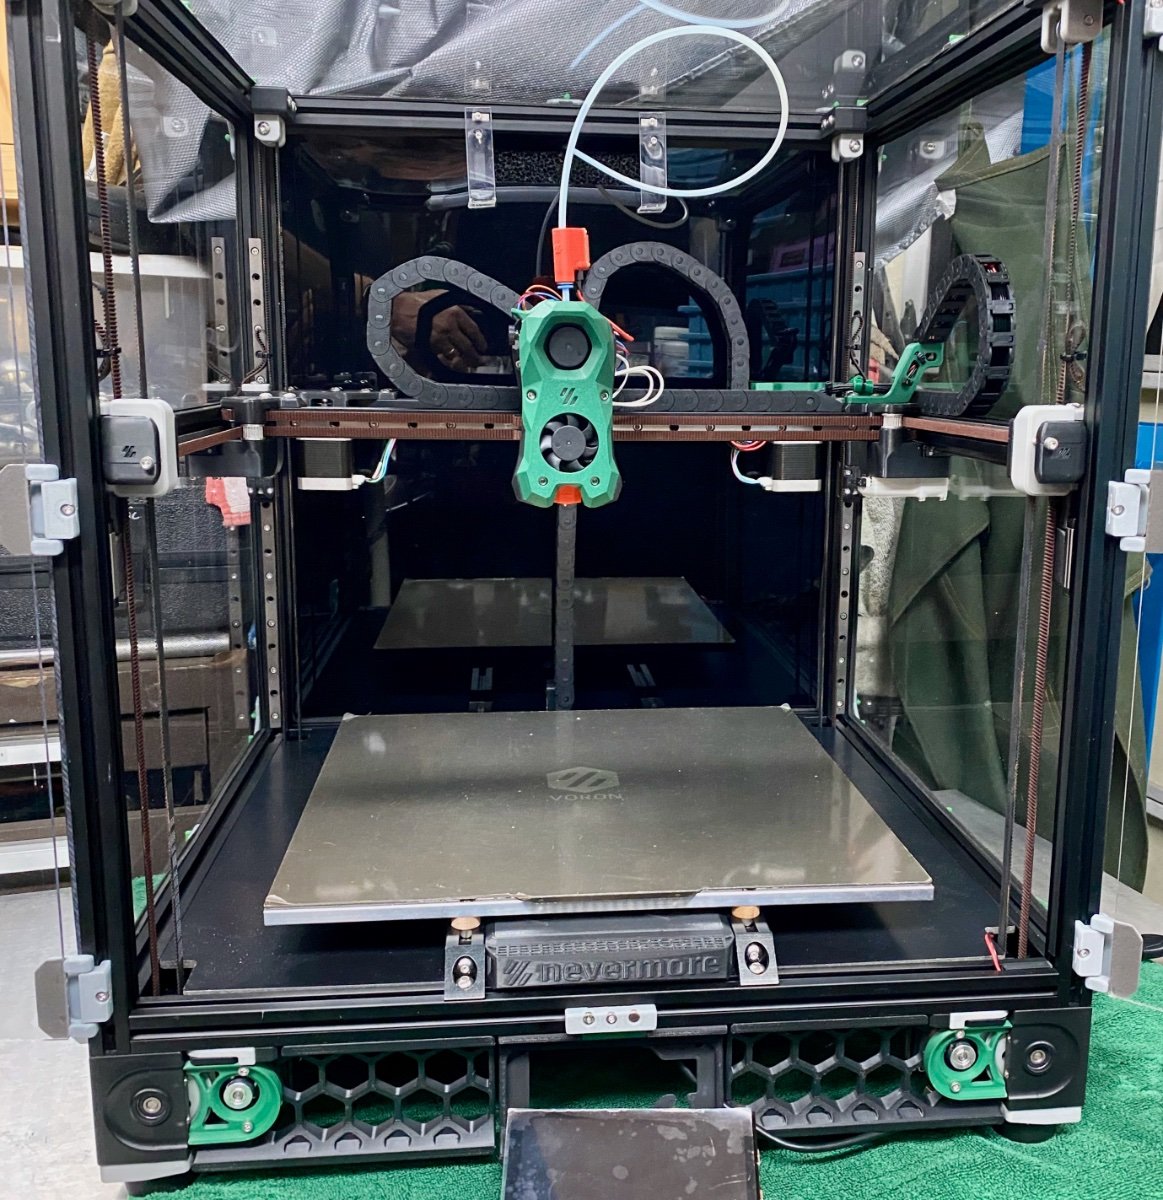
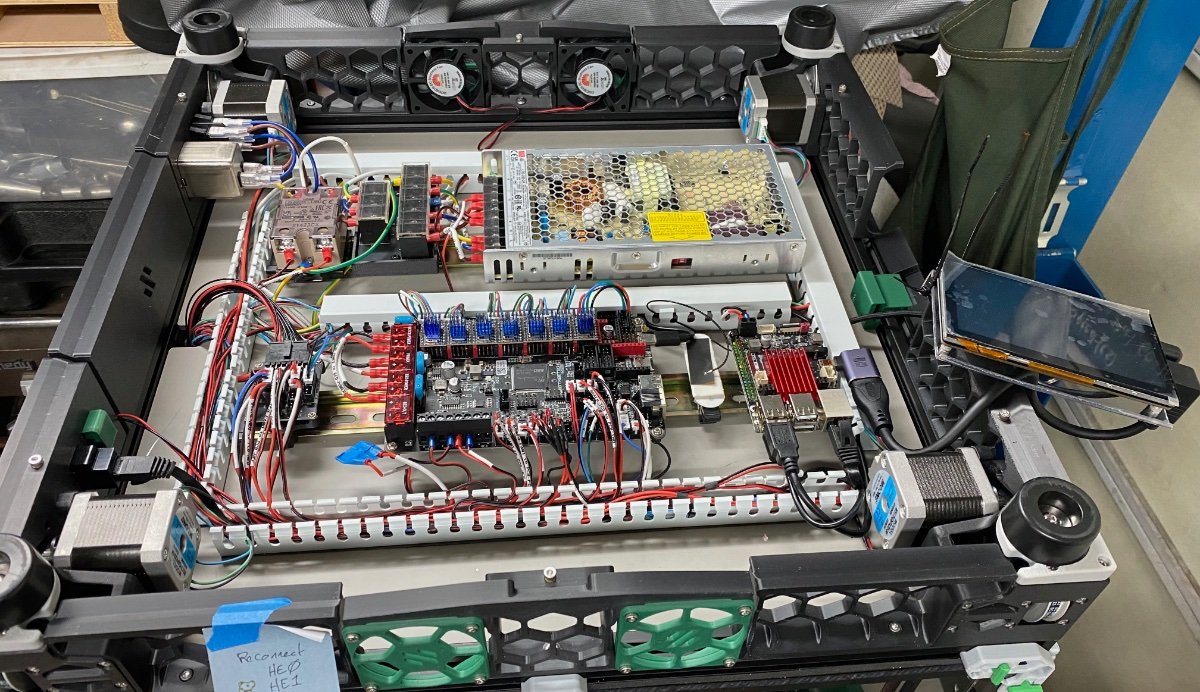
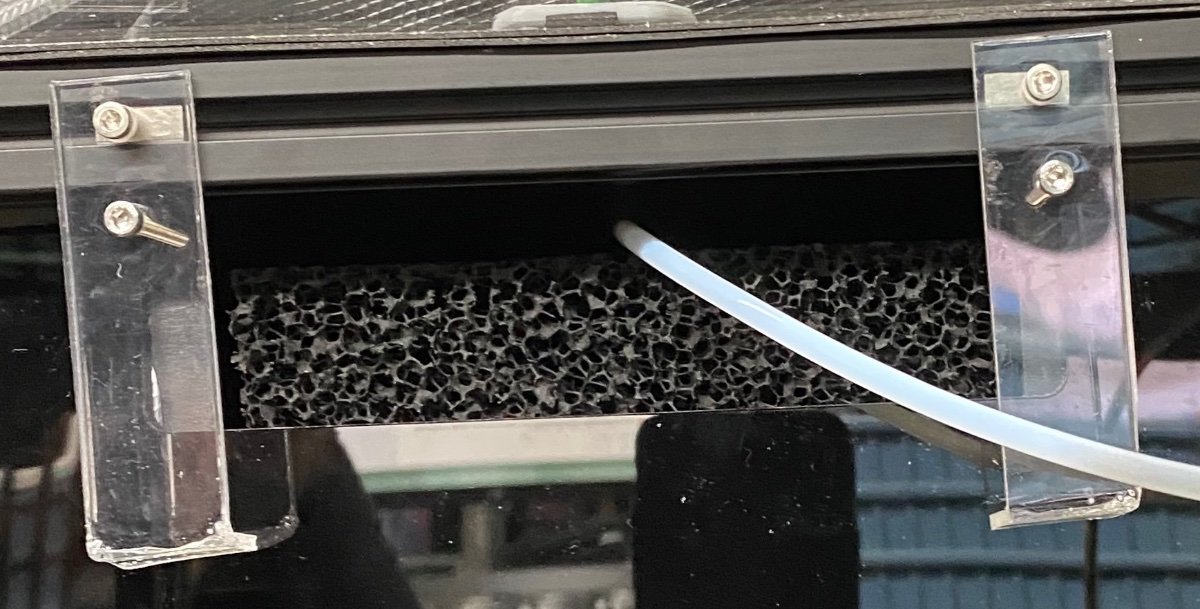
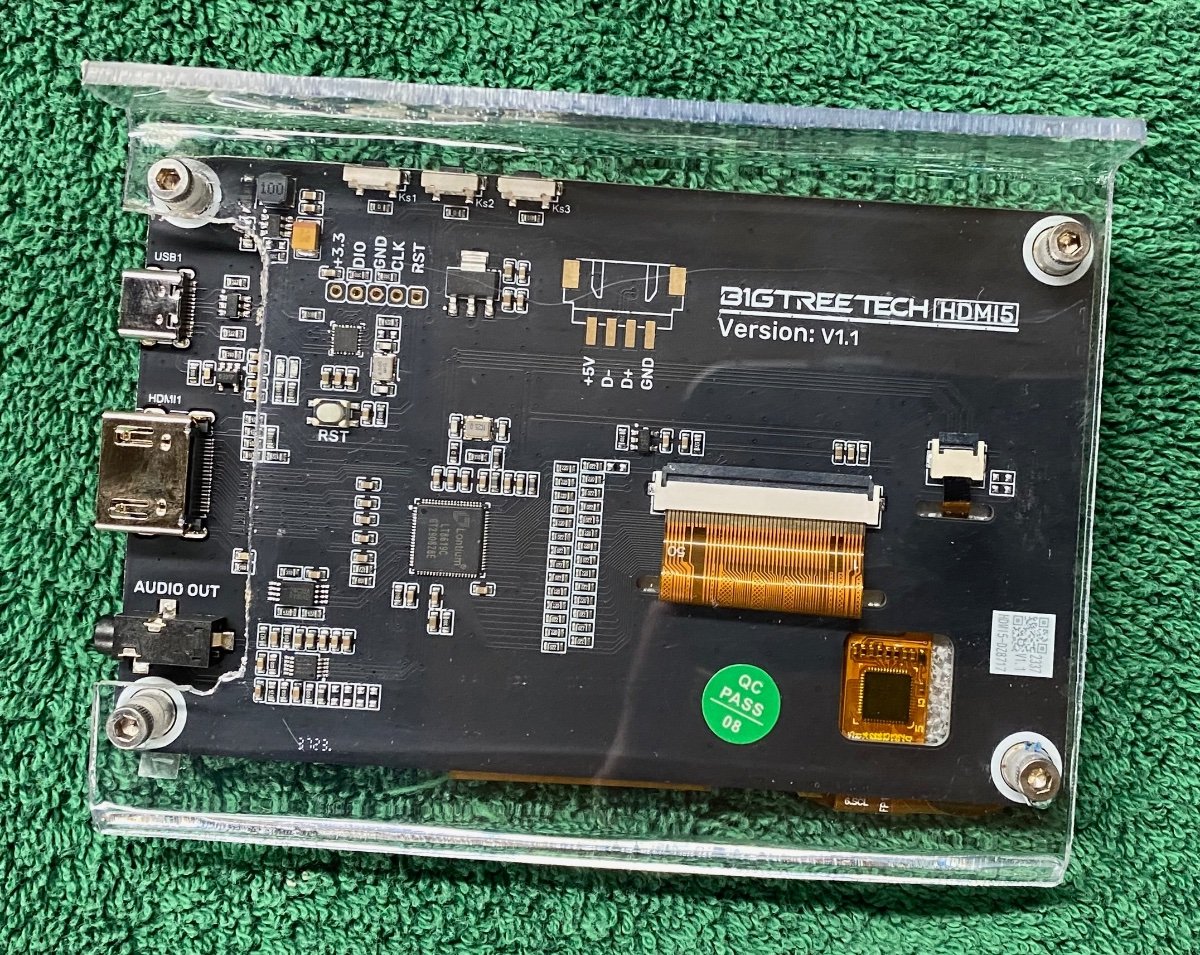
Hello again, Sorry for the delay in posting something since I did my introduction in January. < tossed longer and rambling message > The easy part is done with the frame, gantry, build plate, enclosure. Wiring is ran. The 3D printed parts kits I had ordered were missing parts. I initially bought "all the printed parts" as a kit from a vendor, to later on realize it did not have the skirts or the screen mount. Ordered the skirt kit from same vendor, only to discover it was not the screen mount for the touch display. Didn't see an option on that person's site to choose the proper screen display. And it did not have the enclosure pieces. Went with a different vendor and got my enclosure parts. Completed the enclosure to again find missing parts - the exhaust grill and hangers for the exhaust fan. Reached out to a few different vendors on etsy. Didn't get replies. I decided to improvise some temporary parts using acrylic. If I can get the printer up and running I can print the few remaining parts using models I found on this site. The 3rd and 4th pictures show the exhaust mount and the touch screen support. The display support will allow me run the printer while not shorting the display on my metal work table. The printer has the TAP option. I built the ABS mount for it. It doesn't feel right. Something with the magnets and the screws doesn't feel tight enough. I worry that when printing the print head will shift. Tried different magnets from McMaster-Carr, along with different contact screws for the magnets to latch onto. Still felt loose. Then I saw a nice aluminum frame for the TAP, bought that. Waiting for it to arrive - first "upgrade" to be installed before even using the printer. Now it is time for the part of the project I have been dreading - installing software. Already had a false start when I tried to install the wrong OS. I straighten that out and got the correct software for the BTTpi installed and running. I already erased the SSD once to start over. I am about to do the same once more as I try to find the right instructions/path. I feel like I have missed the correct path. When I assembled my Ultimaker over a decade ago there was one set of instructions to follow, and the OS and printer code was already on the controller board. Screwed everything together, loaded filament, got my first prints. This time around it has not been a straight forward path. Using the Voron instructions I was able to build the frame and the mechanical parts on the printer. When I started wiring it up I noticed the electronics parts were different from the Voron instructions. The substitutions seem to make sense, and using a few different youtube videos and other sites I am pretty sure it is wired up correctly. Bought the printer kit in mid September. Started to build it in mid October. Took a break to focus on the holidays, resumed in January. The mechanical build has been done for over a month. I think I should be done by now. The software feels more convoluted. I'll get thru this after I take a little time look around for the rosetta stone that has to be out there. Thank you for reading this far. And I hope I have posted this correctly
-
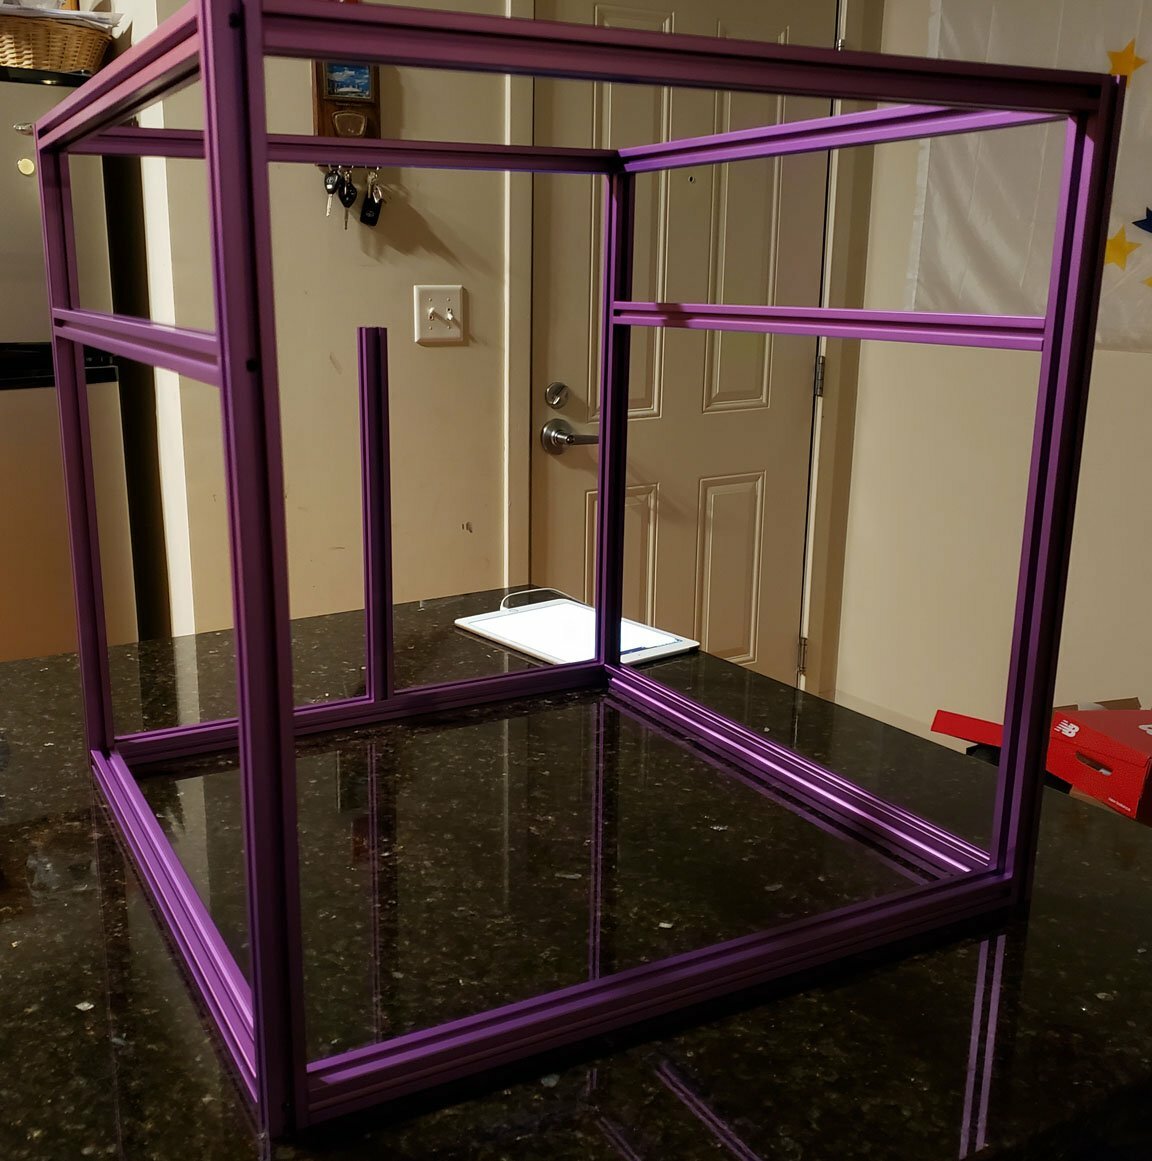
I've been accumulating parts over the last few months for the new Trident, choosing every part myself. I went with a Formbot kit for my 1st, the 300 Voron2.4. Needless to say, buying the kit required all the cash up front. I was so excited to build another, I began buying parts a little at a time. It was much easier on the wallet. Shortly after I had purchased the most expensive parts, I decided to retire. Now I have plenty of time to build it. As of this post, I am short one important component. I ordered a wire harness from KB3D 6 weeks ago. It has not yet shipped. I was informed last week that I am #10 in the queue at Linneo, so it should be shipping from Spain soon...-ish. Anyway, the first part I ordered was the frame. I got it from a FYSETC store on AliExpress for about $65. The price is higher now, especially for shipping, but I happened to catch a pre-sale deal. All extrusions were the correct length, holes pre-drilled and tapped, and came individually wrapped in a thin foam. They also came with hardware for assembly, which I did use. That became step one this morning. I have avoided AliExpress when possible, but some things are either very hard to find or the price difference is hard to ignore. T-nuts were one of those items. I mostly followed the sourcing guide on the Voron Configurator. All the motors are LDO from KB3D. Day 1 is over. The frame is together and squared up completely. Over the past few months, I have printed several sets of parts in ABS and ASA in a few different colors. I'm having trouble deciding. lol. I'm going to sleep on it. Wish me luck. (To Be Continued)