Leaderboard


Popular Content
Showing content with the highest reputation since 08/27/2021 in File Reviews
-
 Great mod and super responsive author, thank you for sharing!4 points
 -
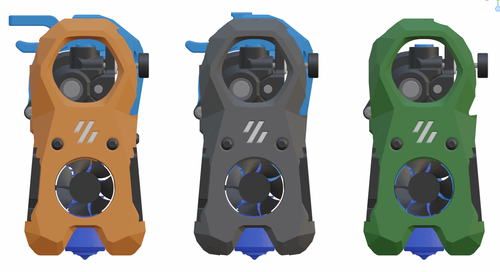
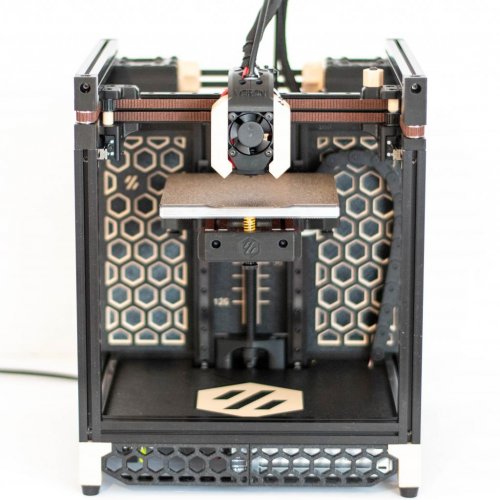
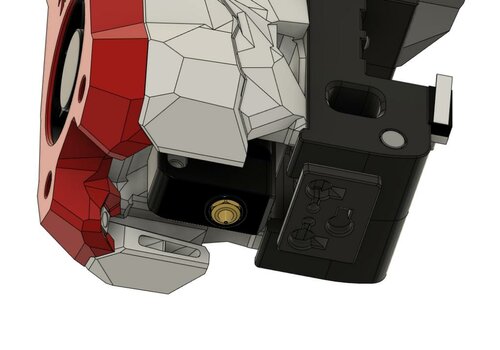
Been using this now for a few months and few things to say about it..... Never seen a more active creator as atrushing! modifications, changes, whatever, so far he created it.. But besides that, this is a wonderful mini stealthburner, cools well, lighter, fits in a V0 and much more.. First I thought, dont like to see this orbiter, and I want to stick in a fake fan... but after making it, I love seeing the orbiter, its a strange thing how reality is different than from a photo... I do think a Revo fits best in this, since space is limited, but I made it with a dragon, and it fits also, but wiring is well, it takes patience with fat fingers Thanks for this @atrushing3 points
-
I just put these on my 2.4 350 because i'm planning to do a bit of upgrades this weekend, and they're amazing! Easy to install, perfect instructions and super solid construction. Now i can tip, tilt, slide my printer around and don't have to worry about unplugging everything. Thanks a lot for creating these, they should be included in the upstream STLs.3 points
-
Solid addition to my build! So much easier to get at the electronics. All parts went on seamlessly. I appreciate the that went into designing this to be rock solid. Thanks!3 points
-
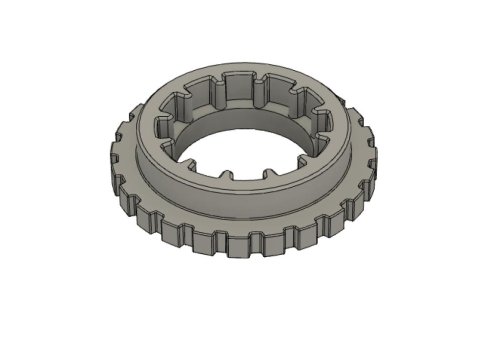
I am now using this combination, Sherpa with the Mini Stealth, and its a set made in heaven. Putting together the mini is harder than the normal SB, just a warning, it makes sense, but just putting it out there. Its smaller, but same wiring goes in there, its just one part, not 4. And that makes it lighter, smaller, but a bit harder to put together with the fans and wiring. But when you are done... its smooth sailing, it prints like there is no tomorrow, you notice the weight difference... The Sherpa is a monster too, I find it the easiest extruder up to now to feed with filament, it always grabs my filament without getting stuck somewhere.. and yes, its light, this combination is about HALF the weight of a normal SB. I still need to switch to canbus, since the cable connectors are a pain in the butt. So if you use a mini, or directly take the cables to the board, OR go canbus from the start. @atrushing he is the best!!! and again, thank you for this beauty!! I know the Orbiter is popular, but really, they should consider the Sherpa.2 points
-
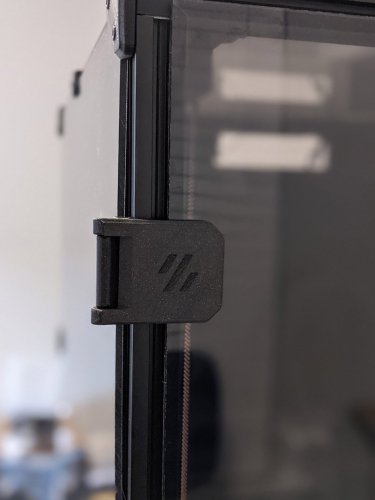
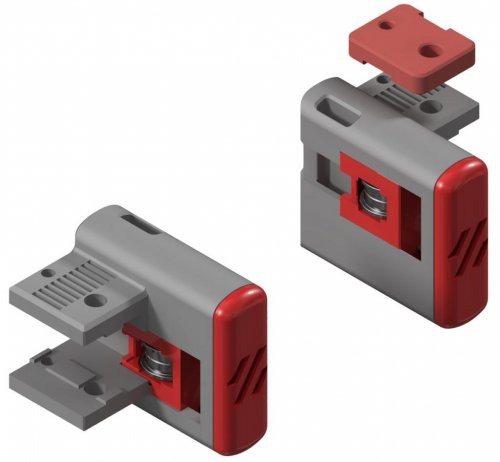
What have I been doing before this??? and WHY?? This mod really made me go halleluja, I have been trying out so many door hinges, but this is the one.. why didnt I start here... The drill guides are .. godlike, so easy and I just took the chance on them, didnt verify (who has the time) just went with it.. My panels are a little thicker too, 3.2mm just about.. and worked perfectly with this, but I am guessing thinner panels too, I will try in a few weeks again with a stock Formbot kit. THESE ARE THE HINGES!! no doubt.. if you dont need 270 degrees, but can do with about 200, GO! They dont stick out like other hinges AND they still leave space from my front idlers, since they are snug to the doors.. no problem with these! For me the middle gap is not even 1mm, super straight and everything feels very solid.2 points
-
Great Mod. I have this running on two of the three V0's and cannot fault it. Printing: Prints well with the standard Voron settings and no supports needed. LED's Tried a pre made set but the wiring proved a challenge (too much). Best to make your own chain - the wires then fit perfectly in the channels in the toolhead. Diffuser and Logo LED a good tight fit. You need patience here - don't rush it. Fans: Easy to fit with good cabling routes (Found it easier than the standard V0 toolhead) Probe: Initially had to adjust the toolhead to make the Zeroclick fit. But as soon as @Buurman alerted @atrushing, a modified zeroclick probe appeared that can be mounted to the fan on the right. Works perfectly Cooling: Have not had a problem with any parts so far - Printed all the parts for the Boxzero mod on the Trizero with mini stealthburner. Very accurate and aesthetically pleasing. Conclusion: If you ever had your doubts - put them aside and GO FOR IT2 points
-
Looks great, fits well. Love it. (Printed mine in GreenGate3D "PrimeTime Lime" Green and "Matte Black" PETG.)2 points
-
These are gorgeous, thank you for a great design. The only down sides are that the spacers were too small for M3 screws. I scaled up to 110% on the X & Y in my slicer (PrusaSlicer) then the M3s fit perfectly. Also, I changed these for the DIN rails in the Formbot kit, which was 10mm closer than these original setup. Plus, now you can use the brass inserts. Keeping with the Voron theme. BTT_octopus_DIN_mount_A_insert.stl BTT_octopus_DIN_mount_B_inserts.stl spacer_x4_scaled 110.stl2 points
-
Works perfectly! Especially the 180 degree version is perfect in combination with the Legacy Crowncooler Mod (https://github.com/sneakytreesnake/CrownCooler)1 point
-
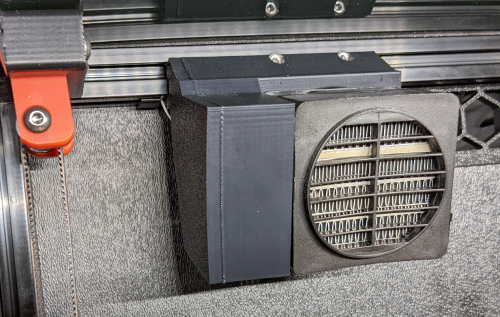
I have installed 3 of these now, Works great to keep the temps in the chamber .1 point
-
Great design, works well, everything fits up as it should! I had to cut out the back rib to fit the heating element wires through, however, it was a simple fix with a pair of flush cutters. Fits really good with the silicon sock as well, no issues yet. I just wish there was the UHF support, which includes the small threaded extension.1 point
-
I is really great, but i used it for having only 1 great door with two hinges - so the matching problem in the middle is solved. Then i took your hinge_backplate and designed new shutter with magnet on the top and the side including fixing the top und side panel in one piece. At the bottom is another construction for the closing by magnet. Because of one piece for my design is from here i put my complete design also in here. Maybe some will find it helpfull for using only one door. Tuergriff.stl Schiene-Tuermagnet.stl Tuer-innen.stl Rahmenhalter.stl Tuer-außen.stl1 point
-
Super helpful for maintaining chamber temperatures. I'd use a quality fan, though, not the one included with the Amazon heater - mine is already starting to scream like a banshee. Thanks for the mod!1 point
-
Great solution but I printed on their side for greater strength so that when opening to slide over the belts it wasn't trying to snap them across the layer lines.1 point
-
What x3dr said1 point
-
I have printed these out for all my topside panels and the design is great. After working with them a bit, I remixed the design and added a small bump to the middle latch to allow me to get a fingerhold. I would also like to see if the middle latch can be flipped over in the stl so that all outward surfaces are the same finish. NewLatch-4.0mm-Fingerhold.stl1 point
-
Fit perfectly and eliminate three more places that filament scraps can accumulate.1 point
-
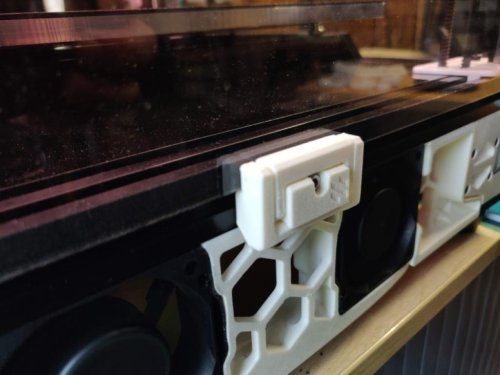
Works really well, even at the build stage of my new 2.4. Perfectly placed fulcrum point so it can tilt up as in the photo while building. As previously mentioned, it makes it easy leaving the plug in while working on it. These will go to my existing 2.4, I will reprint with the grill pattern white to match my b/w 2.4 in photo. Thanks for sharing the files. Simple, smart, solid and functional.1 point
-
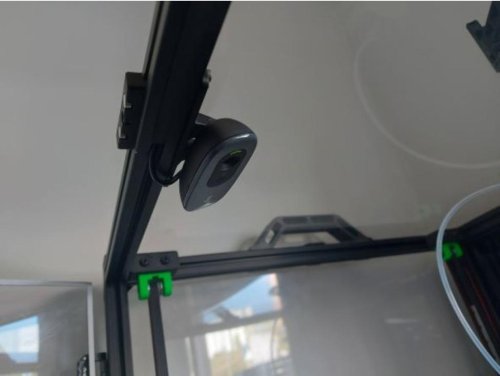
Great camera option! I love how low profile and out of the way it is. I mounted it to the top side to look down.1 point
-
Perfection! Nice tight fit, but still easy to remove. Love how low profile it is.1 point
-
I really like this mod. I can't tell if these stabilize the gantry better, but they do allow you to use angle brackets to assemble your frame. That makes squaring the frame easier and adds stability overall.1 point
-
looked for a nice way to run some wires in the frame. About 30 seconds into designing my own i decided to see if the team had already done this.. Time saved and a handful are printed to go on while i wire the rig up. They fit great!1 point
-
Just as a heads up, the new c270s do not have a manual focus anymore. This will work on the older models though. I broke the lens cover off of my new c270 trying to adjust the focus1 point
-
These hinges were a welcome replacement for the standard hinges. I can now leave the doors open for an extended period of time without worrying about them detaching themselves and falling in the floor. The 270 degree swing is also very handy so I'm not concerned with opening the door too far. I did make a modification from the original design, and ended up printing plastic hinge pins instead of using the recommended screws. Thanks for sharing!1 point
-
This mount worked perfectly. I actually bought this camera because I found the mount. Bill R1 point
-
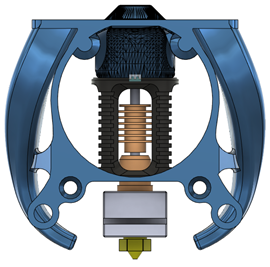
This is a fantastic take on cooling re-imagined for the Afterburner tool-head. Easy print, and great performance. Thank you!!!1 point
-
The OG Voron hinges broke almost immediately, putting these was a pleasure and much more sturdy without the risk of pushing on the door and breaking the hinge. Thank you so much for creating these!1 point
-
I printed and installed them. I think they are much better. You can see the idler and ist much easyer to route the belts, espacially i you have to replace them. Best thin ist, that it is possible to tension with 2 screws so that it is possible to align the idler while tensioning.1 point


.thumb.jpg.455d15673ede3fd647f42b97864bbce2.jpg)