
-
 9
9
About This File
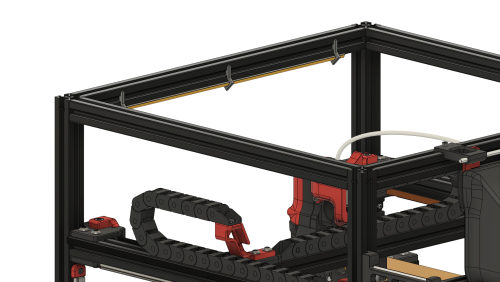
SuperSlim LED

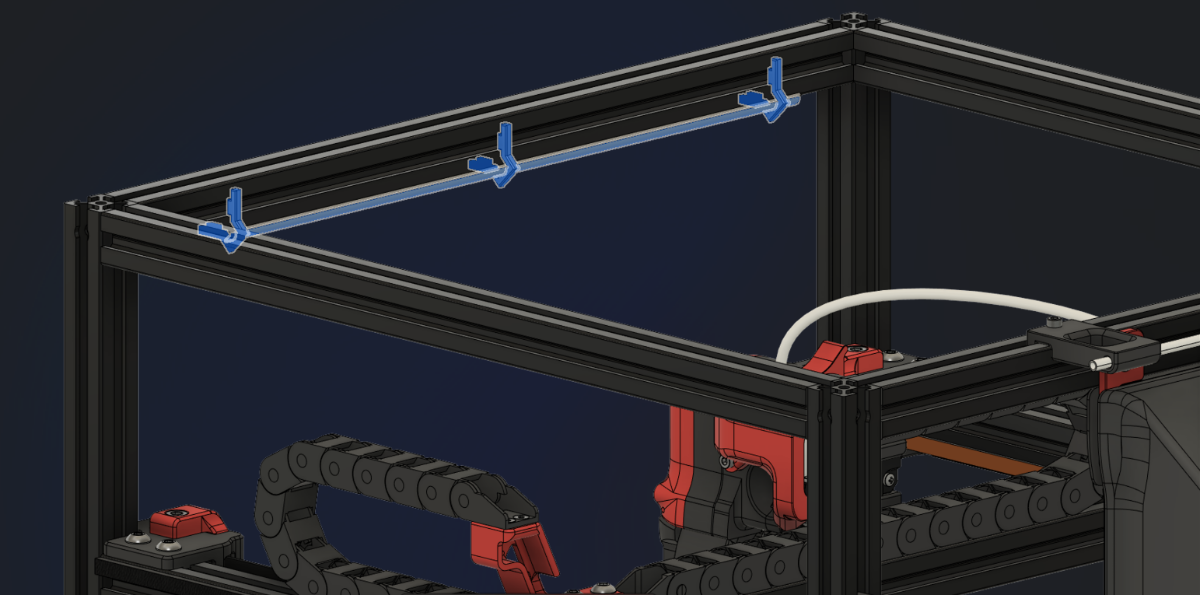
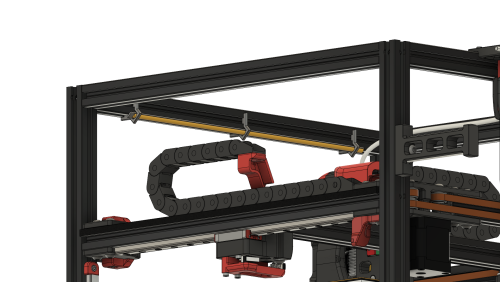
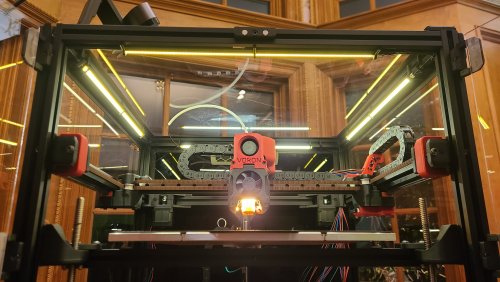
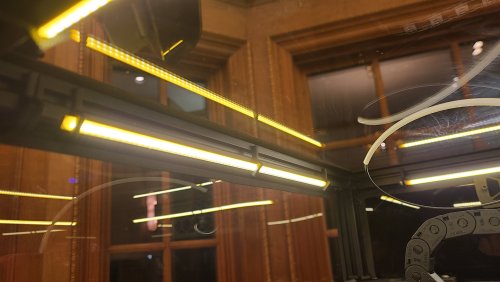
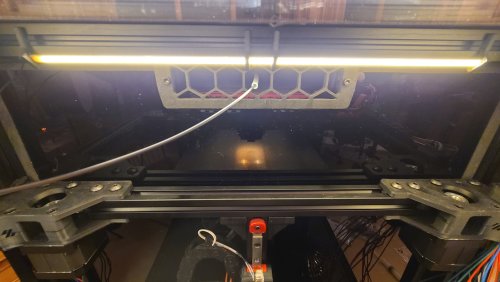
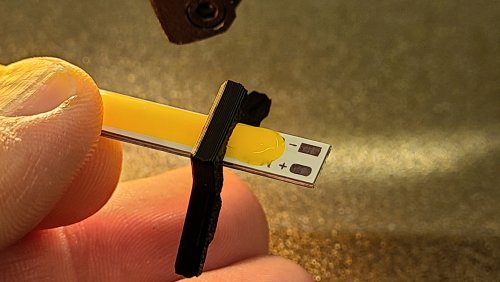
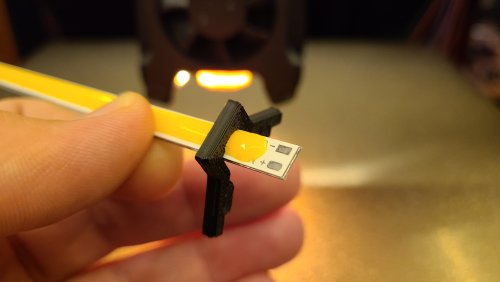
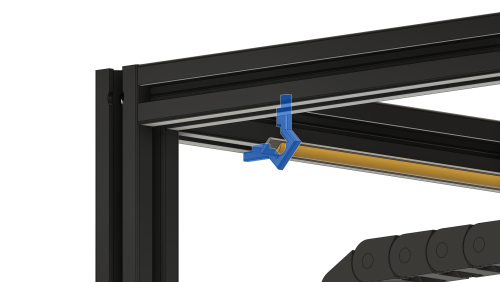
This is a design I'm calling the SuperSlim. It's a super slim LED bar that fits at a 45 degree angle on the 2020 extrusion at the top of your Voron. You print out these small and simple brackets, clip them onto the LED bar and against the extrusion, and presto! You have a gorgeous looking, bright, and simple LED light. Even better these bars use micro LEDs so you get a lot of light diffusion, i.e. no hot spots, and one of the best final looking lights out there for your Voron.
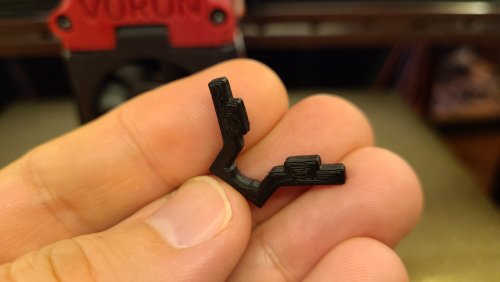
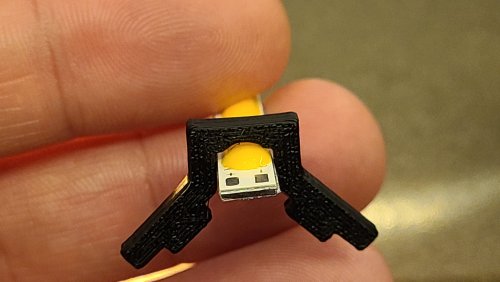
SuperSlim Bracket
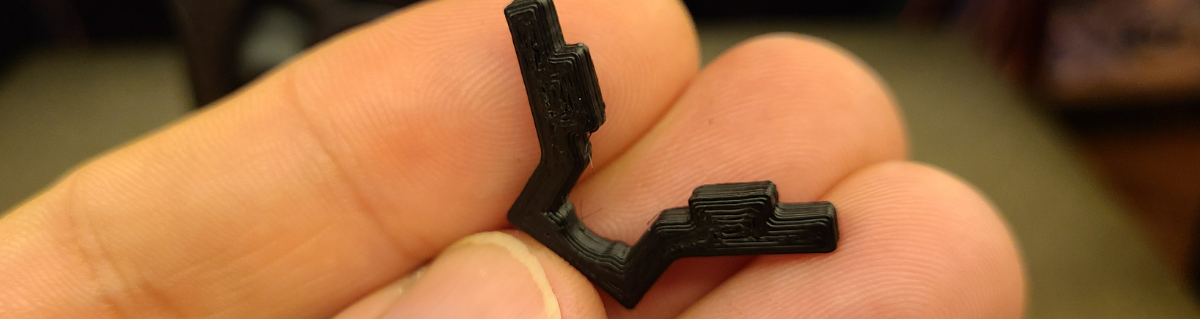
The bracket truly makes this design awesome and simple. Here it is in all its simple glory. Print 12 of these. In fact print 20 of these and use them to push/hide your wires tucked into the extrusion slots as well because they're so quick to print, easy to snap in, flexible, strong, sexy looking, and durable. And they're fun to print on your new ABS capable Voron.
Grab the STL or 3MF file attached to this post to print out the bracket using your favorite slicer.
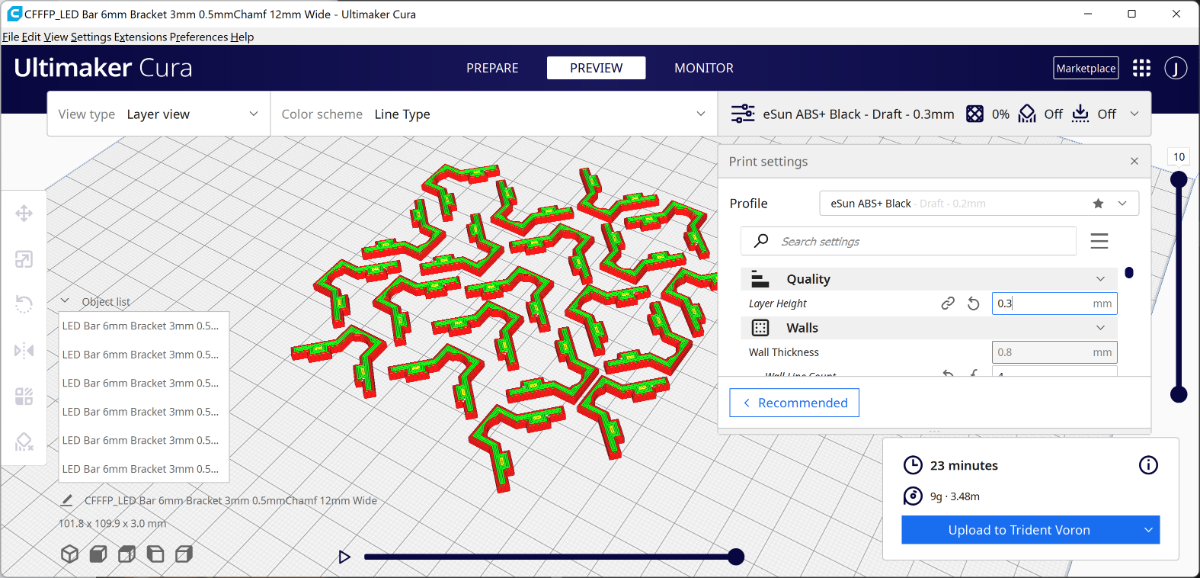
Use 0.3mm layer height for faster prints that are stronger. Use 4 walls to achieve basically no infill. 100mm/s speed should be fine.
Micro LED Bar

Here's a link for the LED light bar on Aliexpress. There are several vendors, so just search 300x6mm LED. Get the Warm White color temperature. Too stark of a bright white is harsh to look at.
300x6mm LED Lights (Pack of 10. About $1.70 each.)
https://www.aliexpress.com/item/32786326547.html
Wiring / Soldering
The light bars are 12V, so to plug them directly into your control board's 24V output, like HE2 (heater 2), so you can control the light from Klipper, you need to wire up 2 of the lights in serial to get 24V. Then wire up the other 2 in serial for another 24V. Then connect those together in parallel to drive off of one heater output.
- So connect the + out of HE2 to the + on your first LED bar (LED1).
- Then connect the - from LED1 to the + on the your 2nd LED bar (LED2).
- Then connect the - on LED2 to the - on HE2.
- Go ahead and test out LED1 and LED2 by turning on HE2 using the settings in the section below.
- Once you're happy, go ahead and finish connecting the last 2 LED bars the same way you did this set of LED bars in step 1 thru 3.
Configuring Klipper
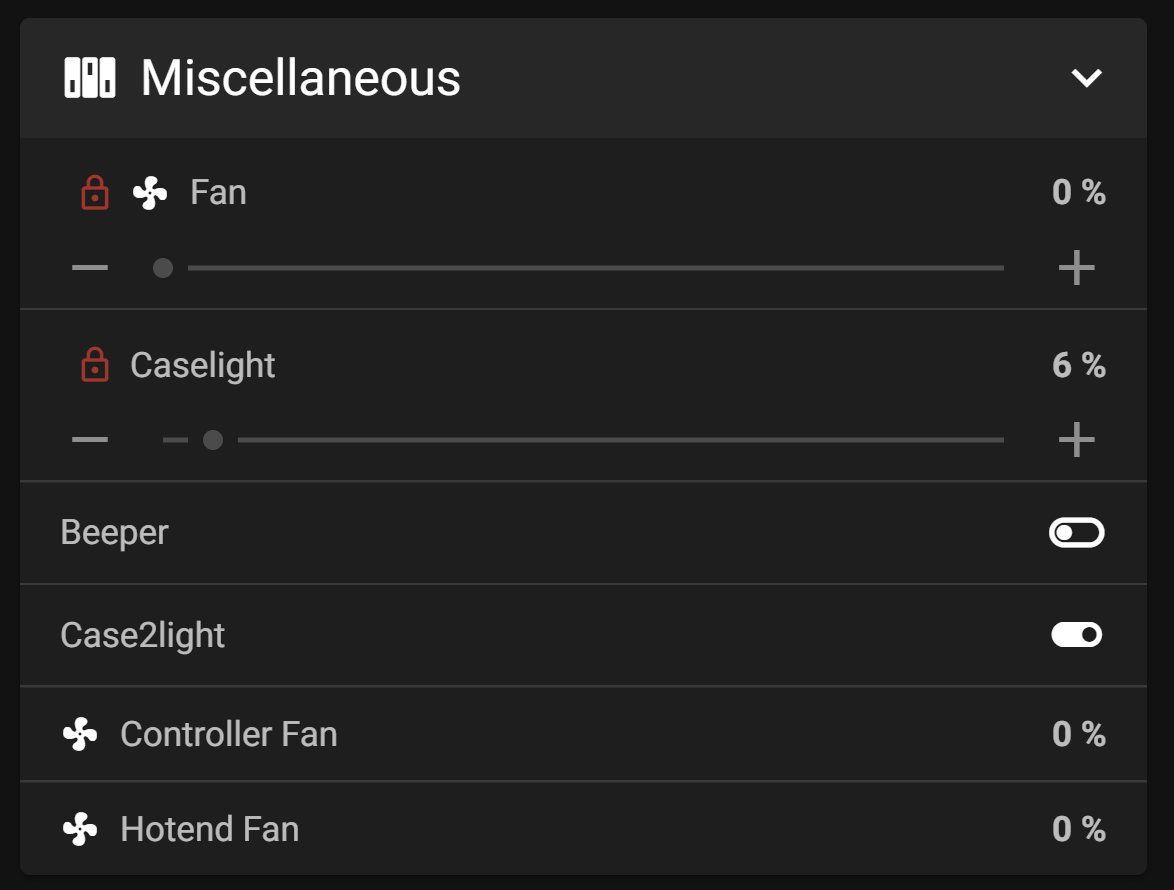
You can see it here in Mainsail called "Caselight".
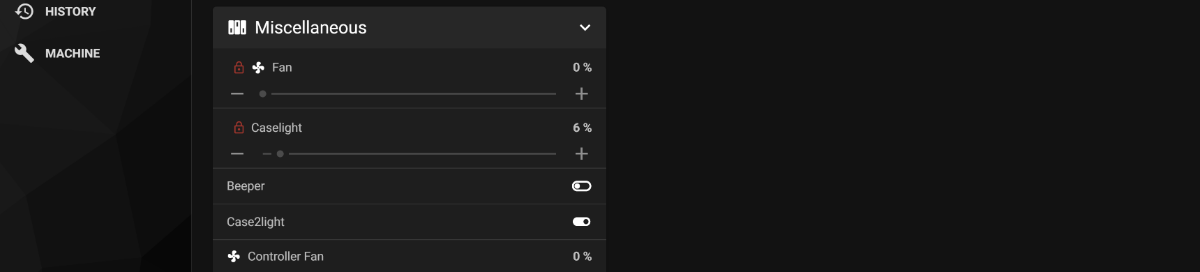
Here is the printer.cfg settings for controlling the LEDs.
[output_pin caselight]
# Chamber Lighting - HE3 Connector (Optional)
pin: PB11
pwm:true
shutdown_value: 0
value:0.06
cycle_time: 0.0002
# with 0.0002 the min is 5%. 7% seems like a good idle state. 40% for prints. over 60% to 100% all seems to be same brightness
# with 0.0001 the min is 9%. 12% seems like a good idle state. over 60% to 100% all seems to be same brightness
hardware_pwm: True
Add some macros as well for convenience.
[gcode_macro LED_ON]
gcode:
  SET_PIN PIN=caselight VALUE=1
[gcode_macro LED_PCT_IDLE]
gcode:
  SET_PIN PIN=caselight VALUE=0.06
[gcode_macro LED_PCT_PRINT]
gcode:
  SET_PIN PIN=caselight VALUE=0.4
[gcode_macro LED_OFF]
gcode:
  SET_PIN PIN=caselight VALUE=0
Then modify your Start / End / Cancel macros so they turn up and down the lights when you start or end your print.
The Start macro...
[gcode_macro PRINT_START]
#   Use PRINT_START for the slicer starting script - PLEASE CUSTOMISE THE SCRIPT
gcode:

    ;SET_PIN PIN=caselight VALUE=0.4  ; turn on case light
    LED_PCT_PRINT
The End macro...
[gcode_macro PRINT_END]
#   Use PRINT_END for the slicer ending script - please customise for your slicer of choice
gcode:

    LED_PCT_IDLE
The Cancel macro...
[gcode_macro CANCEL_PRINT]
description: Cancel the actual running print
rename_existing: CANCEL_PRINT_BASE
variable_park: True
gcode:

  LED_PCT_IDLE
You should end up with some nice macros that turn your lights on and off at the right time.

This video walkthrough of my serial request will help you get an idea of what these lights look like in a video.