All Activity
- Past hour
-
 R0BN4571C changed their profile photo
 - Yesterday
-

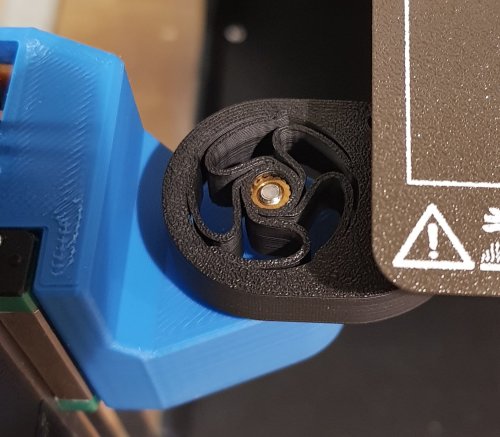
Voron Trident GE5C Bearing Alternative - Flexure
jseparovic commented on atrushing's file in Printable Voron User Mods
 Thank you for this file and design , also see it as a great way to account for thermal expansion
 -
That's the one that caught me on my VZ330 AWD build.
-
Monitor the fan noise ,if its gettng louder then replace ,your asking how long is a piece of string ? good fans will last ,cheap fans will not .
-
I initially had the very first released external 5160 Pro drivers but as I found them to bulky, I switched to the 5160T Pro drivers.
-
 Flip712 joined the community
 -
Great, thank you. I enjoyed reading your post, very informative. Are you running 6160T, 5160 Pro, or external 5160Plus drivers?
-

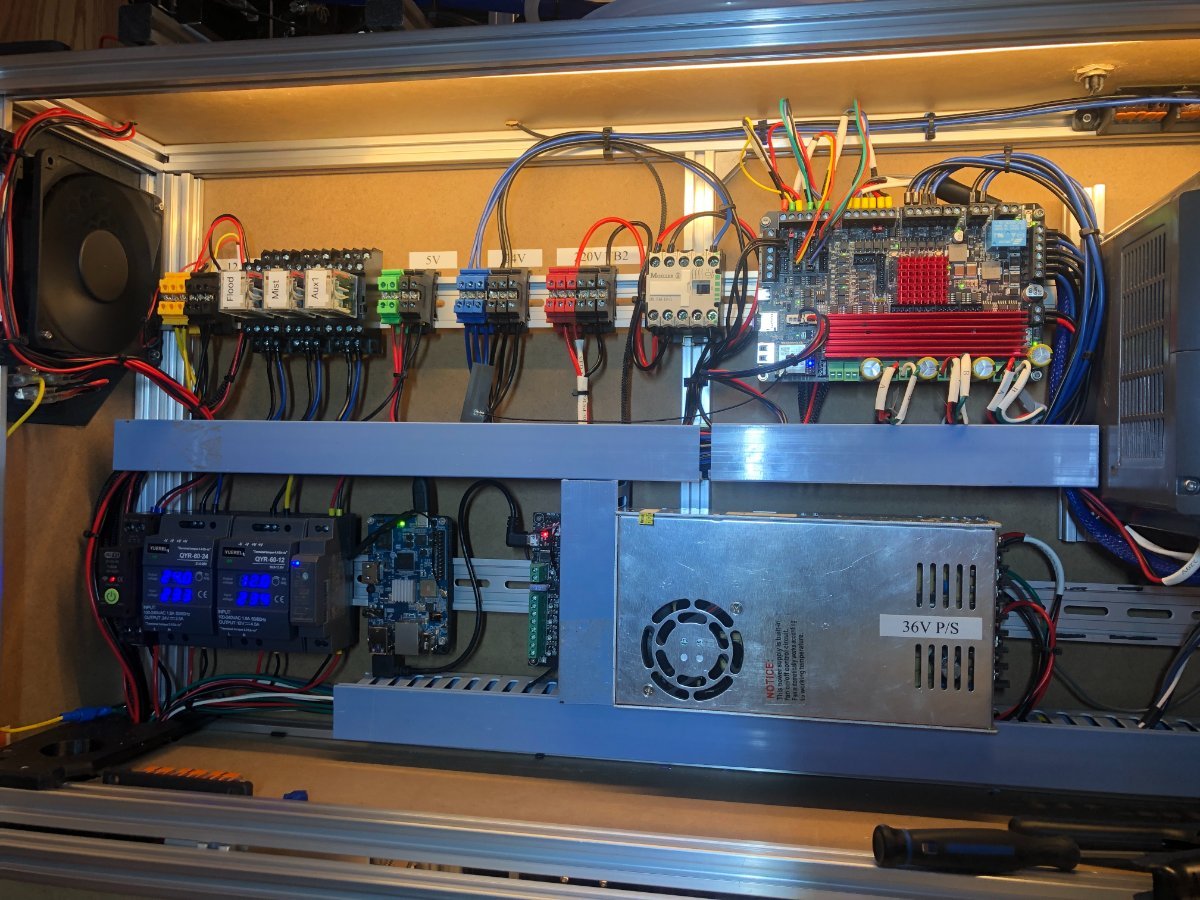
Milo V1.5 CNC Bench Mill - Water Cooled - Casa Enclosure
PFarm replied to PFarm's topic in Build Diaries
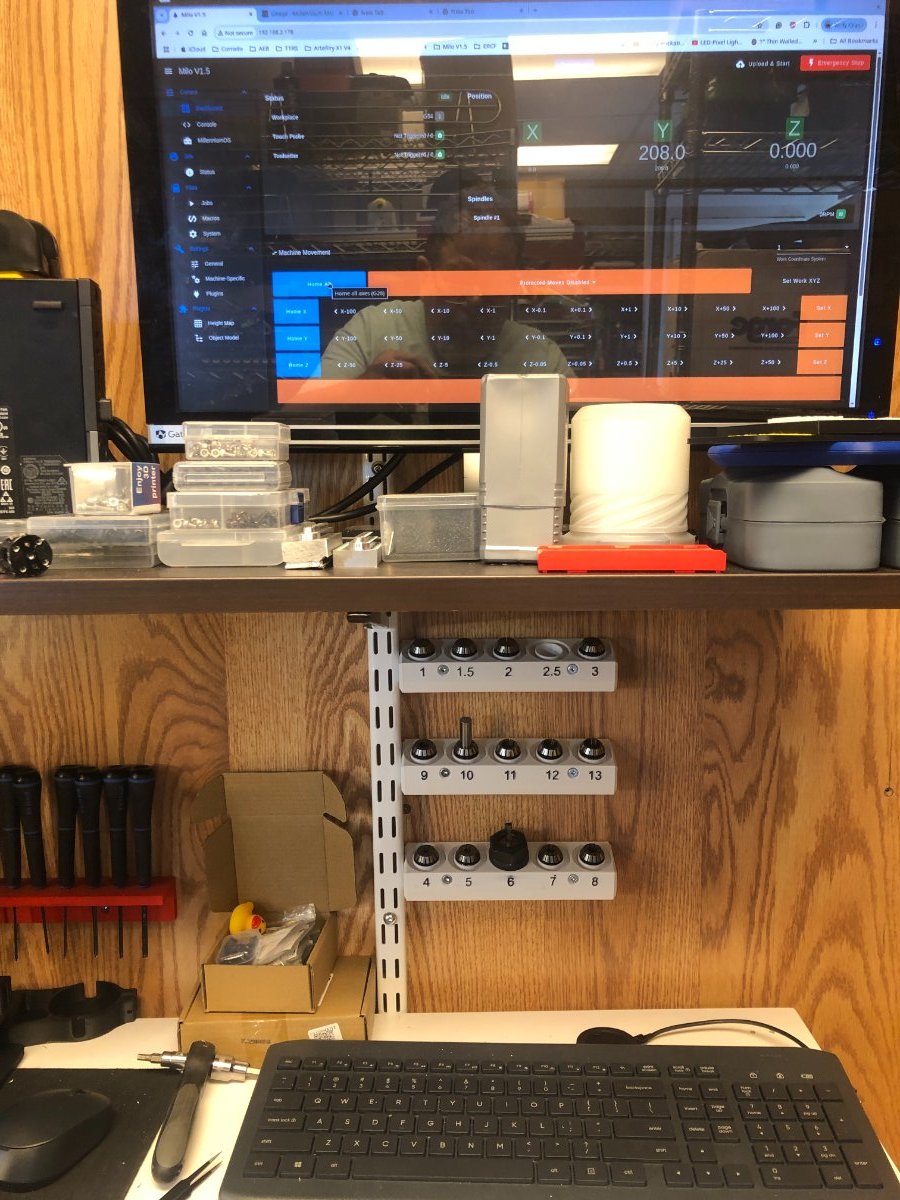
Wired in the coolant relays today, I need to complete the air plumbing and wire the solenoids. Wired the pendant e-stop in series with the Casa e-stop, I couldn't get the software e-stop to work with the pendant. I printed some wall-mount ER20 collets. It's nice that the Casa has a collet drawer, but in reality, when doing tool changes and opening and closing that drawer isn't very convenient. In my opinion, having a pendant is a must-have mod; moving the axis to line up the touch probe is significantly easier than using the RRF GUI.
- 294 replies
-
- 1
-

-
- selfsourced
- milo v1.5
- (and 3 more)
-
 Familo31 joined the community
 -
 wowpalompa joined the community
 -
 dkindleysides joined the community
 -
My VZBot 330 runs on an Octopus Pro board with 48V 5160 drivers. As a matter of fact all my printers are running Octopus boards. Have not had a problem on any. With the 5160 drivers it is important to note the wiring to the drivers as this is cause for the most issues I had. You will also need to connect the two power supplies via GND in order for the 5160 to operate. I am currently in the process of converting a Ender Plus to an AWD Mercury One with a 5 toolhead Lineux Toolchanger and this will run on an Octopus board with 48V 5160 drivers.
-
So the software ( Vectric Aspire ) I use asks firstly asks for the dimensions of workpiece. Let’s say a nice bit of oak 300x300 and 30mm thick. Then again within the software it then asks where will the workpiece datum 0,0,0 be I select top face and the middle in X and Y axis on the material. So 150mm in from bottom and side edge. Then I create my design could be text or a relief whatever you like. Then let it create my cutter path G codes based on cutters selected. Export the G code cutter path to my desktop. Now on the router I home the machine first and then move the spindle to somewhere central in the workable area. i use a rule diagonally across the corners to lightly mark a cross in the centre of the timber. Fasten down the material making sure its edges are square to frame if the machine. I use a v carve bit in most of my projects so install and tighten then jog the cutter / spindle over this cross and whilst lowering the cutter making sure to zone in on the cross on the timber. In the Z axis use a feeler gauge between the top of the timber and the tip of the cutter till I just can’t move the feeler freely. (0.15mm) Once there set this as your “ SET WORK XYZ “ on your control screen. This datum now tallies up with what I selected originally in the software. Upload your g code and press start and away you go that’s it. Hope this helps I’m sure that there are many ways in which to do this and to be honest it’s the way I have always done it without any issues.
-
I am in the process of building a v2.4 or a V2.4/ VZbot mutant. Did you ever have luck with the 5160 pros? Did the commenters on discord why the Octopus Pro 1.1 is considered a bad board? I was about to pull the trigger on ordering both. Thank you in advance.
-
 SBeck joined the community
 - Last week
-
So just say I use that, I position a piece of wood on my bed. I put the bit to the bottom left corner, and set the x,y,z to the bottom left corner. How does that affect my gcode I am running? I am thinking in my cam software, right now I am using Easel, which is not great. I want to setup fusion but I am not knowledable on it.
-
Yes exactly that, it’s your workpiece datum’s ? Once set you can return back to the same position over and over
-
Thank you. I'll have to figure something else out or goo with status quo. I was hoping to feed TPU direct to the toolhead, bypassing the filament sensor (which on my 2.4 is mounted at the top of the back panel, and the Bowden tubing to the toolhead. I have printed TPU successfully in my present set up, I just wanted to improve the feed path. I also use a 3mm ID Bowden and wanted to change to a 2mm ID and tighten up the allowance on the motion sensor, right now I have to use 10mm. I find that 2mm ID tubing is too restrictive for TPU. I guess that I could set a flag in the post processing script for the TPU profile, and then disable the sensors using an "If" statement in the START macro.
-
I put a GDSTIME fan in my Stealthburner about 3 years & 3500 hours ago. Still running strong.
-
Start Macro has the last say.
-
 SGT changed their profile photo
 -
I'd say 200 to 500 hours before failure. It's not because the elevated temperatures did something to the bearings, it's because I'm using a hex wrench while the fan is running. Like when trying to get to the extruder to clean out a melted filament jam. One end of hex wrench then gets in between the fan blades during a moment of inattention, a rapid unscheduled disassembly, and it's time to take everything apart and find a replacement. I was pretty mad too. Those fans weren't cheap and I did it twice. Generally speaking though, so long as you aren't testing to see which wins in a fight between plastic fan blades and metal tools, those fans are reliable and you don't need to replace them for years. If they're going to fail, it's either going to be in the first few hours or you're set for a long while. If you're going to replace them, it's mainly because they're starting to rattle and becoming very annoying. Not from outright failure.
-
The only fans I have had die were cheap ones. The old Creality Ender fans I think a few died on me, and one was a Winsinn 4010 ball bearing fan from Amazon that lasted about 18mnths. There was no blob of death though. In my experience if there isn't enough cooling the hotend will just clog. Isn't a blob of death usually caused by hotend leakage or maybe by a part detatching from the build plate and sticking to the hotend? I bought some Sunon 4010 fans 4 years ago and all still work. I still have a bunch spare because none have stopped working.
-
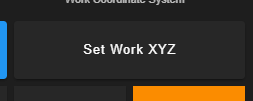
I see, I am curious about one button on the dashboard.. What does this do? Sets all three to 0,0,0? How do we use this? I usually just set the z.. then thats it.. should I be setting x and y too? how will that affect my cam/gcode?
-
I thought I would check to see if there is any sort of consistent time of failure of the toolhead fans. In this instance, I am mainly concerned with the hot end fan with constant chamber heating. I don't really know at what hours it might be good swap them out The thought process I have is; hot end fan = £5, damaged revo voron heater from blob of death = £30, potential cleanup = priceless. Are people getting 500 hours, 2,000 hours etc before failure?
-
There is never a dumb question so never apologise for that
-
As I set the initial work XYZ 0 in the centre of the workpiece the spindle can always be sent back to this initial position. I just remove the first tool fit the new tool and re zero the z axis at the initial position.
-
Well so just say you have a piece that requires 3 different bits.. You do the first one, you pull that one out.. you put a different one in, you redo the z manually? how do you ensure the x/y of where it is.. remains in proper position? sorry if this is dumb questions, I am new to this..
-
in what way?
-
-
Very cool. Im not that concerned about it right now. I have no issues doing the z.. but how do you make sure the x and y are not affected?
-
Thank you a labour of love I have recently added a proper cooling system for the spindle.


-
Recently Browsing
-
Who's Online (See full list)
-
Member Statistics
-
Our picks
-
Top Picks for FDM Printing Enthusiasts This Week on Team FDM
At Team FDM, we always keep a keen eye on what our community is buying. It’s fascinating to see which tools and materials are becoming essentials in your toolkits. This not only helps us understand your needs better but also allows us to discover new and exciting products that we might not have considered before. I wanted to share all of this with everyone in the community to get some feedback and hopefully give you insight into what is popular with others in the community!
Here’s a look at this week’s most popular items, ranked by the quantity ordered, to give you a glimpse of what fellow enthusiasts are using:
Engineer Square Machinist Square Set: A must-have for ensuring precision in every project, this tool has been a top choice for its reliability in checking the right angles on frames and parts.
iCrimp IWS-3220M Micro Connector Pin Crimping Tool: Essential for those involved in electronics within FDM printing, this tool has been widely adopted for its versatility in handling a range of wire sizes, making custom wiring setups easier than ever.
YIHUA 926 III 60W Digital Display Soldering Iron Station Kit: This comprehensive kit provides all the essentials for soldering, proving indispensable for making or repairing 3D printer parts and other electronic components.
FLASHFORGE ASA Filament 1.75mm: Known for its durability and high UV resistance, this filament is perfect for outdoor or functional prints, with the Burnt Titanium and Sparkle Sky Blue variants proving particularly popular.
WERA 05118066001 2054 Screwdriver for Hexagon Socket Screws: Precision is key in FDM printing, and this screwdriver is highly valued for its exactness in fastening and adjustments.
Arducam for Raspberry Pi Camera Module 3 12MP IMX708: A fantastic tool for integrating high-quality imaging with 3D printing setups, allowing for detailed monitoring and time-lapse creation of prints.
VISEMAN 6" Mini Needle Nose Pliers: These pliers are perfect for manipulating small and delicate parts, a frequent necessity in FDM printer maintenance.
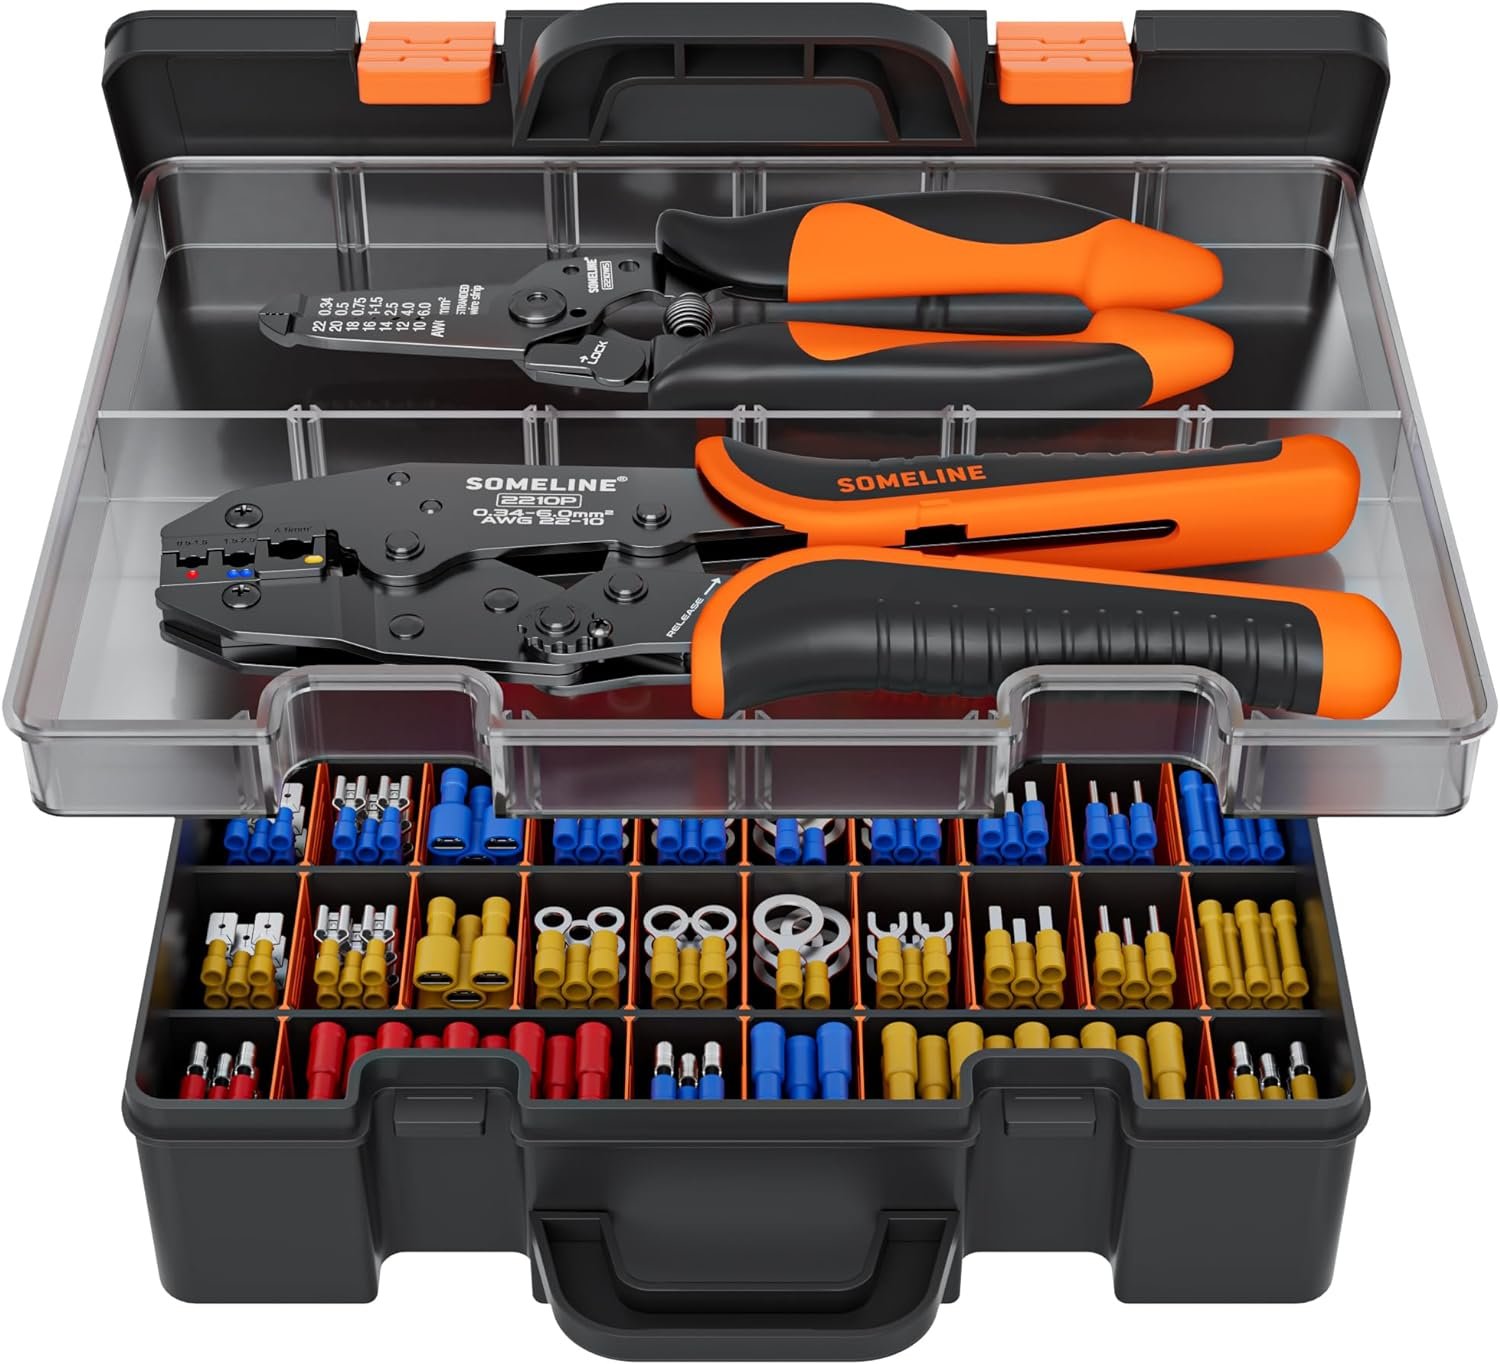
SOMELINE® Electrical Connectors Crimping Tool Kit: With a variety of connectors included, this kit is essential for anyone needing to manage electrical connections safely and efficiently.
Nano Polymer Adhesive (120ml): This adhesion solution is becoming increasingly essential for achieving perfect first layers in 3D prints, minimizing warping and adhesion issues.
By tracking these purchases, we not only cater better to your needs but also occasionally stumble upon gems that might have otherwise gone unnoticed. Each product here has been chosen for its proven utility and popularity within our community. Whether you're upgrading, replacing, or just starting, these tools are sure to enhance your 3D printing experience.
-
-
- 5 replies
-
-
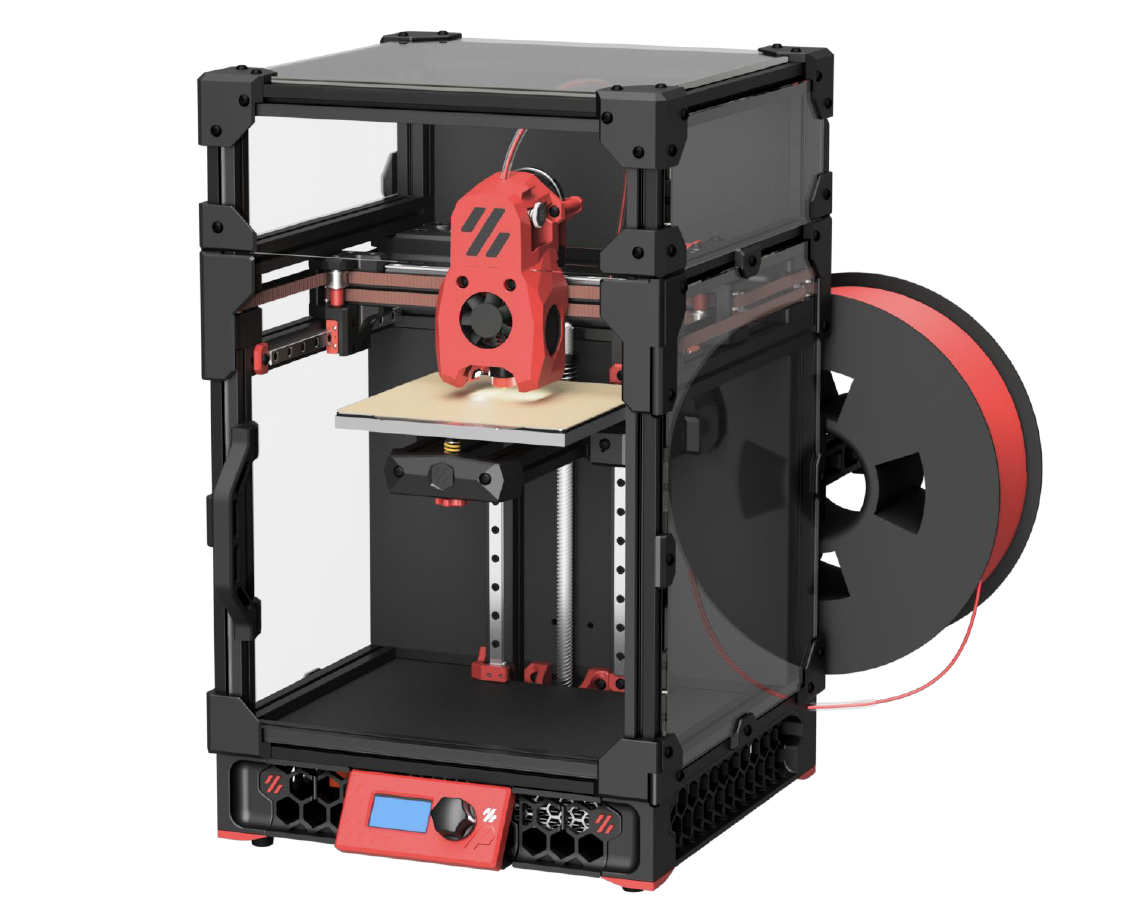
New Voron 0.2 Release
Voron Design just announced the official release of the Voron 0.2 3D printer. This compact and portable machine has a 120x120x120 build volume and utilizes a CoreXY design. It features a low mass direct drive extruder and an enclosed chamber, as well as a 24v DC bed and Klipper firmware.
One of the major highlights of the Voron 0.2 is the new Mini Stealth Burner toolhead, which supports the Revo VORON, Dragon, Dragonfly BMO, DropEffect XG, and Creality Spider Pro. The drive units have also been updated with a reduction in motor screw count and the removal of the endstop for sensorless homing.
In terms of the frame, there have been no changes from the previous version. However, the tophat has undergone some significant updates, including an extrusion-based design with hinged panels and cam locks to secure it in place. All panels are 3mm thick and the side panels are now identical.
The X/Y joints have also been modified, with the tops becoming 1mm smaller to accommodate the Mini Stealth Burner and the endstop block removed for sensorless homing. The bed assembly has undergone some changes as well, with the printed parts being updated and the bed position moved 3mm to the rear.
Finally, the feet/skirts have been updated with the inclusion of the Trident skirt community mod, and the front idlers now have cam locks added.
If you are upgrading from the V0.1 version, be sure to check out the configurator on the Voron Design website for a list of necessary parts.
We hope you enjoy the new and improved Voron 0.2 3D printer!
-
- 8 replies
-
-
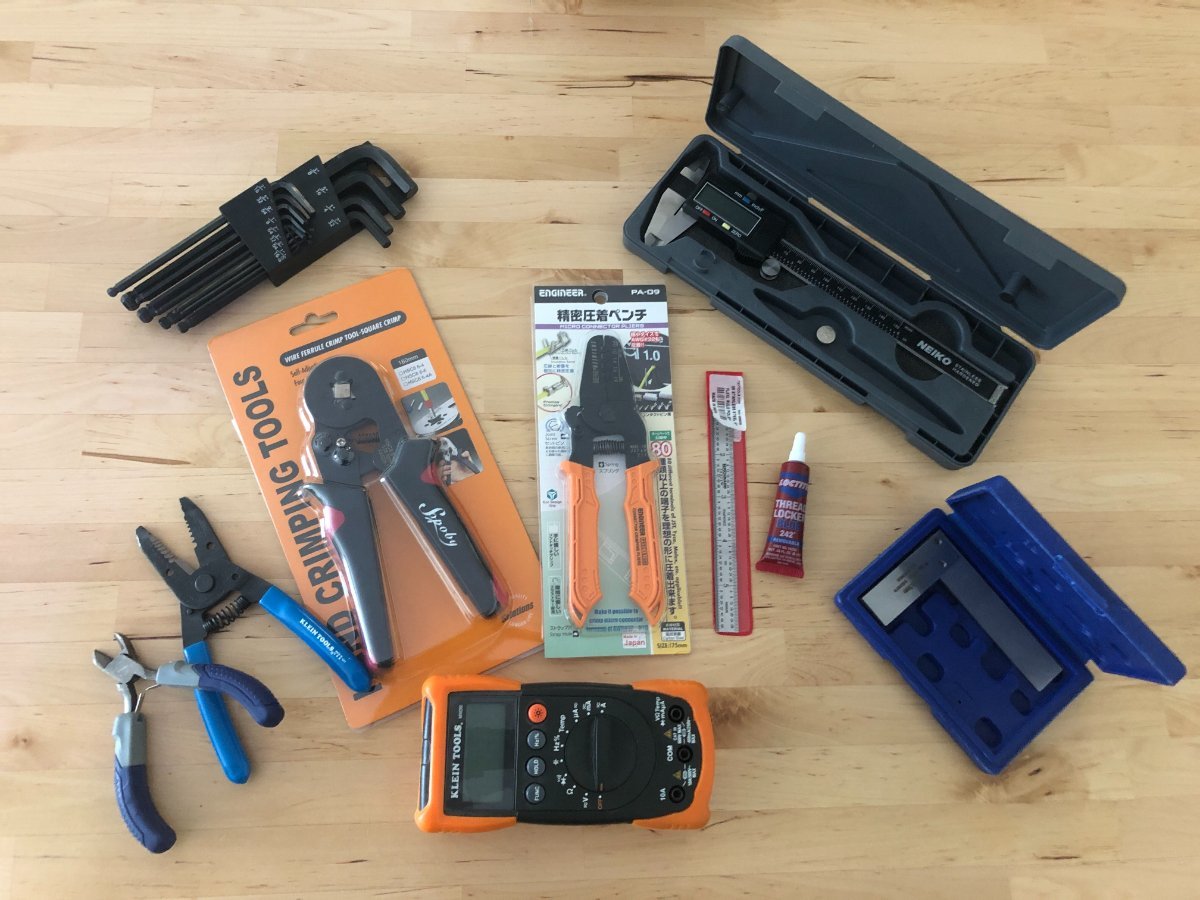
Voron Build Tools Mega-List - 2024 Edition
Researching, purchasing the printer parts of the build list and waiting for parts is only half of the battle. While many Voron builders have many of these tools on hand, and we hop most have familiarity with soldering, there are some tools that make the job MUCH easier, safer, and provide professional quality results.
This is the Mega List for all the recommended or required tools for your Voron build.
First and foremost, crimper are really important for your Voron build. With the amount of wiring required, you will thank yourself to invest in high quality crimping tools. Frequently users ask if tinning and soldering joints is an alternate option. While it may work short term, this is a much greater risk of the joint failing. Typically this is due to the stress of movement, or weakening from the heat created inside the enclosure and around the hot-end during printing.
-
-
- 83 replies
-
-
Voron Kit Recommended "Suppliers"
This post will be continually updated with the latest and great known information regarding available Voron "Kits". As, clearly defined in any communications, The Official Voron Design does not recommend or prefer any of these vendors. The list here is only identified as those vendors who have been identified as successful builds and full kits that are available.
Purchase kits at your own risk, knowing that parts can change, often times for the worse, and as is true with my Chinese parts, Meanwell PSU labelled as such, does not mean it's a legitimate Meanwell PSU, same thing with other popular components (like Gates belts) and fasteners.
While these are not in any specific quality order, they are in order of popularity and availability.
Note: for best results order from AliExpress from user who have the MOST sales - likely they are the best sourced Kits with the fewest flaws.
Additionally, and perhaps most importantly for this thread - Yes, sourcing your own parts will increase your build quality, and verify proper function and fitment. This thread is NOT a discussion on pro's and cons of sourcing parts vs buying kits 😃. Let' try our best to stay on topic!
Voron 0
Formbot - AliExpress
Voron 1.8
MagicStudio - Direct Website
Voron 2.4
Formbot - AliExpress <- Most Common 2.4 AliExpress Kit
Fystec - AliExpress (Pre-Order)
DigiMach - https://store.digmach.com/collections/voron-kits
Voron SwitchWire
Formbot - AliExpress
Voron Legacy
Funssor - AliExpress
If you have any direct experience or would like to suggest another kit for this list please respond in the thread and the thread will be updated!
-
-
- 37 replies
-
-