Jump to content

Search the Community

Showing results for tags 'neopixel'.

  • Search By Tags

    Type tags separated by commas.
  • Search By Author

Content Type


Forums

  • TeamFDM
    • Site Updates and Announcements
    • Frequently Asked Questions
    • General Discussion
    • Voron User Mods
    • Filaments
    • Build Diaries
    • Introductions
    • Tutorials
  • Voron Build Support
    • Voron 0
    • Voron Trident
    • Voron 2
    • Voron Legacy
    • Voron Extruders
    • Voron Electronics
    • Slicers and Print Troubleshooting
  • Other FDM Printers
    • Ender 3 / Ender 3 Pro
    • Anet A8 / AM8
    • Prusa
    • Generic / Other
  • Marketplace
    • The Bazaar
  • Vendors
    • KB-3D
    • Voron Printed Parts Co.
    • Fabreeko
  • Off-Topic
    • Random
    • TeamFDM Member's Creative Collection

Categories

  • Non Printable Files
  • Printable Voron User Mods
  • Manuals and PDF Guides
  • Creative Collection
  • Tools and Calibration
  • Official Voron Releases

Categories

  • User Mod Installs
  • Build Techniques
  • Programming
  • Team FDM Site Tutorials
  • CAD / Fusion 360 Tutorials

Blogs

  • Voron General
  • Why we are the best digital marketing services in Chennai

Find results in...

Find results that contain...


Date Created

  • Start

    End


Last Updated

  • Start

    End


Filter by number of...

Joined

  • Start

    End


Group


About Me


Voron Serial #1


Voron Serial #2


Voron Serial #3


Voron Serial #4


Voron Serial #5


Voron Serial #6


Voron Serial #7

Found 1 result

  1. Version 1.0.0

    105 downloads

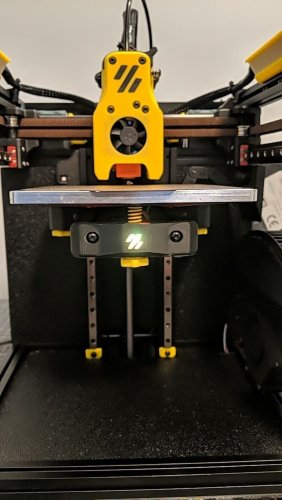
    This replaces the stock V0.1 Front Bed Mount, adding a slot for a single Neopixel or Dotstar LED from a standard 10mm strip. There are channels to run the wires stealthily to inside of the bed frame extrusions on either side. Instructions Print Diffuser_x1 with 100% infill using a transparent or white ABS, textured build surface is a bonus. Print Front_Bed_Mount_x1 using standard Voron print settings cut a single Neopixel or Dotstar LED from a 10mm strip, and 3 (or 4 for Dotstar) equal lengths of wire, long enough to reach from the front bed mount, under the bed, through the cable chain and all the way to your mainboard. insert the LED into the slot on the front of the bed mount, and route the wires through one or both of the channels insert the diffuser in the slot in front of the LED, ensure a good friction fit. if necessary, print the diffuser slightly thicker or thinner by scaling it in your slicer. Install the new Bed mount, making sure the wires are not pinched by the extrusions, they should run directly into the slot, you can use zip ties to secure it. route the wires through the cable chain, and around to wherever your mainboard is mounted. mainboard connections and klipper configuration are left as an exercise to the reader.
×
×
  • Create New...