Description
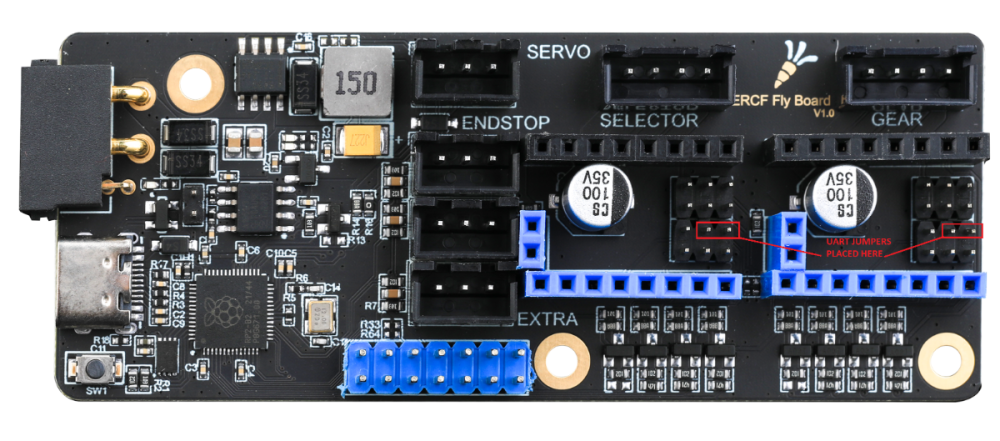
Initial setup of UART Jumpers on the ERCF Fly Board v1.1
Make sure that you install the jumpers as shown below or you will run into issues further down the line.
Flashing klipper to the Mellow ERCF Fly Board v1.1 to use a USB connection.
SSH into the Raspberry Pi
On the Flyboard hold down the SW1 button and attach USB cable to Raspberry Pi (or other micro board) then let go of reset button.
Type
lsusb
Look for ‘ID 2e8a:0003 Raspberry Pi RP2 Boot’ in the list of devices. If it is not present repeat the process.
When you have confirmed that ‘ID 2e8a:0003 Raspberry Pi RP2 Boot’ do the following:
cd ~/klipper
make menuconfig
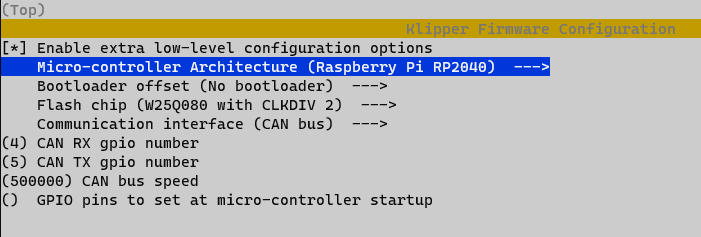
Select the following options for a ‘USB’ (not CAN) connection to your printer. Make sure enable extra low-level options is selected.

Exit & save
make -j4                			   #This will compile the firmware for the ERCF Fly Board v1.1
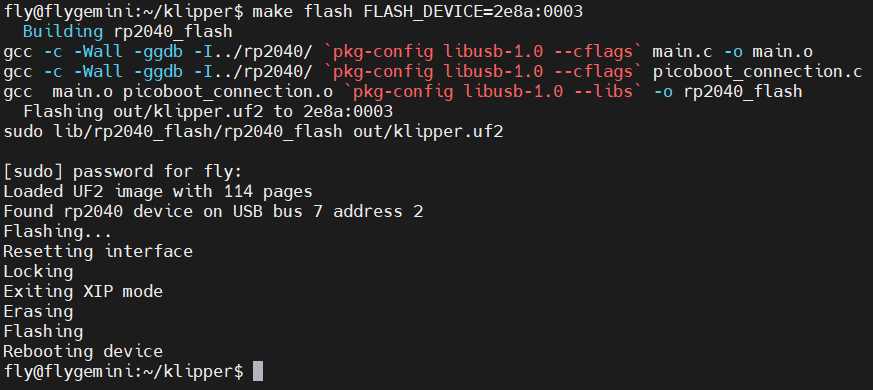
make flash FLASH_DEVICE=2e8a:0003		      #This will flash Klipper to the ERCF Fly Board v1.1
If successful it should look like the image below:

Disconnect and reconnect the ERCF Fly Board v1.1 USB connection from your Raspberry Pi and reboot your Printers Host
You can then move onto installing ERCF-Software-V3 "Happy Hare" by moggieuk
Instructions here: moggieuk/ERCF-Software-V3: New software driver for ERCF control under Klipper (github.com)
If your flashing was successful, you will be able to use the ‘Fystec ERB Burrows Board’ option throughout the install as it will detect the ‘Raspberry RP2040’ mcu.
Use gpio(then the corresponding pin number) in your ercfhardware.cfg
e.g.
gpio20 for the endstop  (P20)
&
gpio7 for the STEP pin on gear stepper (GPIO7)

Note: adding a ‘!’ before gpio will change the movement direction.
Hopefully that will help someone!


Recommended Comments
Join the conversation
You can post now and register later. If you have an account, sign in now to post with your account.