Description
So... just an small introduction. I´ll skip the phisics and the electronics of it as I´m not a reliable source and will hit the practical bit.
This post will be of use if you want to check the actual reading of your thermistors (fairly irrelevant) or if you want to reliably swap printers with the same material profile(for us geeks with 3 or 4 printers, much more relevant).
To do that, you´ll need an external thermocouple reader and two thermocouples.
I´ll show you what I use, and I'll also show you what to use to get the same results on the budget side.
1st you need two K-type thermocouples. First a 1.5mm probe with about 20cm of lenhgt, and second a "pinpoint" style probe.
Quality and precision are not a thing. You don´t need it. Don´t go to RS instruments to buy the most expensive probe you find (somewhere around 100quid) a 5 euros amazon special will do. Why? because you don´t ultimately care about the actual temperatures, but what you need is a constant and repetitive source.
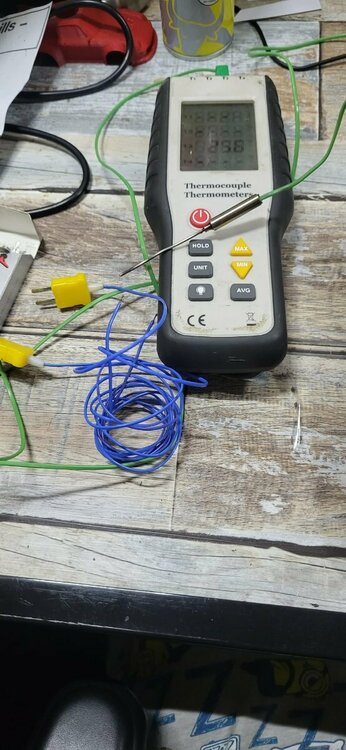
In this picture you can see the probe(green lead), the thermocouple reader and the pinpoint thermocouples(blue leads with a dotty end).
You will use the probe for the hot end, and the pinpoints with aluminium/foil tape for the Bed.
Start with your known and reliable printer (or the one that has the profile that works) and find the way to wire it like this:
For the hot end, you may want to pre-heat it as you will have to push the last bit of filament down with the probe till the probe is stuck at the tip of the nozzle.
In some hot ends is easier to drop the heatbreak and do the temperature checks OFF the hot end... (in my biqus for example)
In some Voron Hot ends that may be an absolute pain and maybe would be a good idea for you to do so before you close your hot end during the build.
Now the results:
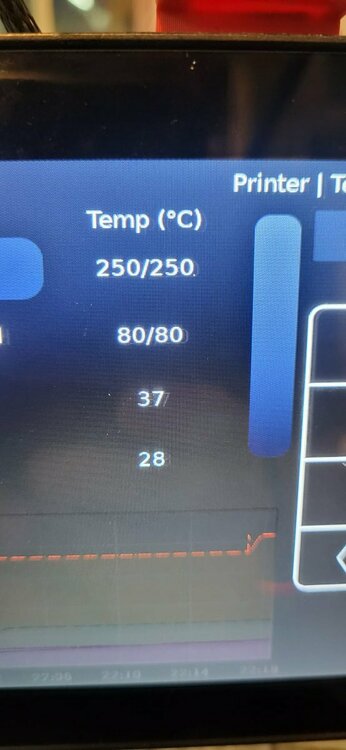
Channel 1, Bed. Target 80 reading 69.3
Channel 2, hot end. Target 250. Reading 239.
The reading in the hot end, is for example the same I was expecting, In all of my printers (but in the one running duet) I have a 10 degrees drop above 200 degrees at the hot en as I use the same chinese shit thermistors with SKR boards. However the one running a duet board reads SPOT ON, so that printer has all her profiles dropped by 10 degrees.
In the bed, honestly I would expect to see a perfect reading, and on the PEI sheet I do after some soaking(+/- 2 or 3 degrees max), but on the glass bed, with the magnetic layer in the middle, I lose about 10 degrees for each 70... so, when I´m at 110 degrees, my actual reading is like 95. So all my profiles for glass printing have been bumped accordingly.
Is a good practice to check if your error is linear or constant.
In the case of my hot ends the error is constant and is due the poor calibration (and the wrong use) of 100K thermistors. Ideally they should not be use outside of its operational range of precision (somewhere between zero and 80 degrees), but they are cheap and considered to be "sufficient" for the application.
In the case of my bed, the drop is linear rather than constant. Is a function of some thermal equation that "X" amount of heat is lost between the plate and the glass. The most heat you apply the greater will be the loss. So you will have to manually bump the bed to different temperatures, let it stabilise and check what is the actual value. Once you get 3 or 4 points, you can pretty much guesstimate the error at any temperature plotting it in excel.
Now, go to your other printer, repeat and compare results. Finally adjust your profile for the target printer with the bumps or drops on temperature you´ve observed.
There is a way to "manually" tweak the thermistors for them to read what you want. IE, if a printer is WAY off (30 or 40 degrees) you can change the beta tables and with a bit of trial error you´ll get there(in rrf at least, not sure in klipper). However, is normally easier to just scrap that thermistor and get another one that reads closer to the truth.
Oh. The budget option. Yeah, instead of buying the all professional multi reader for K thermocouples (not that expensive... south of 40 quid IIRC), you can buy actual K thermocouple thermometers for 5 quid in ebay/amazon/alichinese
Even will come with the actual Dotted thermocouple so you´ll only have to buy the probe.


Recommended Comments
Join the conversation
You can post now and register later. If you have an account, sign in now to post with your account.