Search the Community
Showing results for tags 'QuackProfit'.
Found 1 result
-

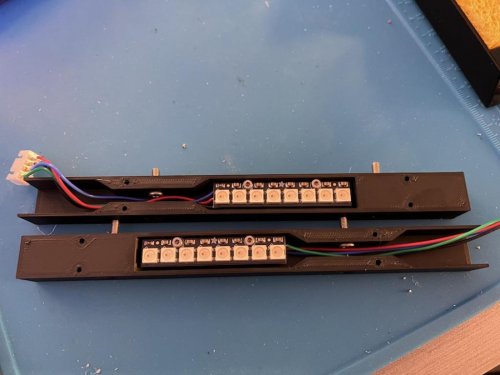
Version 2021.08.04
44 downloads
Mount Adafruit NeoPixel Sticks on the V0 Y-rail Extrusions Add controllable RGB(W) LEDs to your V0 No heatset inserts required Compatible with NeoPixel Sticks from Adafruit Large cavity inside the body makes wire management easier Light guides prevent LEDs from blinding you Designed with Timmit99's V0 Umbilical in mind (not required) _Inspired by the mod from JNP_ BOM Printed parts (2) Adafruit NeoPixel Stick (8) M2x6 flat head - to mount covers (4) M2x8 SHCS/BHCS - to mount the PCBs (4) M3x6 SHCS/BHCS - to mount the assemblies to the Y-rail extrusions (4) M3 nuts - to mount the assemblies to the Y-rail extrusions (2) JST-XH connector plug 4-position - to allow for easy disconnection (optional) 22awg wire Assembly Solder wires of appropriate length onto the back of each PCB (VDC, GND, DIN, and DOUT) If using JST-XH as disconnects, solder the other ends of the wires to 4-position (male) connectors - the connector should fit inside the body cavity once assembled Mount the PCBs inside the printed bodies using M2x8s Don't install the printed covers at this stage Installation Insert 2x M3 nuts on the bottom side of each Y-rail extrusion - requires partial frame disassembly if already assembled For the wire path, you have two choices: Drill 1/4