

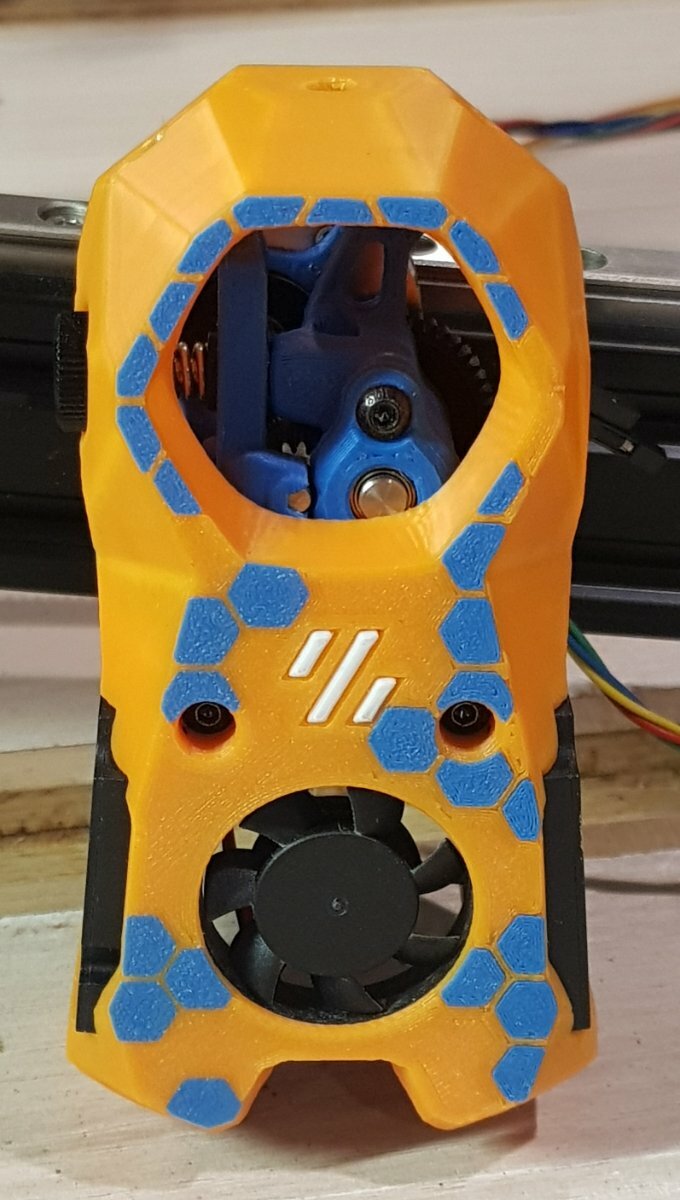
Adding the hex pattern to the face of the shroud is rather straightforward using the tools built into Prusa and Super Slicer. This process could be applied to any accent pattern and could even be extended to non-overlapping multi color patterns. The hex pattern I have uploaded will fit any of the non-stretched Mini Stealth shrouds.
This method can also be extended to apply the Crop-Top mod to any of the shrouds. I have added more details at the bottom of this page.
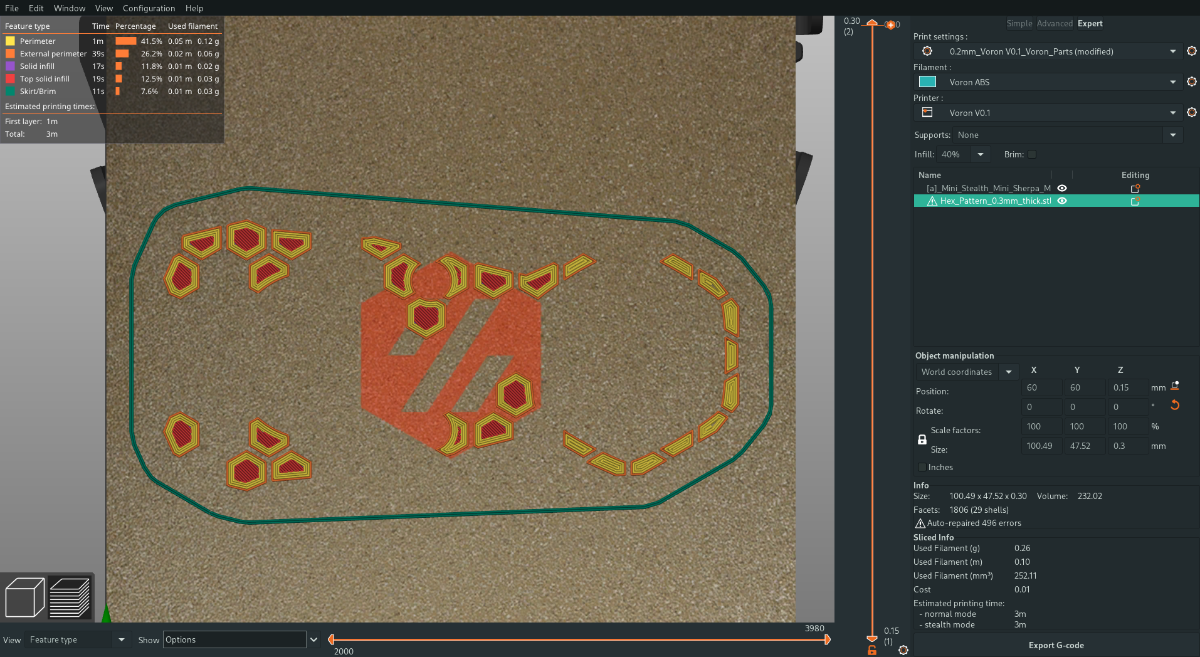
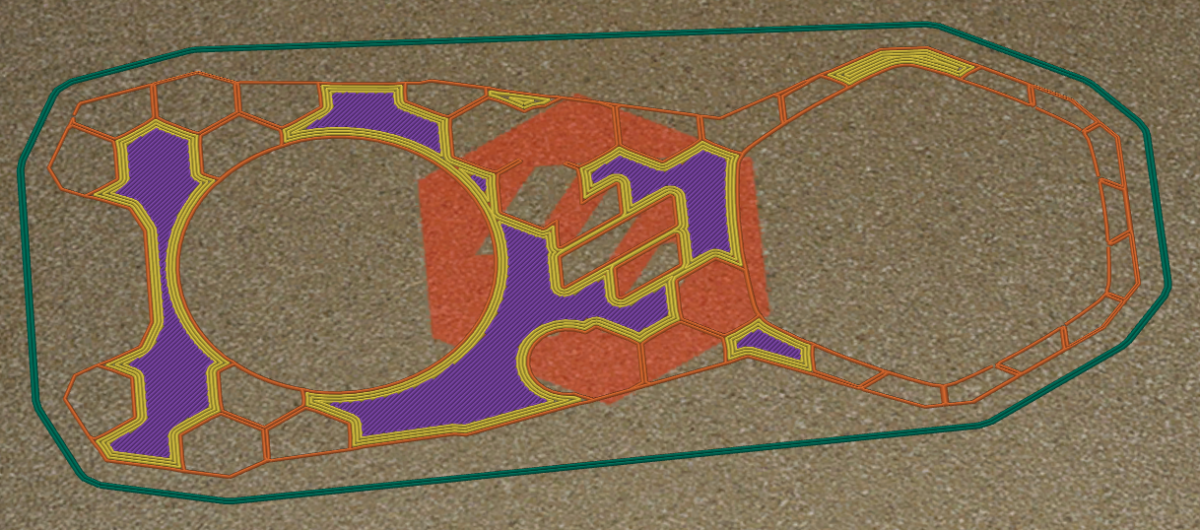
The first step is to import the pattern .stl file. It can be printed in two 0.15mm layers or a single 0.3mm layer, this depends on how well tuned of a first layer your printer can manage. Taking the time to tune the first layer squish will greatly improve your results.
Use the Object Manipulation coordinates to place the pattern in a known location (in this case x60 y60) and rotation. Make sure that the location will not interfere with homing when printing the shroud. If using a skirt, set the pattern skirt to be further away from the object so that the shroud skirt can fit inside or you may need to remove it when changing colors before printing the shroud.
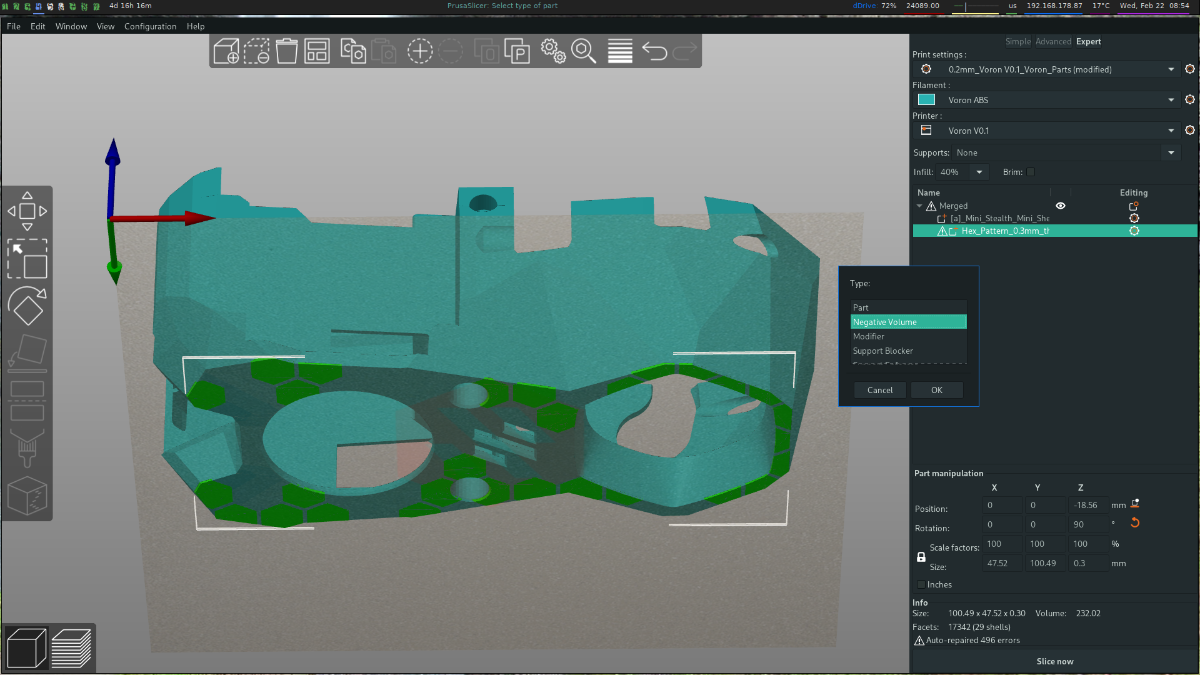
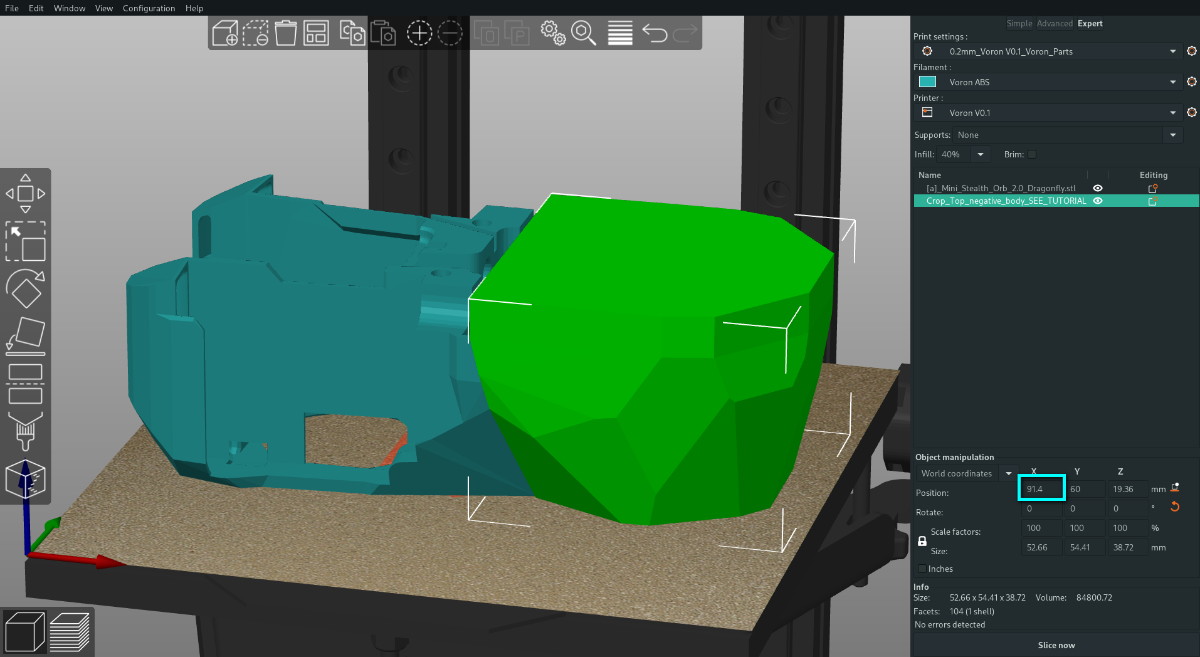
After slicing and exporting the gcode you can add the shroud .stl. Use the Object Manipulation coordinates to place it at the same coordinates and rotation as the pattern before (in this case x60 y60). Then control->select both parts on the plate. Right click on the shroud and select the Merge option.
After they are merged, right click on the hex_pattern in the tree and select the Change Type option. In the popup menu select Negative Volume and then click OK. The symbol will change to a minus sign.
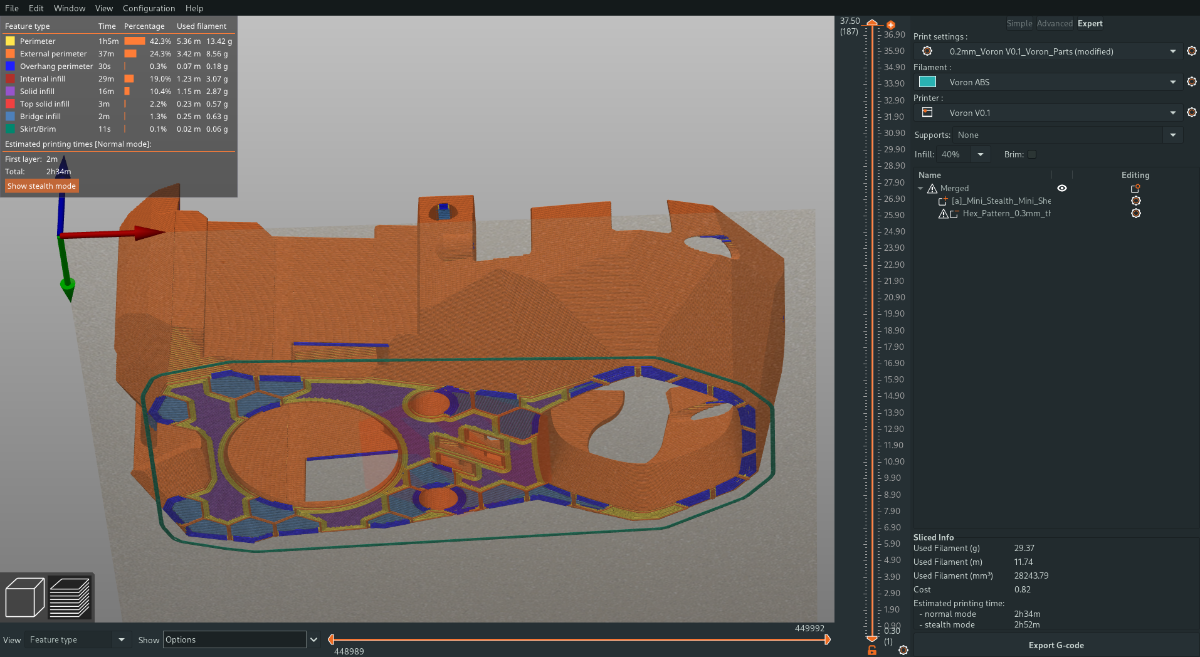
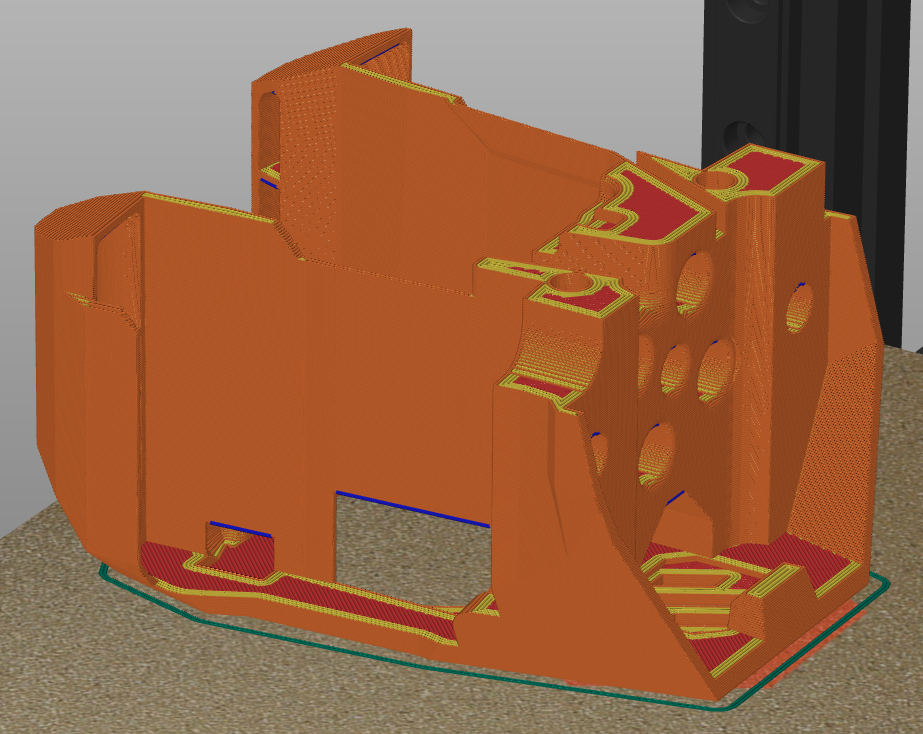
If used, change the skirt offset to be smaller than with the pattern. Set the first layer height to be 0.3mm and the rest based on your preferences (0.2mm is the designed layer height).
After exporting the gcode, it is time to make sure there aren't any conflicts between the two files. If the PRINT_END routine clears your bed mesh, you should comment this out for the pattern .gcode. You could also comment out turning off the bed heater but as the pattern only takes a few minutes to print it is easier to just be ready near the printer.
In the shroud .gcode file it might be easiest to remove the PRINT_START call and replace it with the standard home, heat_bed and heat_nozzle commands. On my V0.1 I was fortunate and the only thing I had to change was my Z home probe location. Some people have made a specific PRINT_START_PATTERN macro to make the process more reliable.
I have added a second hex pattern that allows a thin primary color border around the accent but this makes the first layer of the shroud a little trickier to print.
Crop-Top mod
This will allow you to trim off the top decorative section of the shroud which makes the installation more straightforward while saving around 6.5 grams of filament.
The process is the same as described above but the negative body will need to be moved up by 31.4mm to perform an accurate cut. If using one of the stretched toolheads you can adjust this until the removal body lines up with the valley feature of the shroud.
Then merge the two bodies, change the Crop-Top to a Negative Body and slice with your preferences.
There are no comments to display.