


-
 1
1
About This File
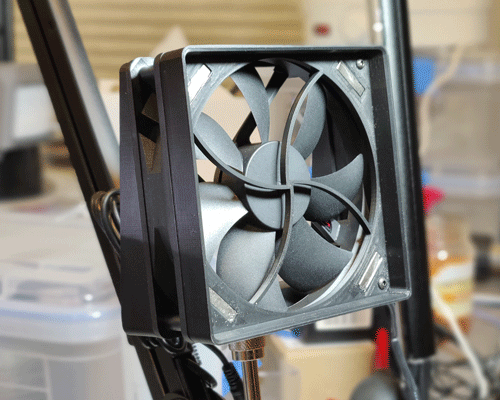
I have a small work space and a lot of crap. I got tired of doing the safety squint version of avoiding breathing soldering fumes so I wanted a fume extractor. I don't have room for a real fume extractor and I don't really do that much soldering, so wanted something that could be folded out of the way when not in use and not take up any desk space. An arm-mounted fume fan that pulls fumes through an activated charcoal filter seemed like a good solution so that's what I built:
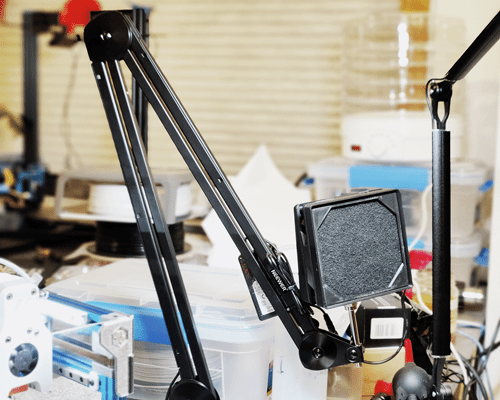
Yes there are versions of it available on amazon, but I wasn't happy with them so I bought an extra long flex arm and a 120mm fan with a variable speed controller. Of course I make no guarantees that this is fit for any purpose including protecting your health, you're on your own there. I'm pretty happy with how this turned out though. It keeps the fumes out of my face and folds out of the way when out of use. I hope you find it useful.
BOM
- flex arm with 5/8" mounting bolt at the end
- 120mm x 120mm x25mm fan with power supply
- 8x neodymium magnets, rectangular 20mm x 5mm x 1mm
- 5/8" hex bolt
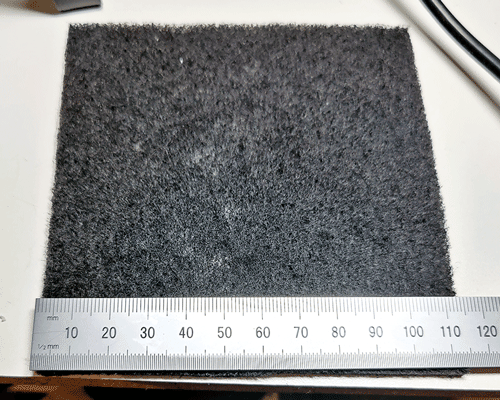
- activated charcoal filter
- 4x m3x35mm BHCS
- 4x m3 4.5mm x 4mm threaded inserts (voron standard ones are 5mm in diameter, these are from adafruit)
Printed Parts
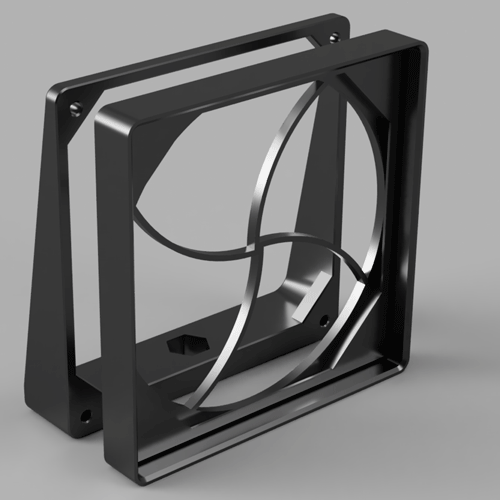
There are three printed components
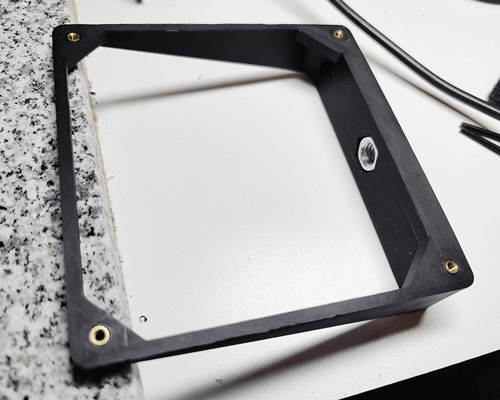
- The screw mount that attaches the whole assembly to the arm
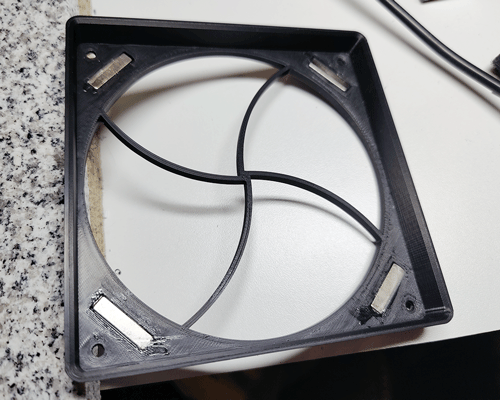
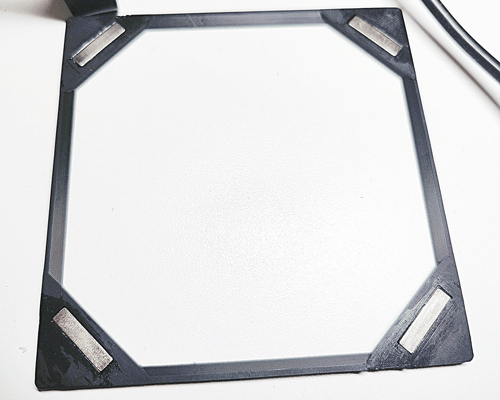
- The filter holder that holds the filter and is the front half of the sandwich around the fan
- The filter retainer that keeps the filter in with the power of magnets
Assembly
It's a pretty straight forward build that you can probably figure out, but here's the main steps:
1) Add the heat-set inserts into the four corner holes in the screw mount, and insert the 5/8" hex nut.
2) Glue the magnets in to the recesses of the filter holder and filter retainer parts. It's a good idea to set all the magnets in the filter holder to one polarity and all the magnets in the filter retainer to the opposite polarity.
3) Cut a roughly 115mm square piece of filter material of your choice
4) After the glue/epoxy is set use the m3x35 screws to pass through the filter holder, 120mm fan, and into the inserts in the mount.
5) Insert the filter and then use the filter retainer to hold it in.
Notes
The flex arm I got has a channel so the cord could be concealed inside the arm itself to keep it out of the way. It's a nice feature I suggest you look for.
The fan I got supposedly goes up to 2700rpm and is super quiet even at full speed so I'm not sure the speed control is necessary.
