Search the Community
Showing results for tags 'formbot'.
Found 21 results
-
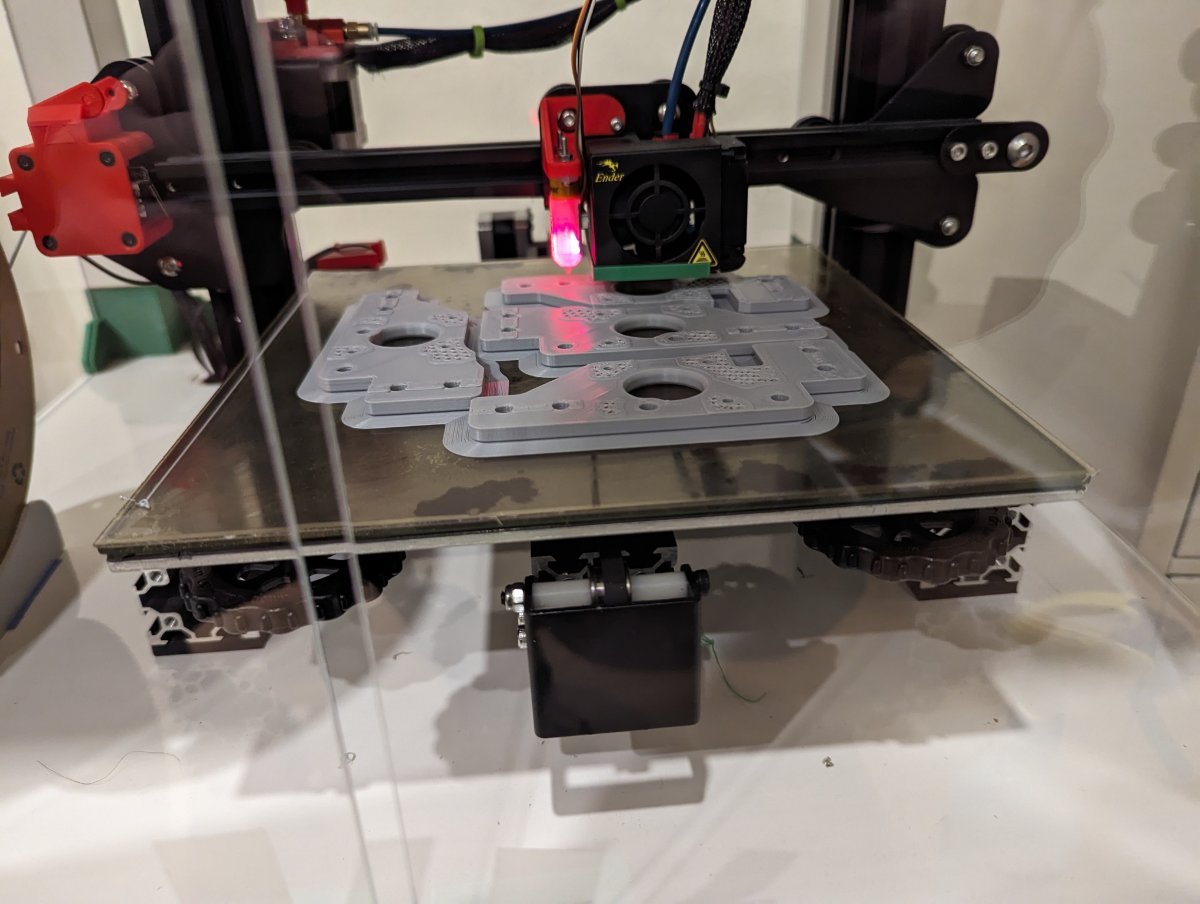
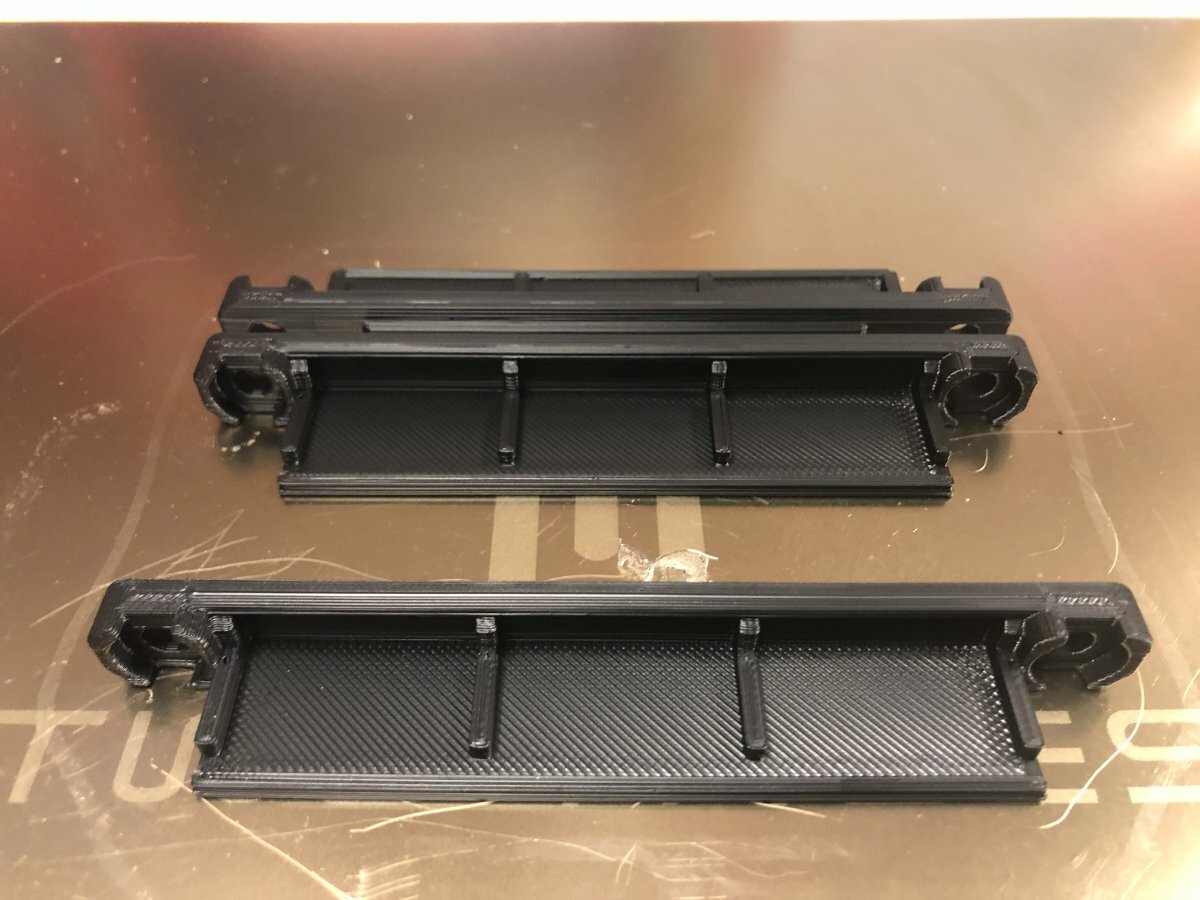
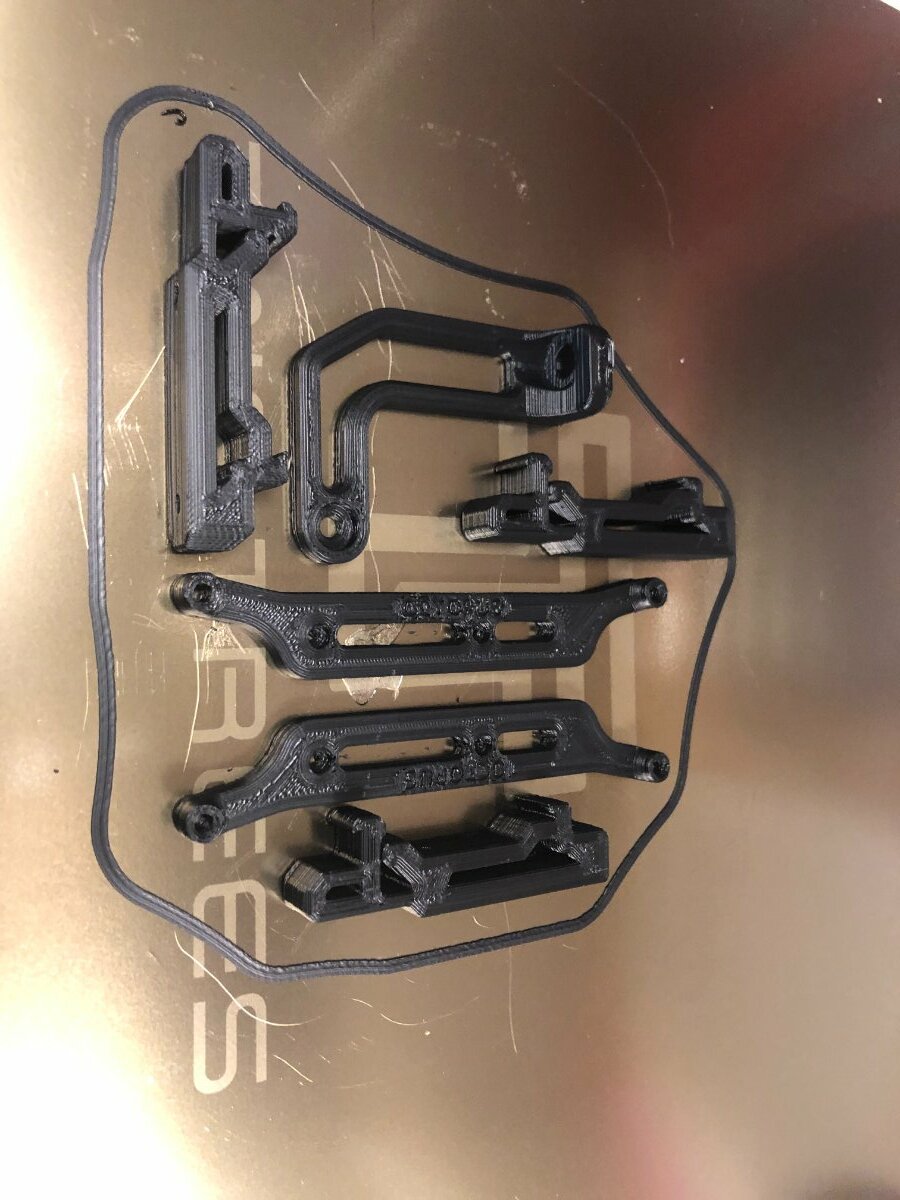
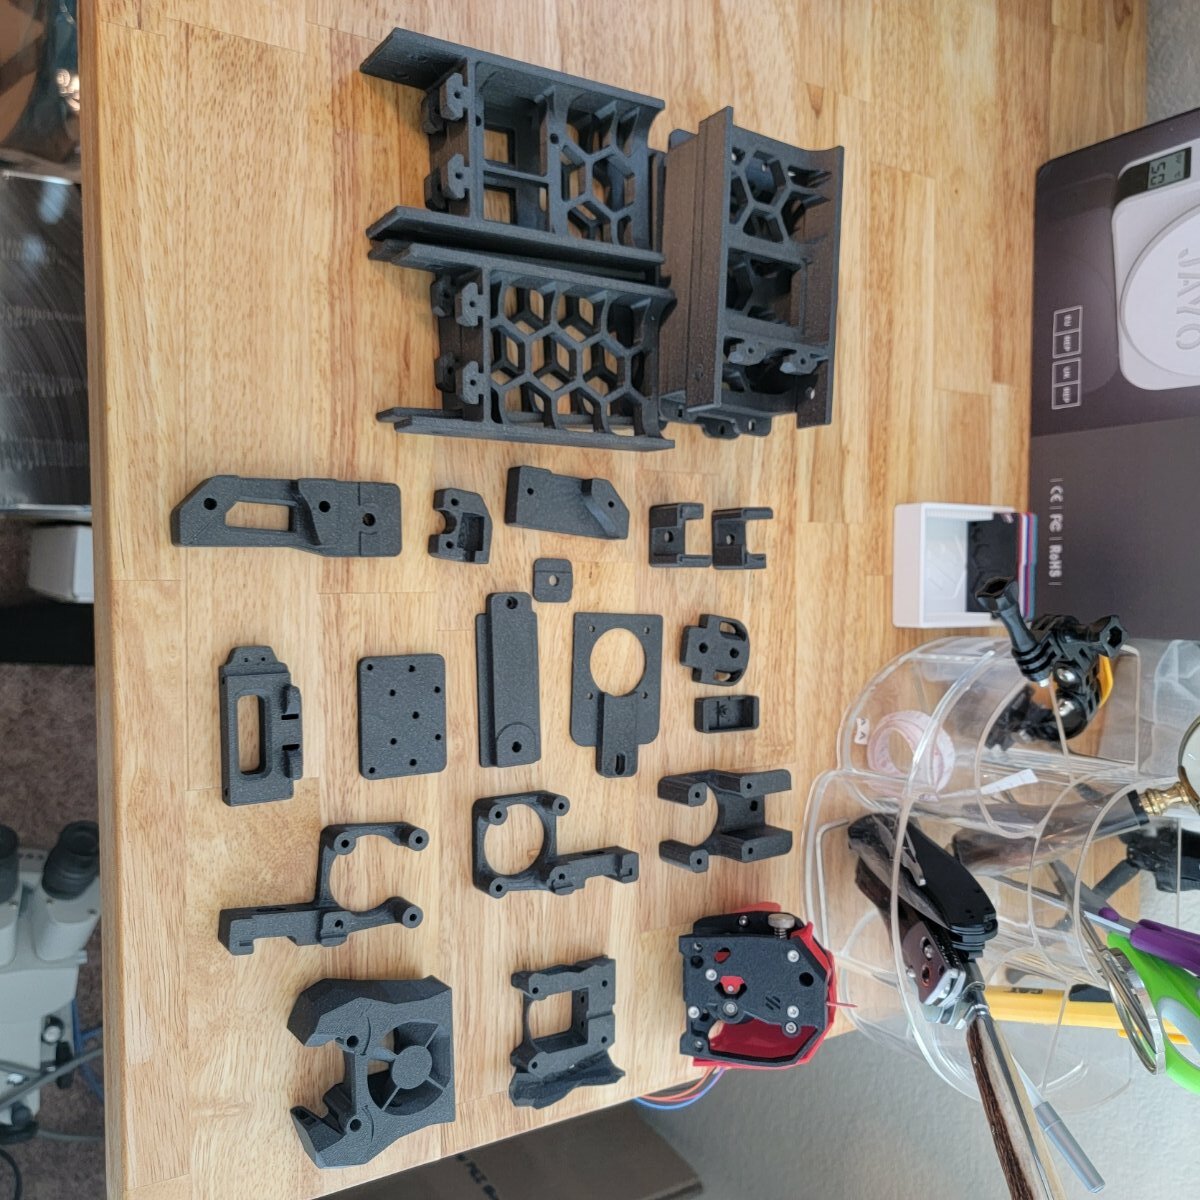
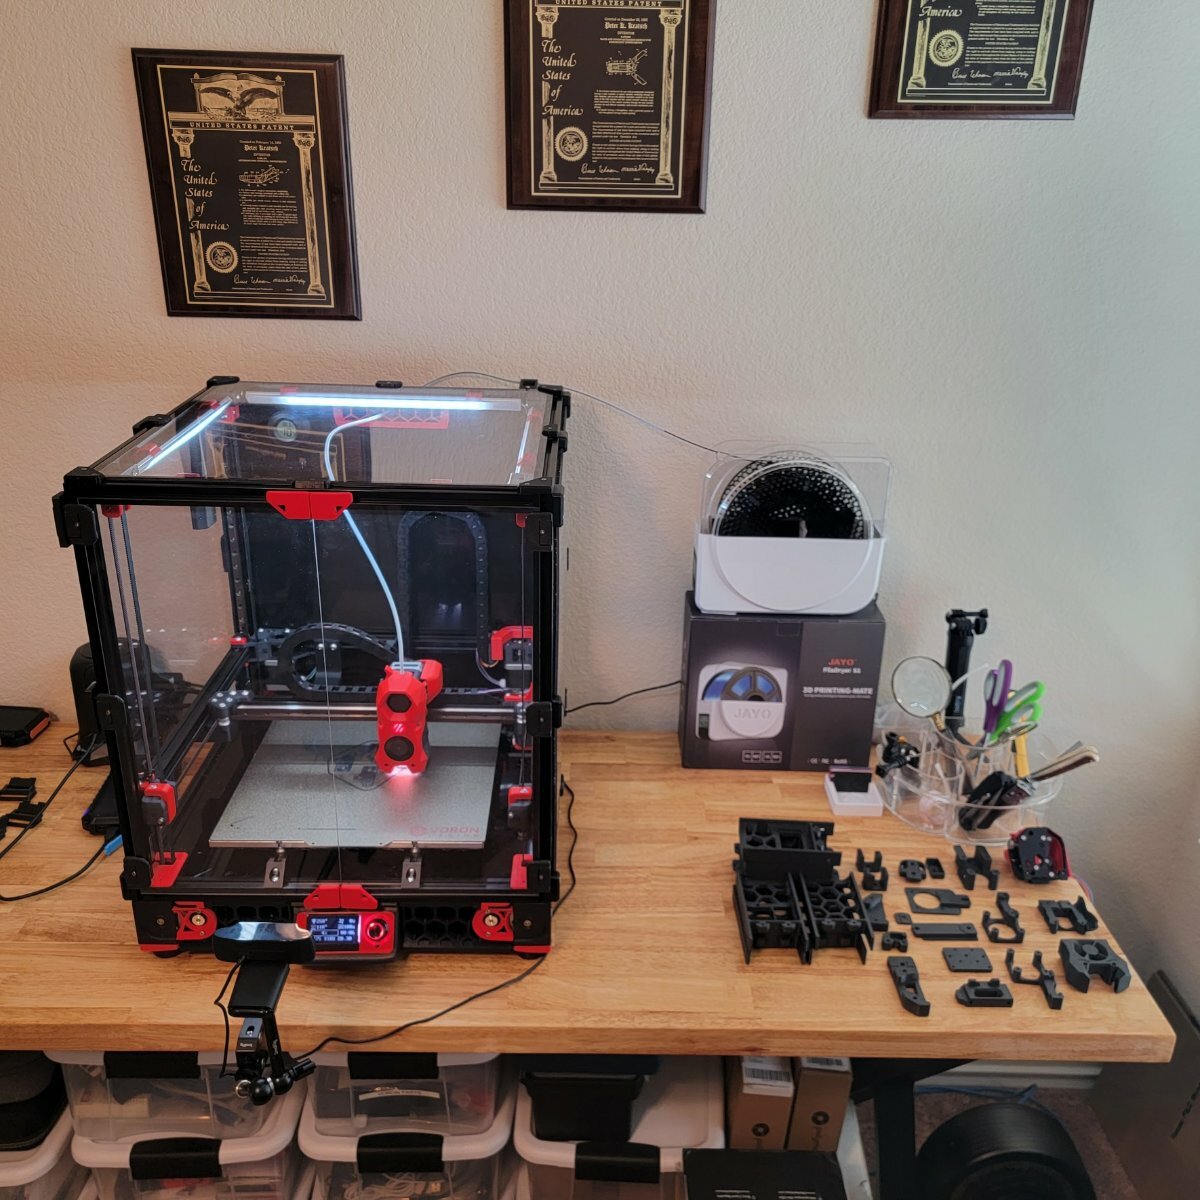
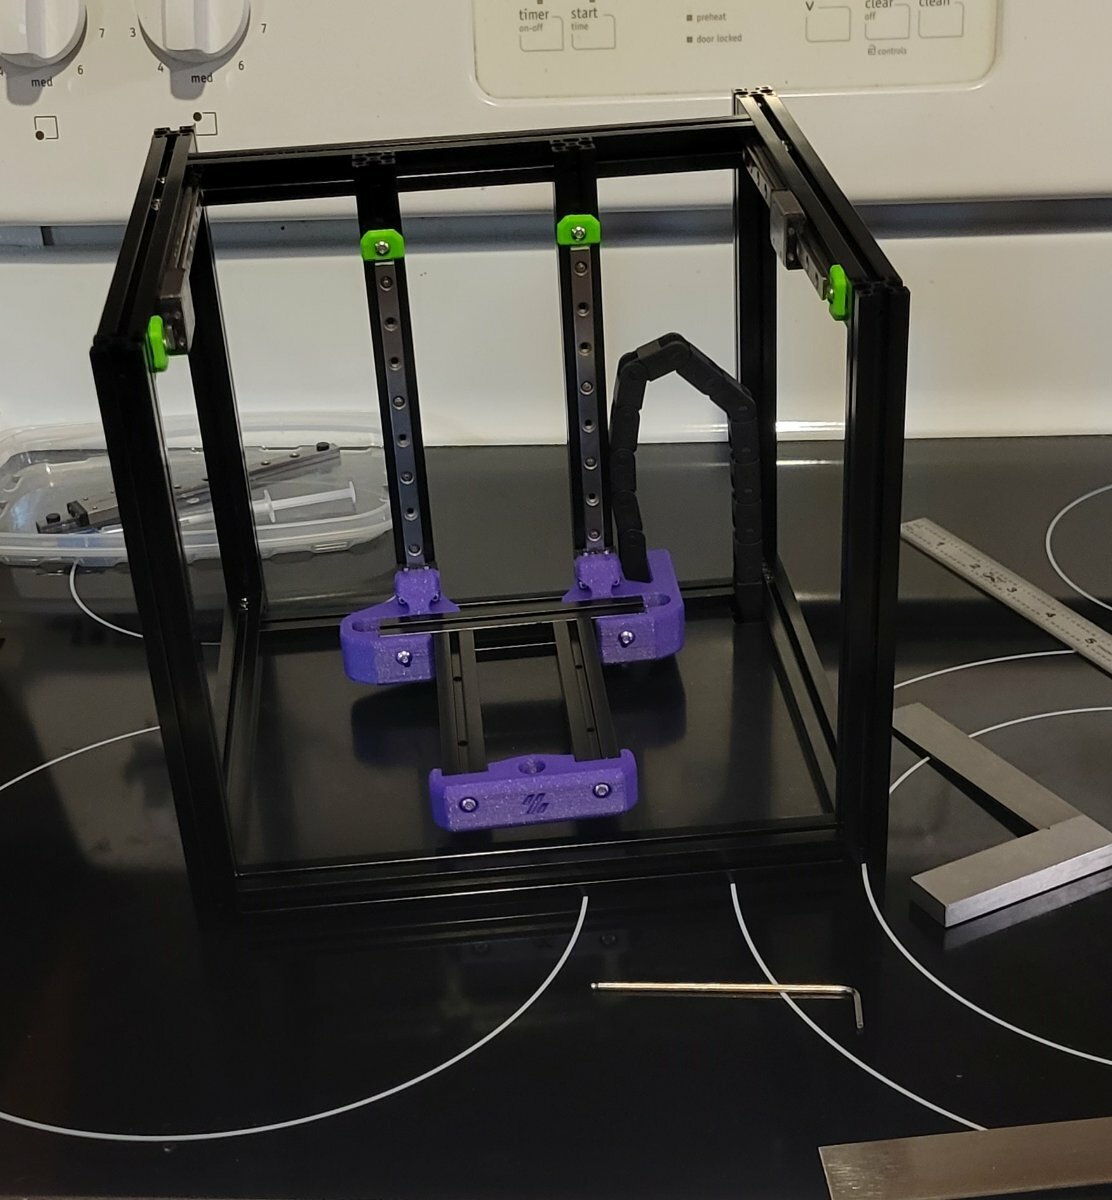
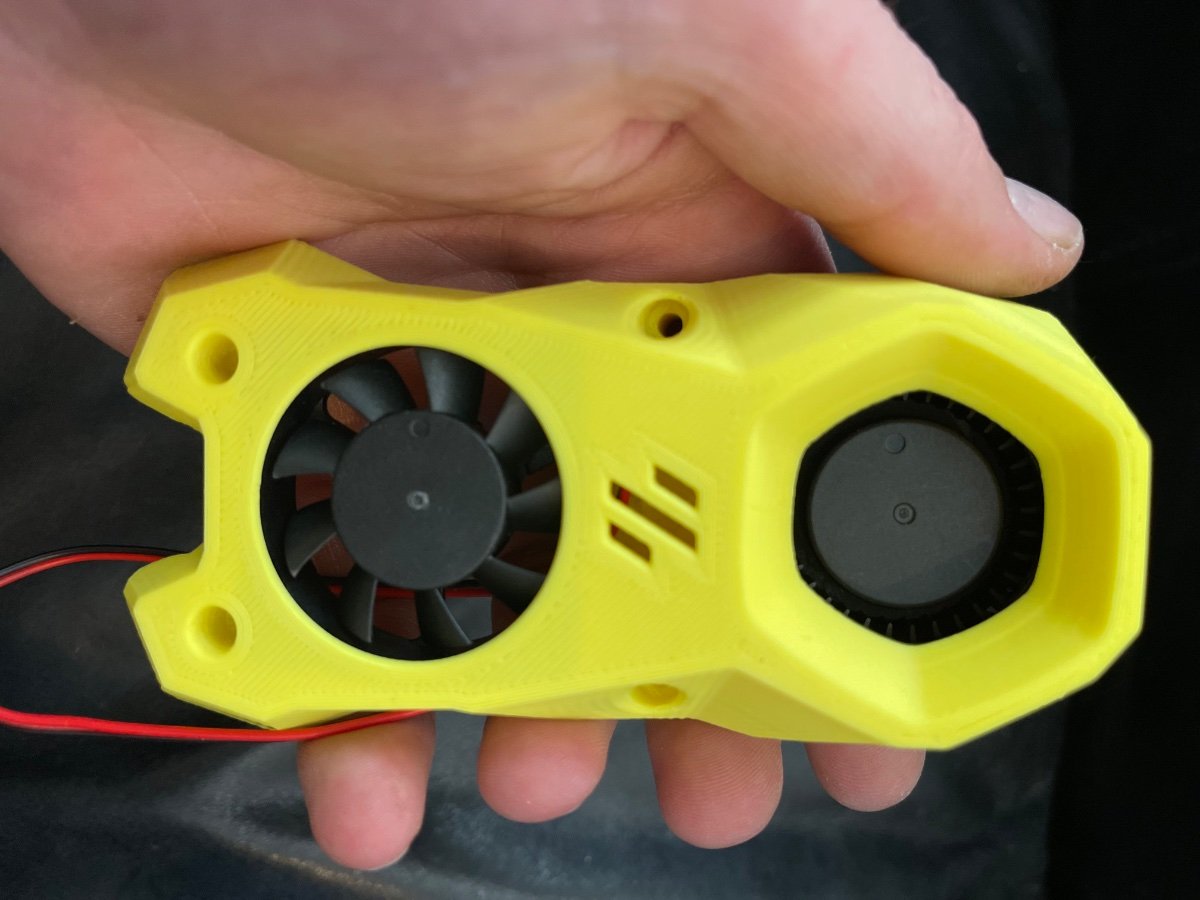
Took a while of debating myself: V0 "cheaper" entry and smol, V2 popular but Trident seemed underrepresented. Really it was mostly everyone saying Trident is a bit easier as the first Voron, and I can always build the others later on. So I ordered my Trident 350 formbot kit yesterday, they don't reopen until Monday. And then however long it takes to be shipped and make it to my door. Still plenty of things to do before then. Mainly: Working my way through the printed parts list and the stl files. Currently at 8% of parts according to it. Would be further but I detoured to bed adhesion problems when I tried the a/b drive frames. Printing on a smooth pei stuck to glass. Bought some gluesticks today and going to sleep on the reprints, they look like they should make it. Hopefully wont have to add too much more to the waste pile. And then there are the mods! I'm open to suggestions but so far: Stealthburner Inverted electronics https://www.teamfdm.com/files/file/526-trident-inverted-electronics/ TAP/Metal TAP/ChaoticLab? https://github.com/Vitalii3D-xyz/MetalTap - Still looking into them, but seems like doing tap now would save disassembling and adding later. Snap Latches https://www.teamfdm.com/files/file/392-snap-latch-2020/ Internal Spool https://www.teamfdm.com/files/file/537-horseshoespoolholder/ Probably Nevermore or another filter eventually

-
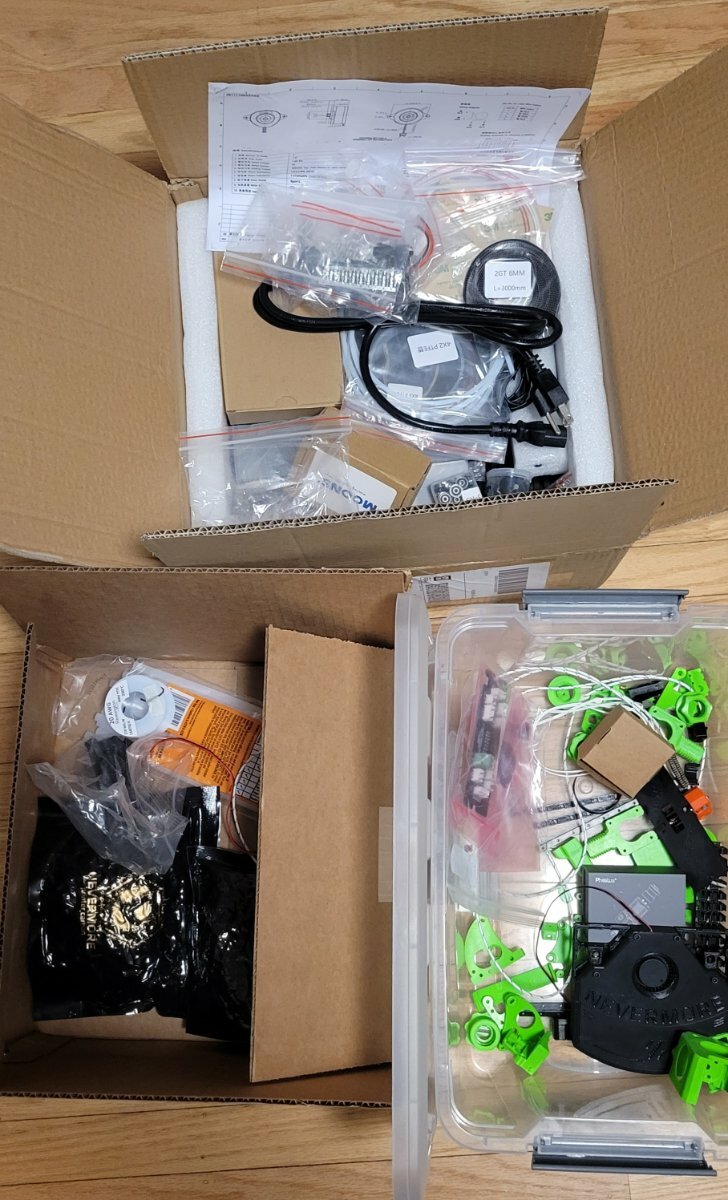
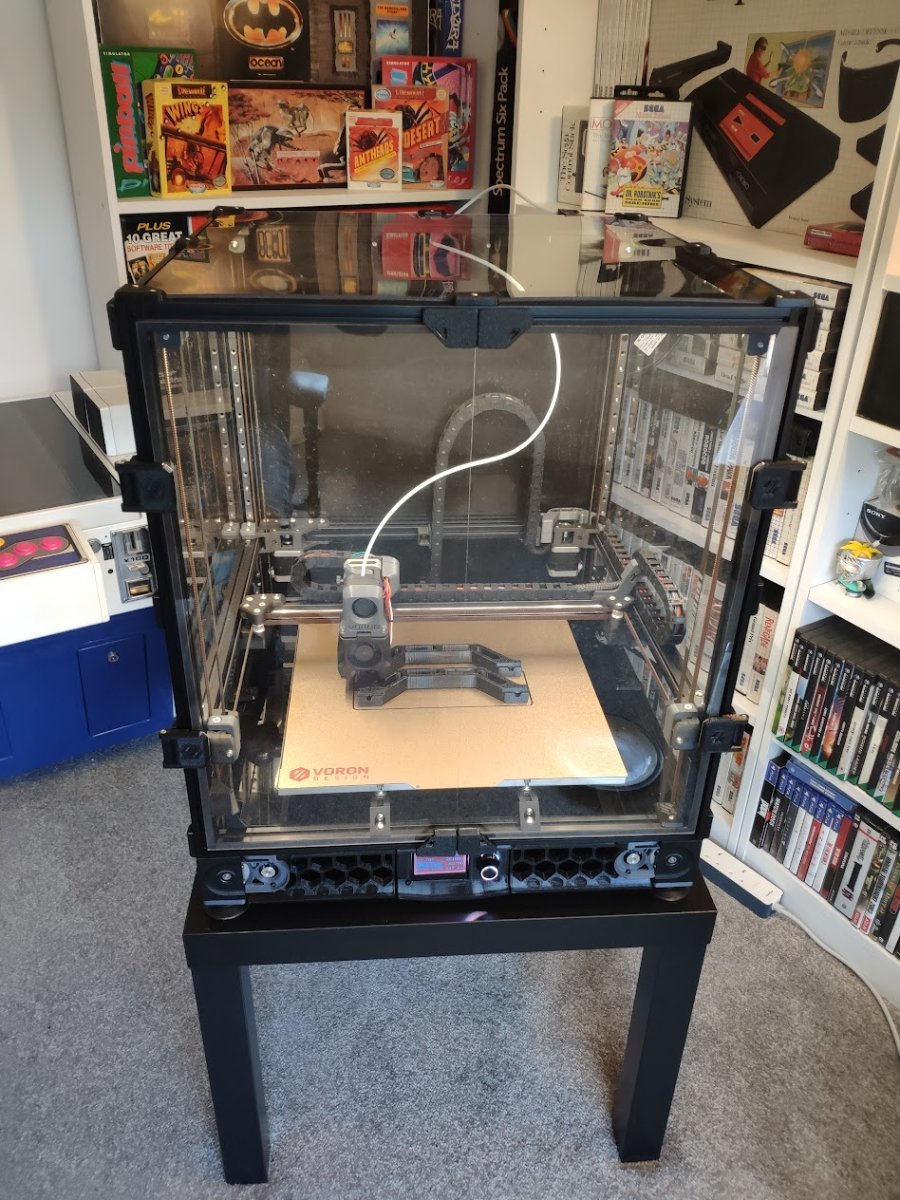
Big box at my door with Chinese all over it , what could it be ? I've been planning this build since I discovered Voron shortly after being gifted a very old Ender 3 which led to purchasing a CR6se which in turn led to modding the crap out of it so it could print the parts for the big box at my door. 4 months ago I'd never even seen an fdm printer in person and today I'm building what is quite possibly the coolest robot around. Mistakes coming , lessons to be learned, thank God for discord. Here goes everything....
- 43 replies
-
- 3
-

-

-
- builddiary
- trident
- (and 3 more)
-
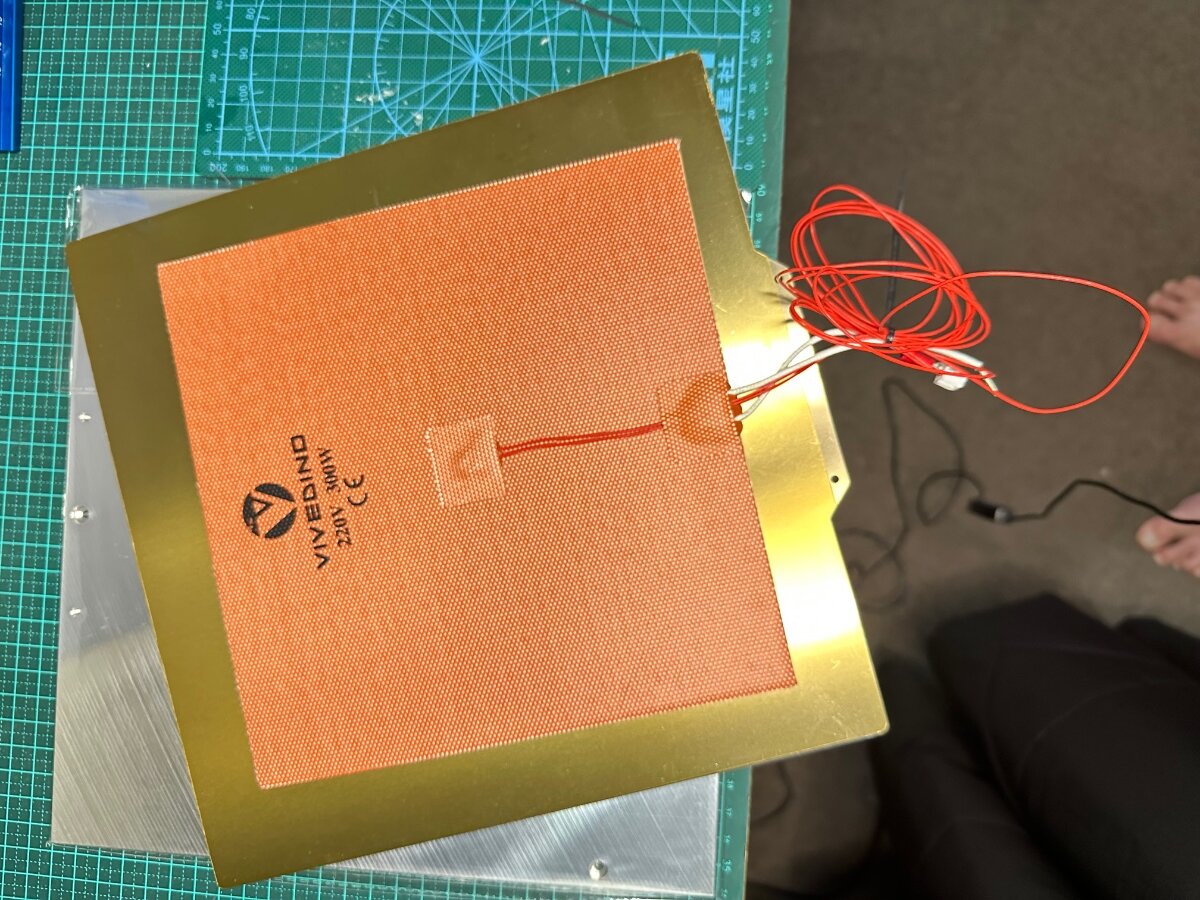
 Ah.. nothing beats a short and snappy title Building my 10th V2.4R2 or so, and this one is 100% for myself instead of selling it. Most things I be using here on top of the default Formbot kit, and adjustments to the default print parts are what I use in all my builds, this one has just some little extra or lets call it the "supreme" package... its still a Formbot and not sourced the parts by myself, but its a good quality kit, affordable, and they ship fast, if you like to build your own. I sell Voron builds, fully build, so I get quite a lot of questions, people who want to build themself a Voron, and I am a BIG supporter! Thats the whole idea of Voron. But I also know persons who are now trying to build their Voron for 3 months now, and still dont have it working properly, or at all... So... Hope this Diary/Guide is going to help you, I will try to make the parts that are most asked about better explained... I also get my information from others, there are way more experienced people out there than me, who wrote up great things, I will just link that way when we get there... What will this build look like, im based in the Netherlands Europe, so some links my not be useful, sorry. PS. I am NOT associated with any of these shops, dont earn anything on the links, etc, its just my build, advice is always welcome! Formbot Kit, this is where I order them - https://www.formbot3d.com/ - In europe? choose sending from Czech, and on Paypal payment, check the payment options to pay in Dollars, and let your bank do the conversion rate, for me this is about 70 bucks cheaper, paypal is expensive, shipping is free and there is no import, delivery in a week or so. This time im going for the Revo Voron, but normally I use the Phaetus Dragon HF/SF. Fermio Wire kit, nothing really wrong with the default wiring, yet its bulky and had breaking wires ones. Fermio wire kit is expensive, but awesome. https://fermio.xyz/fermio-labs-gmbh/voron2-wire-harness-btt-octopus-350-spec/ - about 125 euro, all Helukabel Heluflon®-fep-6y wires.. uhm, yeah, whatever, its good! Keenovo bed heater mat - Nothing wrong with the default Formbot heater mat, I just want to try this one: https://fermio.xyz/keenovo-international-group-limited/keenovo-silicone-heatmat-340-x-340-mm-230-v-ac-500-w/ - its a bit larger. Stealthburner with leds, I am a lazy ass, so I buy the LED string - https://fermio.xyz/fermio-labs-gmbh/stealthburner-rgb-led-kit/ its only 6 bucks, and has the thin high quality teflon wires, I just cant beat that price, by burning my finger on clumsy soldering... I am using different prints than the default ones where there are bearings used, especially toothed bearings.. I use smooth pins instead of M5 bolts and smooth bearings instead of toothed for this you need adjusted prints, some amazing guys made this already, and I will link to them later. Smooth pins are available on Aliexpress, or whatever you like. Then some default other wonderful mods, Klicky, PurgeBucket, other Front Idlers, Stealthburner, belt covers, Panzerball feet and 5" Touch display. Using Extrudr ASA Filament (big fan) but I am not stuck to it, I just dont use the cheap stuff, never been successful for me... I may go for another Red Bull theme here... Fermio custom Aluminium Composite panels. - https://fermio.xyz/fermio-labs-gmbh/voron2-v2.4r2-aluminium-composite-panels-350-spec-black-logo/ Other extra things may follow....along the way.. INDEX - to direct you directly to the posts and avoid all the useless comments here Setting up the frame(work) - Click here to go directly there inside this post. Setting up Z Rails, mounts/feet and motors and Z idlers. Page 22-51 in the manual. Click here to go directly to the post in this thread.... A/B Drives and Front Idlers. Page 62-81 in the manual - Click here to go directly to the post AB drives - Front Idlers Gantry! Page 82-107 - Click here to go directly to the post - Gantry! Belts Z and AB. Page 108-146 - Click here to directly go to the BELTS post.... Electronics and Wiring! Click here to go directly to the electronics/wiring post Software setup Klipper/Mainsail (sorry my choice!) - Click here to go directly to Software installation guide Follow this topic if you want updates!
 -
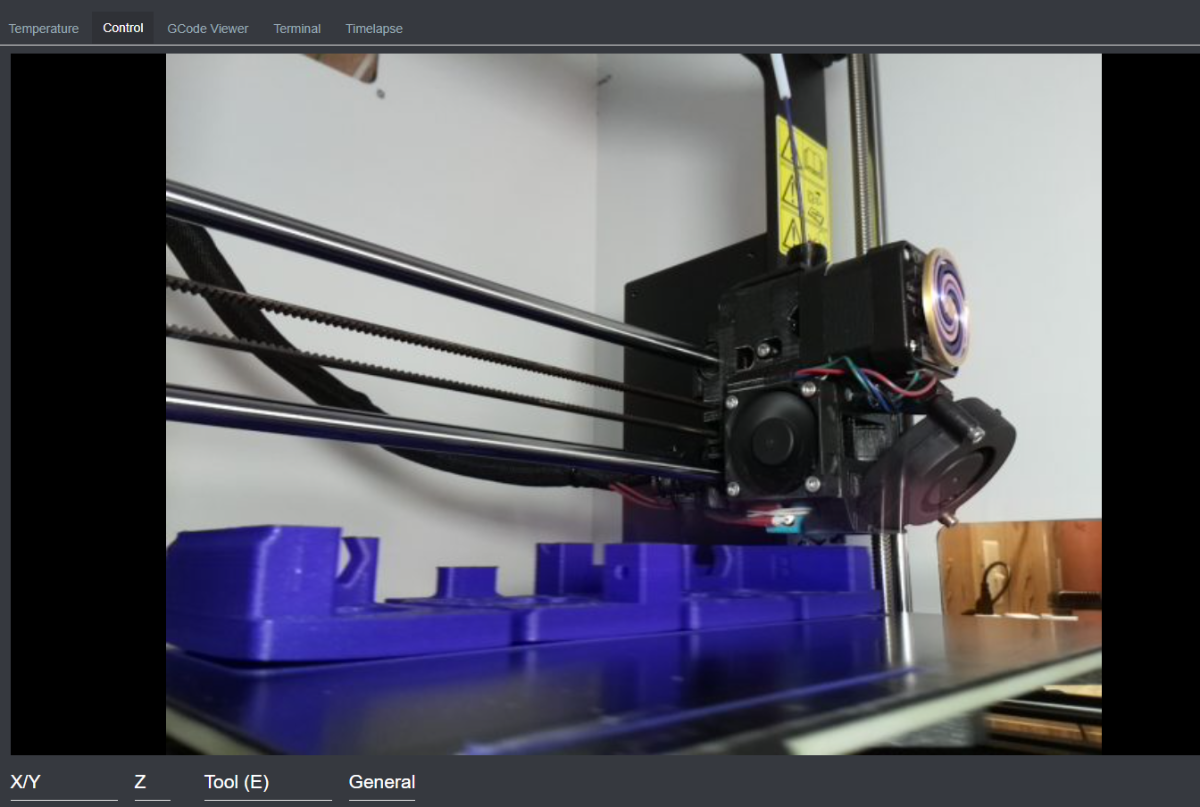
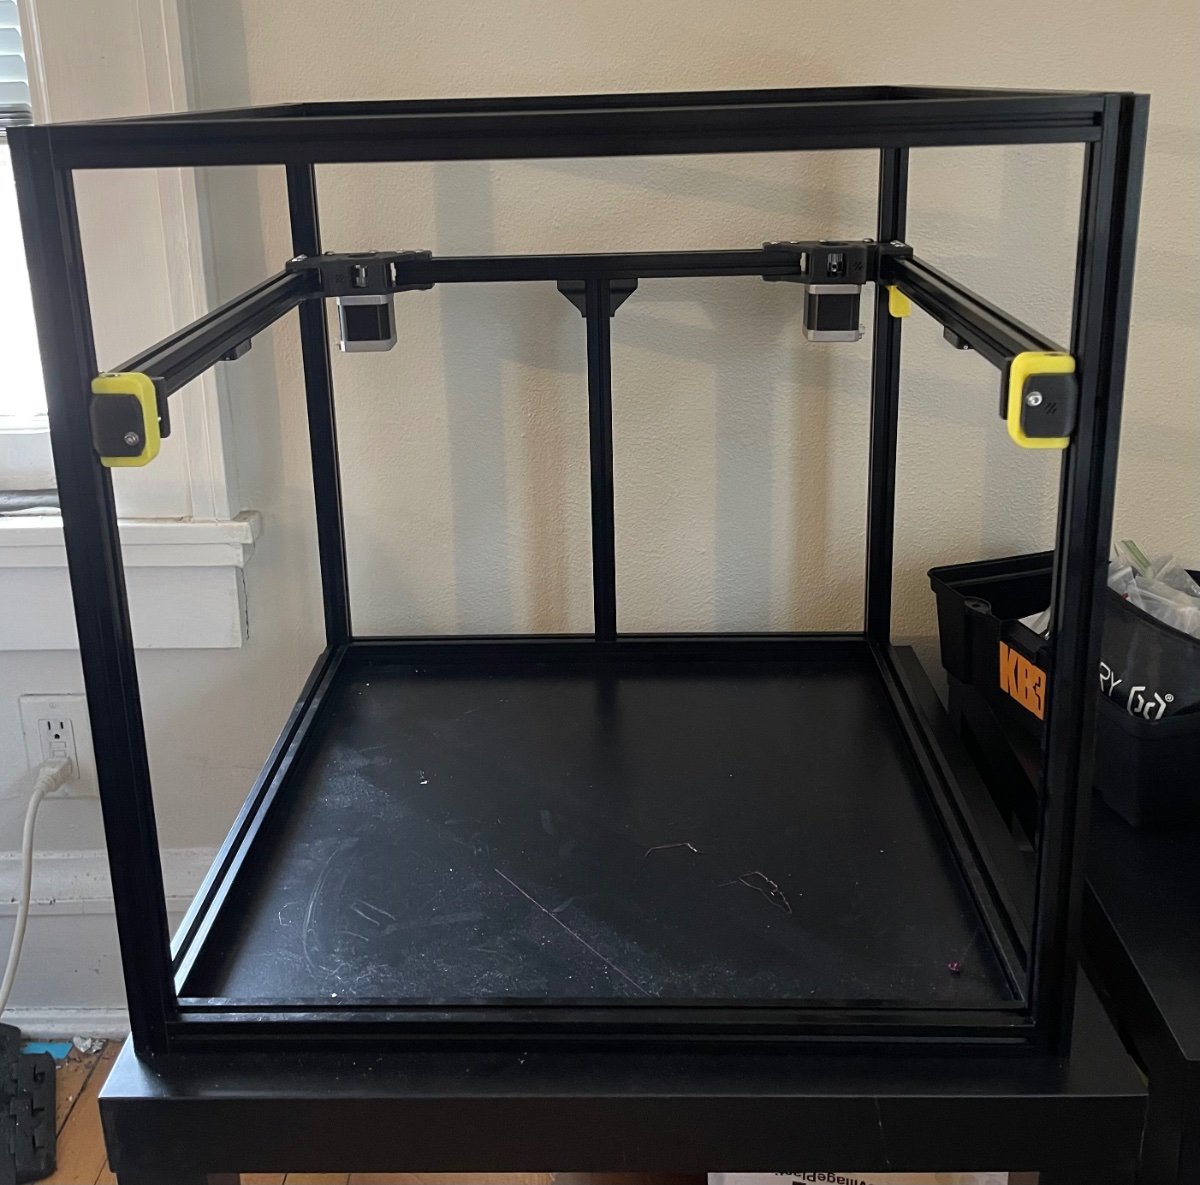
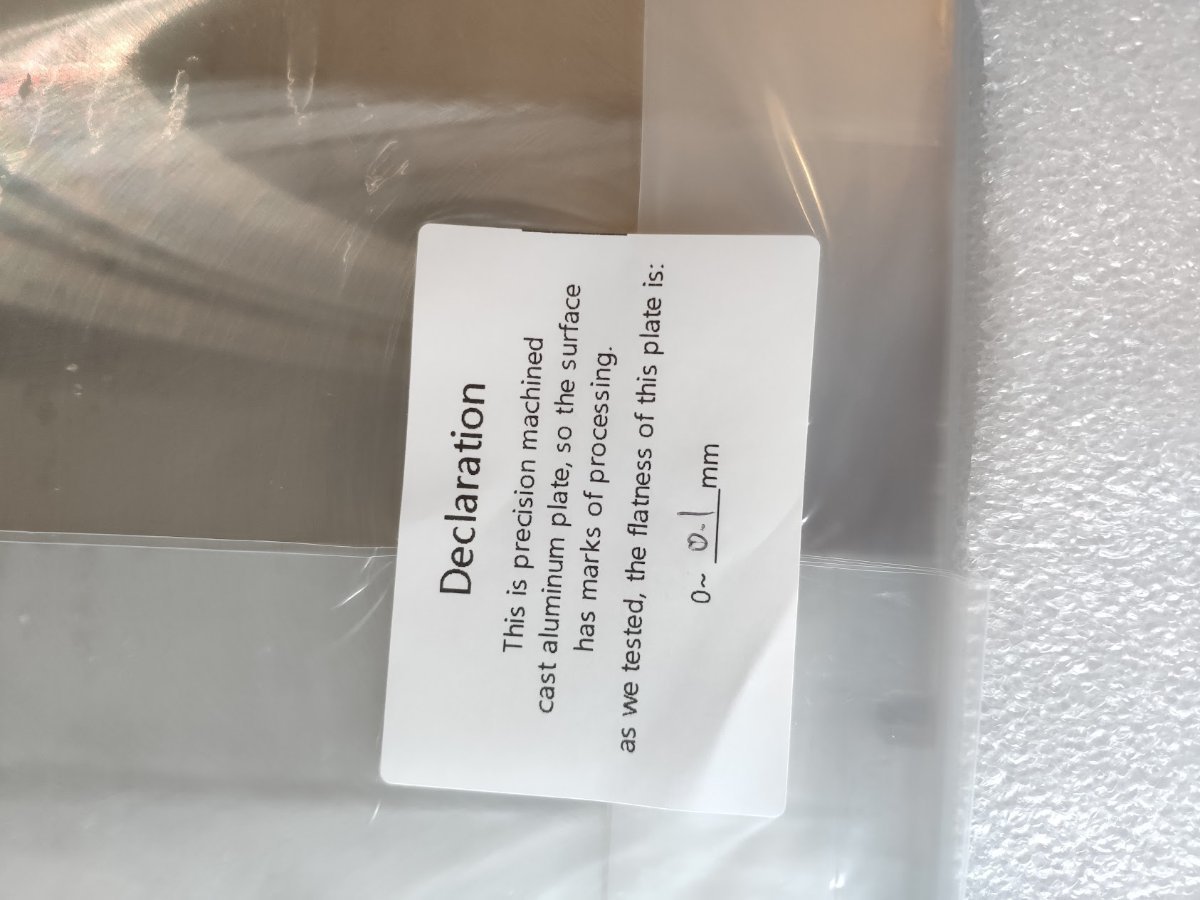
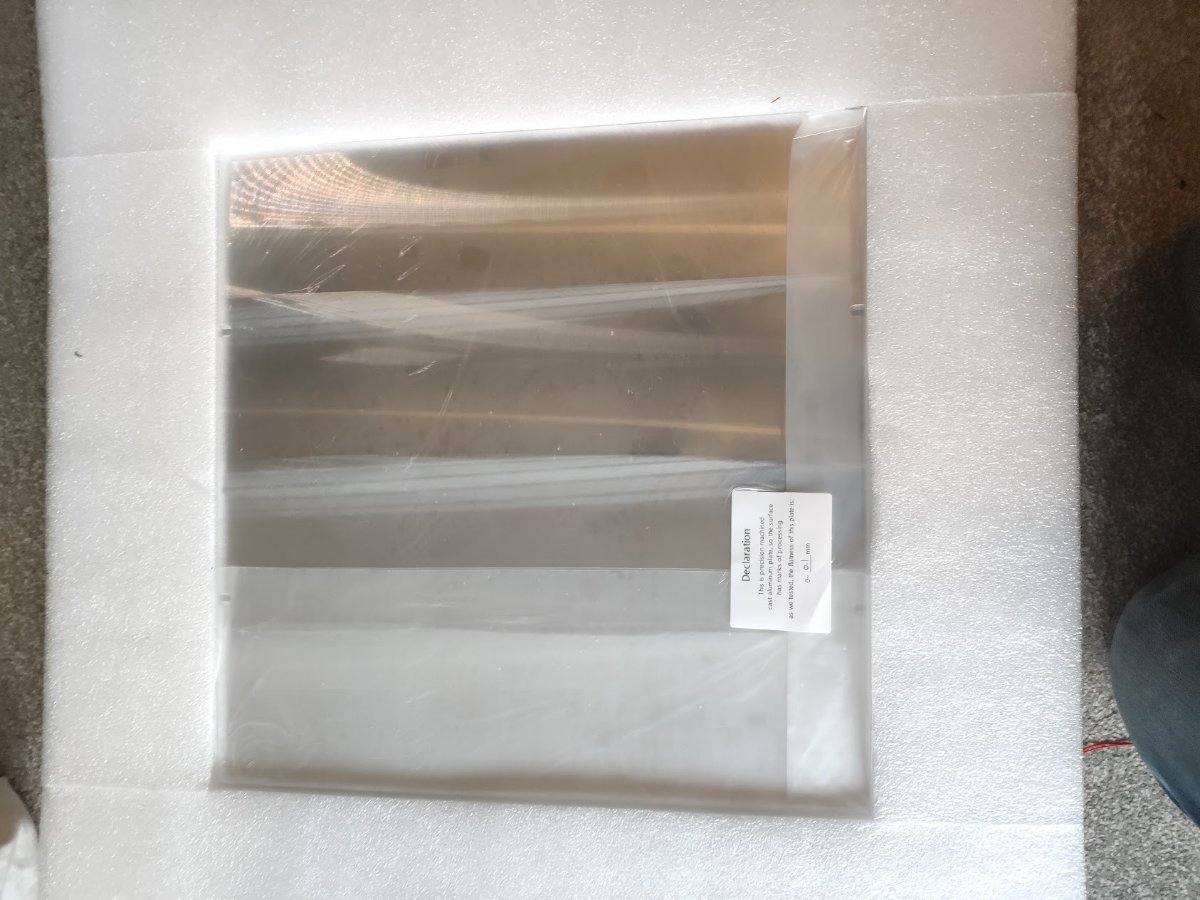
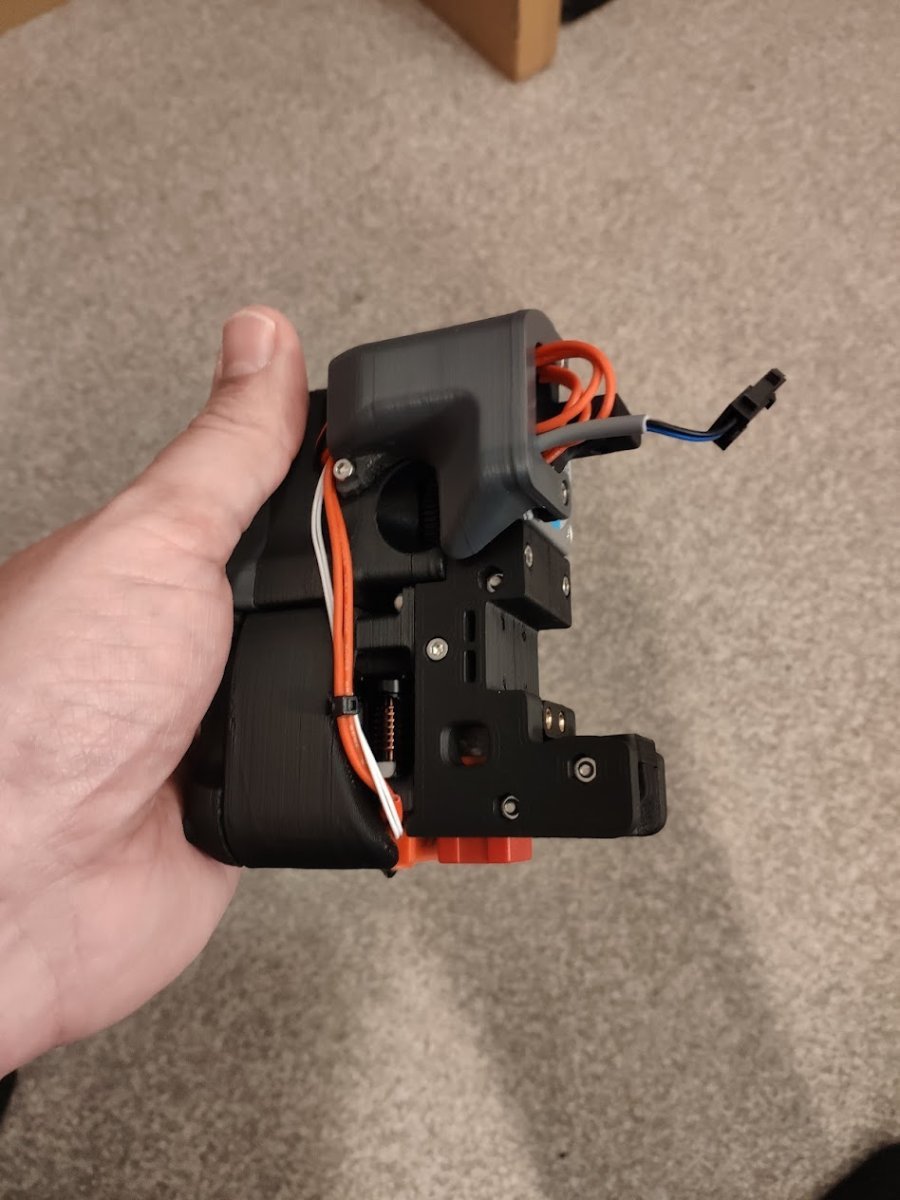
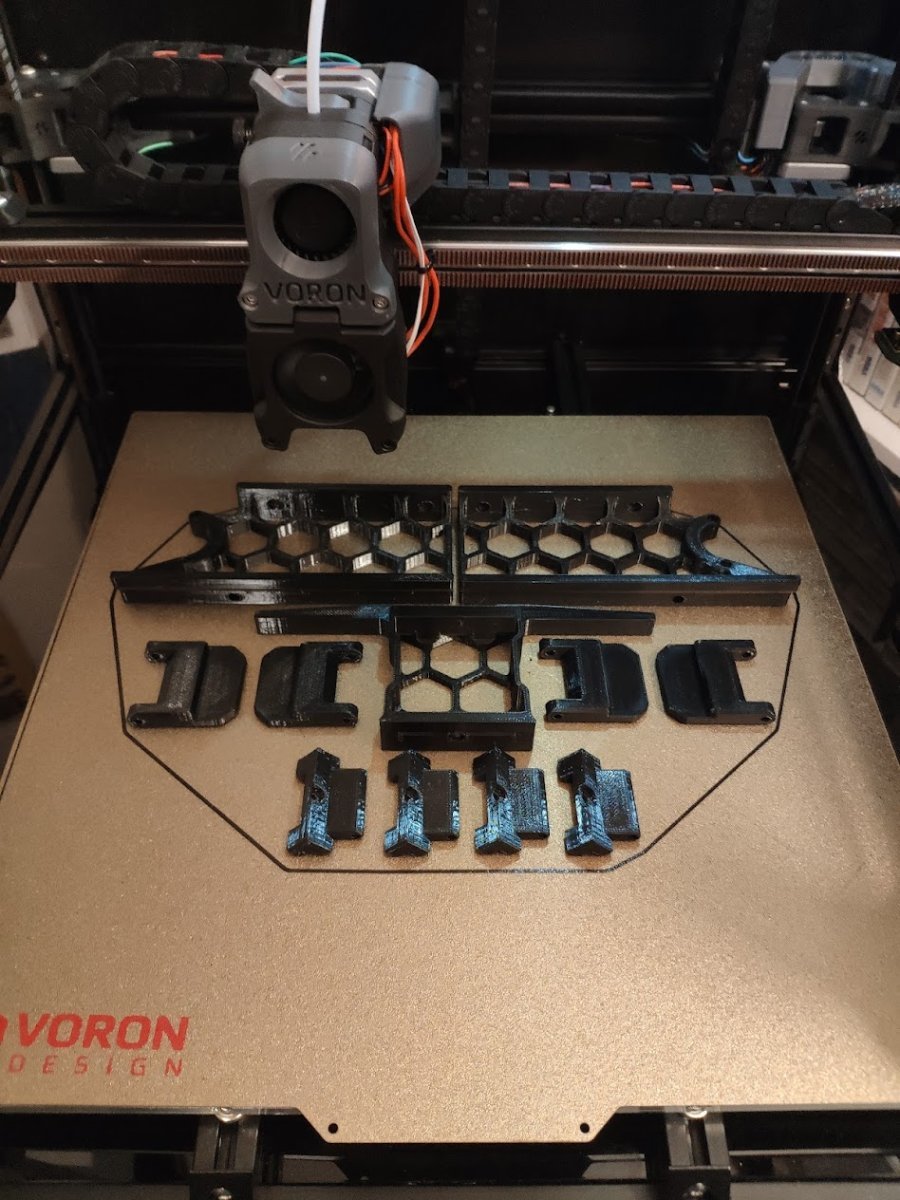
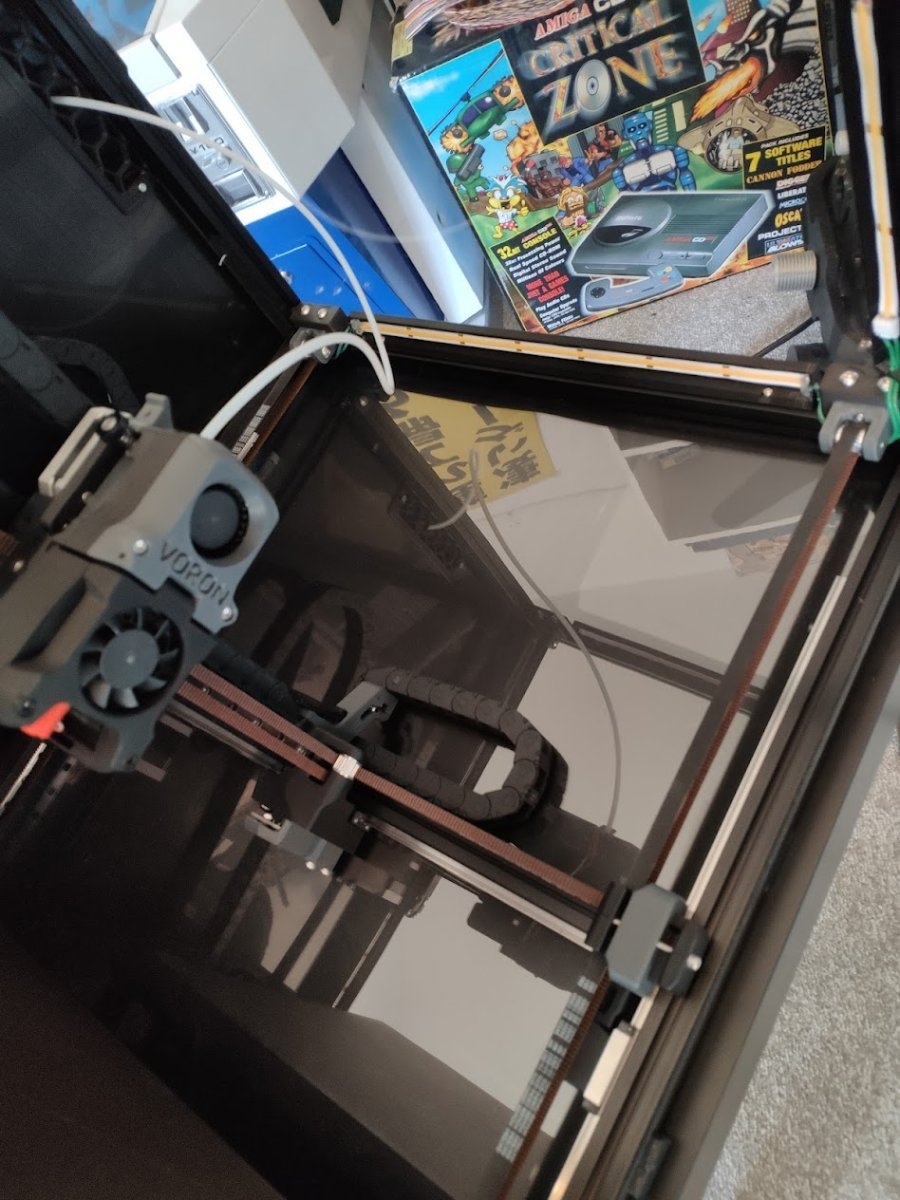
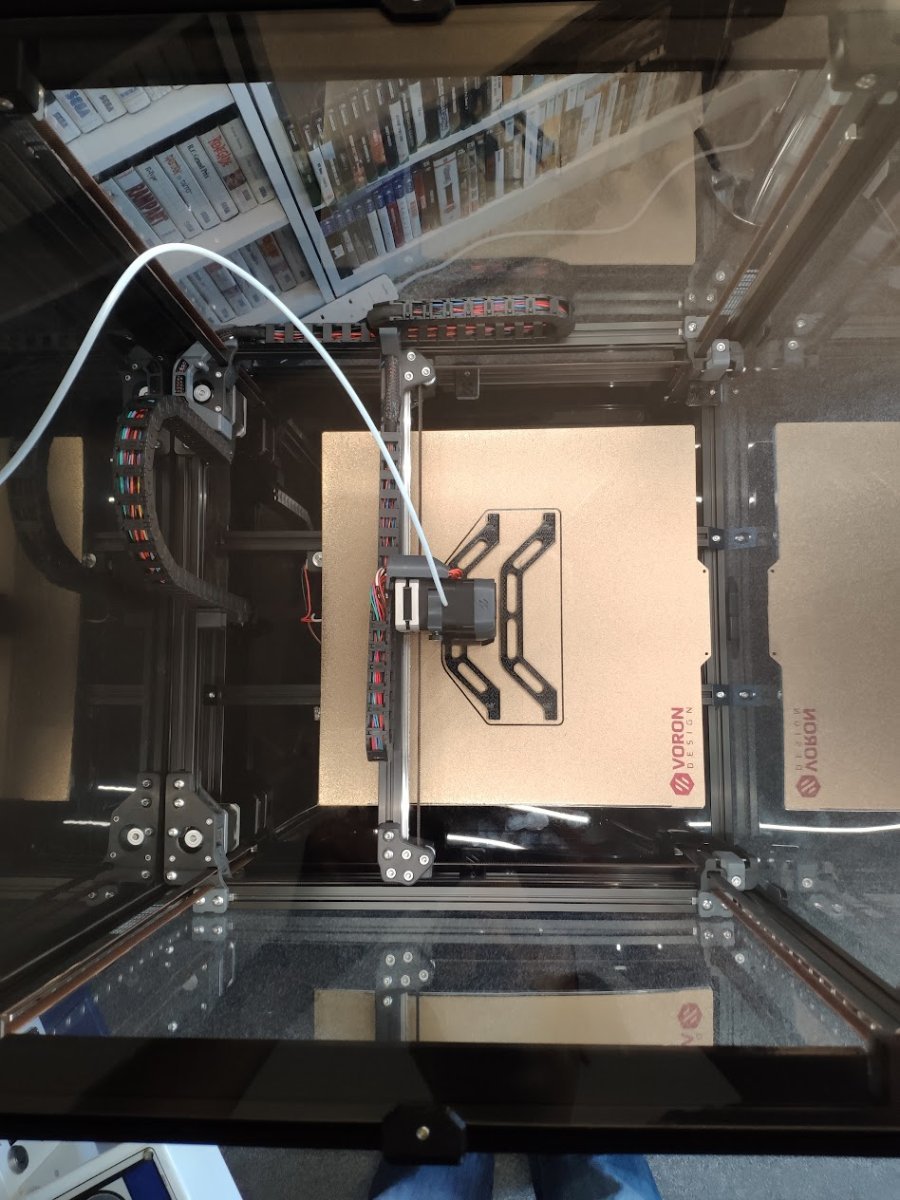
Hi! So, I haven't printed anything much out of PLA or PETG in months. A couple of projects in TPU are nearing the end. The V0.1-1/2 is getting a workout and the Prusa just sits idle as it is not especially happy with ABS or heaven forbid, PC or Nylon. So, rather than upgrade the Prusa to MK4, I decided on a V2.4. So, I started printing out parts on the V0.1. I also ordered a BTT Can toolhead board, SB2209 and a U2C. Also, I obtained a Raspberry Pi 4. I really wanted a 250mm, but in USA only the 300 and 350 sized are readily available. So, I tried ordering a 250mm Formbot kit from 3Dprintersbay, and after a week.. no reply, no acknowledgment of any kind. But, they do reply to email! They are real, after all. But, alas, 250s are a few weeks away... would I care to upgrade to a 300? Oh, OK. While waiting, I ordered Alclad bottom and back panels in White from Printed Solid. So, a few days later along comes the Formbot kit. Over the weekend of 13 May, I sorted out the parts, programmed the Pi with MainsailOS, and tried programming the SB2209 The build started on 15 May. The initial framing took one evening. 16 May -evening - assembled the Z drives, continued printing parts 17 May - evening - Installed the Z drives, Z idlers, Z rails, continued printing parts 18 May- evening - Assembled and installed the Heated bed, continued printing parts 19 May - evening - Started Gantry assembly Weekend of 20 May - A busy weekend, but managed to complete the Gantry assembly. printed some more parts. Ordered a Pi43TFT screen. 22 May - evening - Installed the Gantry, set Z belts tensions 23 May - evening - Assembled Voron TAP, ran AB belts 24 May - evening - Started to assemble the Stealthburner with a Dragon. Configured the Octopus 25 May - evening - Completed Stealthburner assembly and installation. Started on the electronics bay. Printed more parts. Flashed the Octopus. Had trouble setting up the CAN. 26 May - evening - Mostly completed the electronics bay. Got the CAN toolboard to talk to the Pi! 27 May - busy day - evening - initial setup of AB motors directions, configured the SB2209, verified correct hotend operation. Printed more parts. 28 May - Got Z drives directions configured, performed initial tests, got Quad Gantry Leveling to play nice with Voron TAP. Started printing the remaining parts that are too big for the V0.1, namely the fan carriers and the center rear skirt section. Printed yet more parts, but I'm mostly done with printing parts.... 29 May - Had the V2.4 print some more big parts for itself before resuming construction. Assembled most of the skirting, installed the Z belt covers, which was a bit fiddly as the Formbot rail slots are just a couple of tenths of a millimeter too narrow, necessitating some filing of the plastic parts to fit. Also assembled all of the panel retainers with their hammerhead nuts with loctite... about 35 pieces in all. And tidied up the wiring a little bit. Am trying to decide how to rout the CAN toolhead cable. Noted that the EBB SB2209 CAN toolhead has performed flawlessly so far. Also noted that the print quality is quite good with no tuning whatever.
-
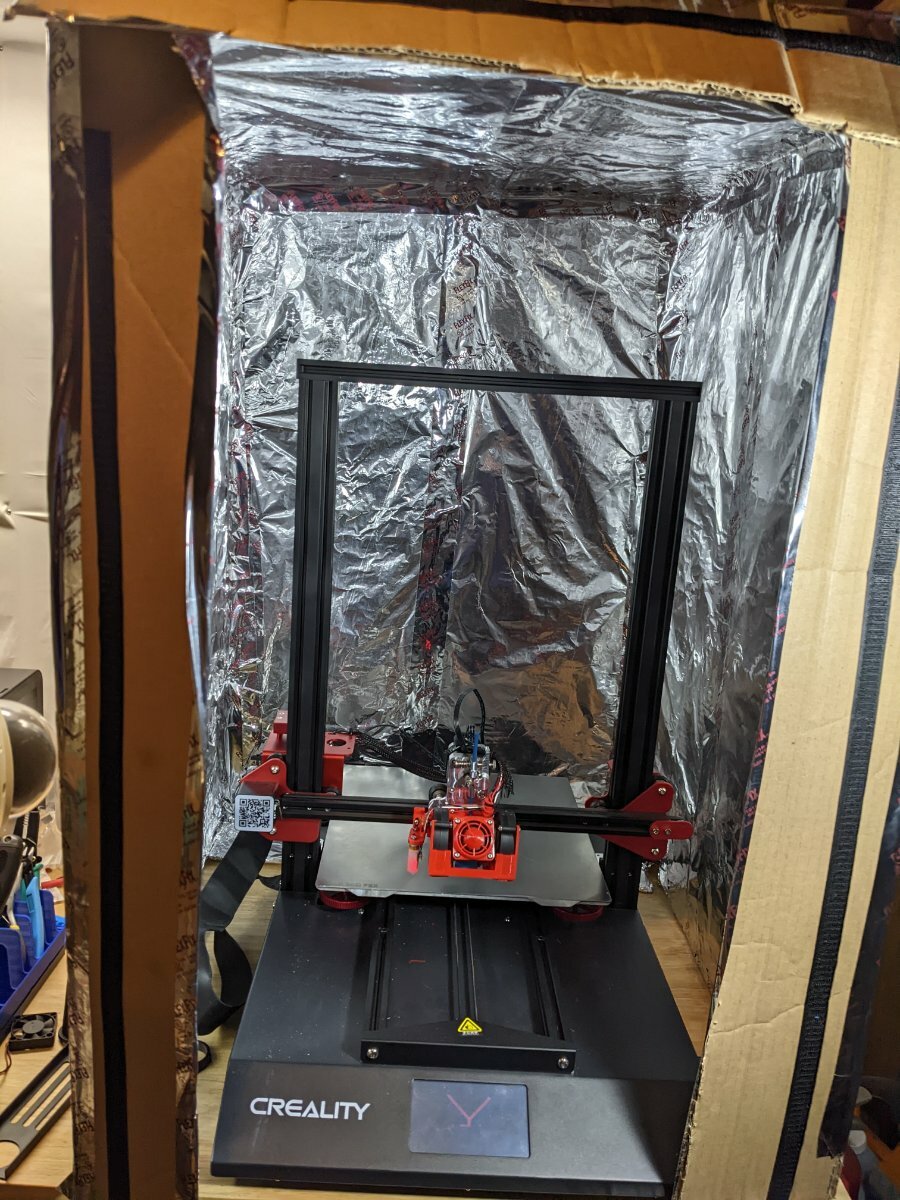
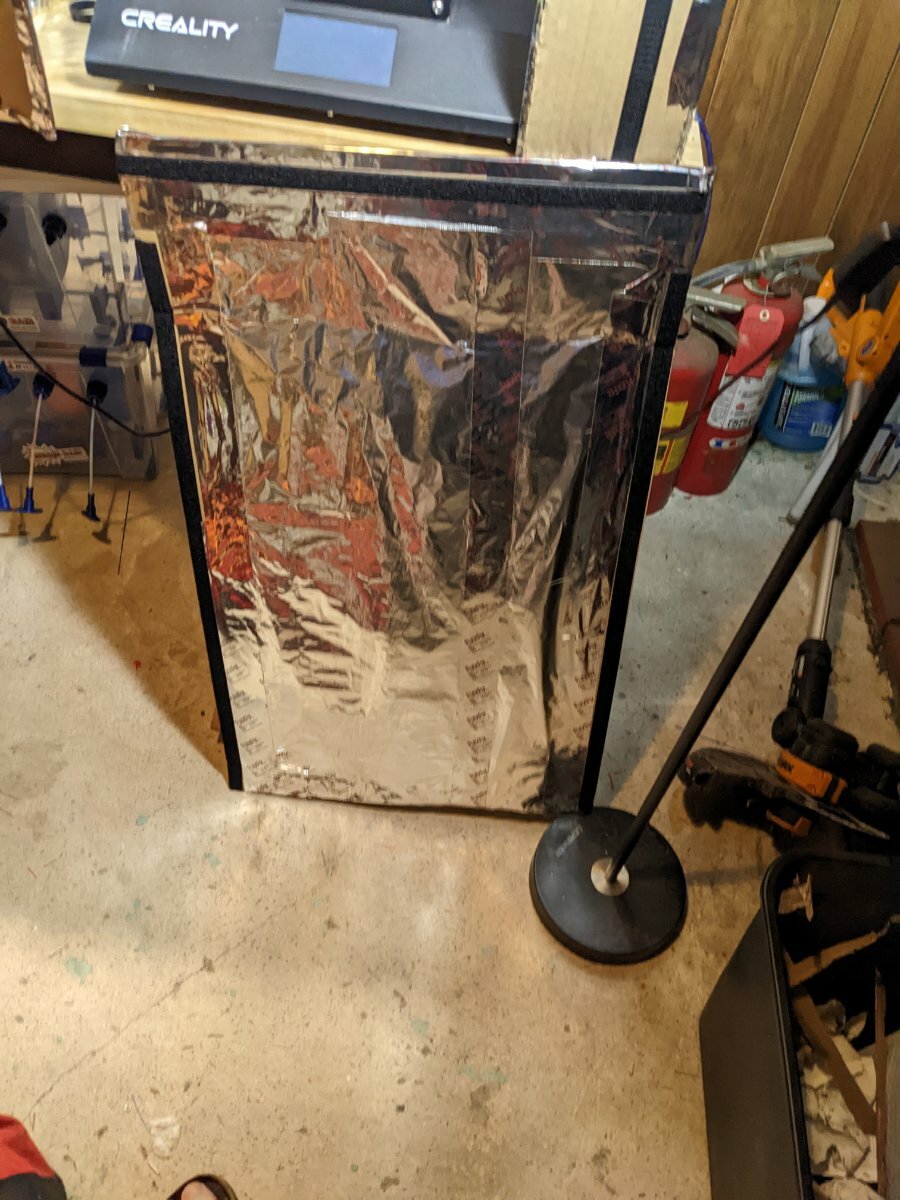
This is my first Voron build, got the email from Formbot saying the kit be being shipped (Whohooo!) I setup a ghetto enclosure with two cardboard boxes for my Artillery X1 to print parts. Also first time printing ABS so this will be interesting any help, suggestion, critic are welcome. Figured I'd start with electronic bay parts to tweak slicer setting (Cura 5.1.0) since parts will be hidden. Base colour Spartan Obsidian Black Sparkle ABS+, accent Spartan Cloud Grey Sparkle ABS+. Build will be in two week increment, I work and two weeks on two weeks off shift in Western Canada, almost at the end of my career I retire January 28th 2023 . I'm still browsing thru build, has anyone done the LDO electronic bay layout with the Formbot kit where the din rail run from front to back instead of side to side? I need to setup one of my Artillery X1 with Klipper so I can get familiar with the platform, presently using Octoprint so may go the Octoprint/Klipper route first then migrate to Mainsail. Print in the photo are 3D3 Sigma Prototype ABS.Printing at 235C/110C glass bed with PEI sheet is why I set it 10C higher. Use hairspray too help with adhesion clean with Isopropyl before re-applying hairspray seem to working for me. Titanium heat break with a Micro Swiss copper plated #4 nozzle.
-
Building a bed slinger this time around. Kit is in transit. I went with Frombot3D, they did me right with my 2.4R2 build so I'm going with them again. Would have like to try the LDO kit but price and availability turned me away. I guess I will see if the savings ends up being worth it or not. So far I'm printing parts. Base parts are Prusament Galaxy Black ASA, Accent parts will be FilamentOne ASA Sky Blue.
- 70 replies
-
- 2
-
-
-
- builddiary
- switchwire
- (and 2 more)
-
This post will be continually updated with the latest and great known information regarding available Voron "Kits". As, clearly defined in any communications, The Official Voron Design does not recommend or prefer any of these vendors. The list here is only identified as those vendors who have been identified as successful builds and full kits that are available. Purchase kits at your own risk, knowing that parts can change, often times for the worse, and as is true with my Chinese parts, Meanwell PSU labelled as such, does not mean it's a legitimate Meanwell PSU, same thing with other popular components (like Gates belts) and fasteners. While these are not in any specific quality order, they are in order of popularity and availability. Note: for best results order from AliExpress from user who have the MOST sales - likely they are the best sourced Kits with the fewest flaws. Additionally, and perhaps most importantly for this thread - Yes, sourcing your own parts will increase your build quality, and verify proper function and fitment. This thread is NOT a discussion on pro's and cons of sourcing parts vs buying kits . Let' try our best to stay on topic! Voron 0.1 Fabreeko - Pre-Order Formbot - Frombot3d.com KB-3D - kb-3d.com 3DMakerParts - LDO Kit https://3dmakerparts.com/products/ldo-voron-v-0-1-full-printer-kit Voron 1.8 MagicStudio - Direct Website Voron Trident (Formally v1.8) Formbot - Formbot3d.com 3DMakerParts - https://3dmakerparts.com/products/voron-trident-full-printer-kit-preorder?variant=40841158688975 Voron 2.4 Formbot - Formbot3d.com Fystec - AliExpress <- Most Common 2.4 AliExpress Kit DigiMach - https://store.digmach.com/collections/voron-kits 3DMakerParts - https://3dmakerparts.com/products/voron-2-4-kit Voron SwitchWire Formbot - Formbot3d.com KB-3D - kb-3d.com (Pre-Order) Voron Legacy Funssor - AliExpress Frame Kit If you have any direct experience or would like to suggest another kit for this list please respond in the thread and the thread will be updated!
-
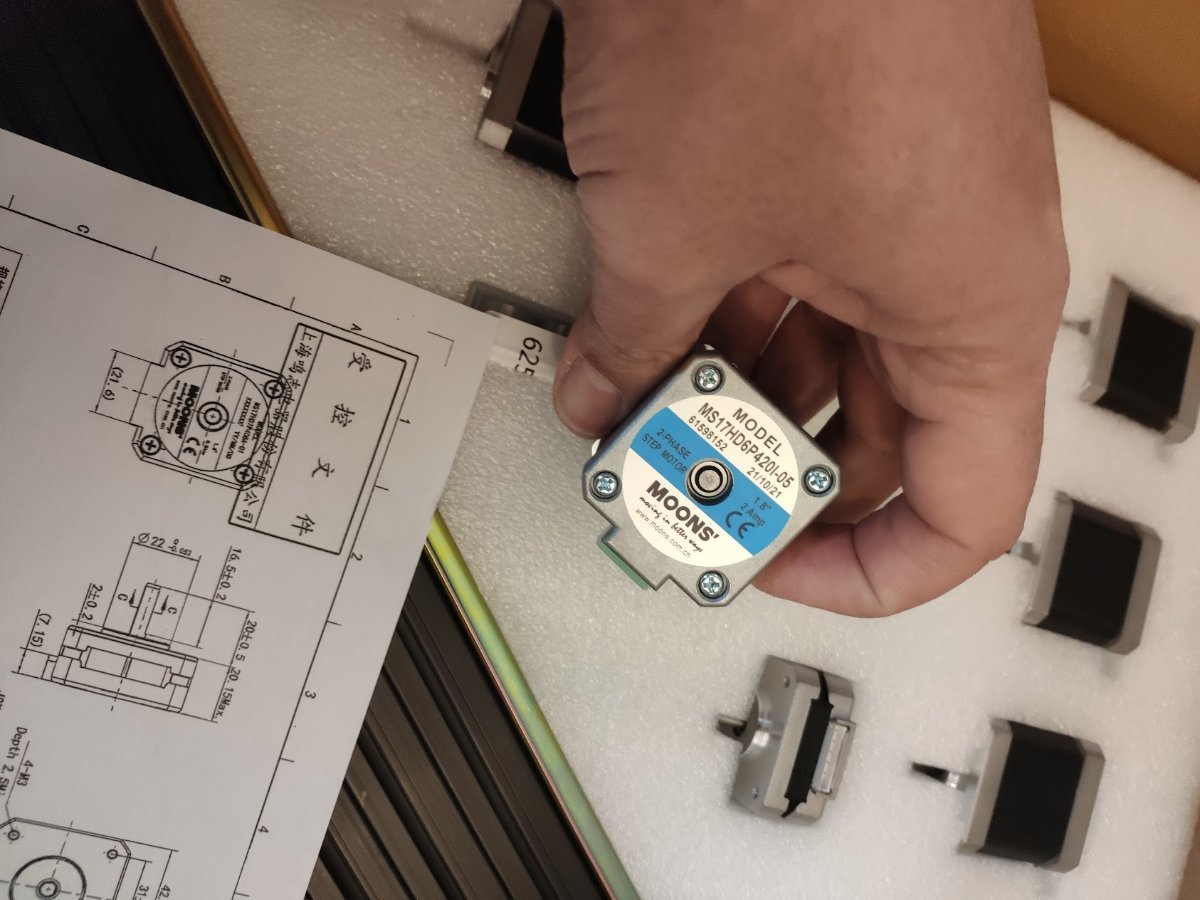
Because I build my printers (v2.4 R2 350mm) from Formbot kits always, and now about 12 build so far, I want to help others thinking about this kit. Since end of Feb 2022 the kit is shipped with Moons stepping motor for the Stealthburner (round 17mm version) I have always ordered these separately and these motors are very good and very temperature resistant, I prefer them over LDO motors. Tip for european people, chose shipping from Czech and when paying with PAypal CHOOSE last moment VALUTA options, choose to pay in dollars! This way you DONT use exchange rate from paypal, but your credit card company, this often saves you 70 dollar or more, exchange rate from paypal is insane!! I dont advise using the default cable kit, while its ok for the electronics bay (perfect actually) the cables are not perfect for the moving parts. I had cables breaking 2 times, and I now build all printers with the Fermio cable kit, lighter, thinner, and extremely durable, but, its about 125 euro. Any questions about the kit, happy to help, I can really advise this kit.
-
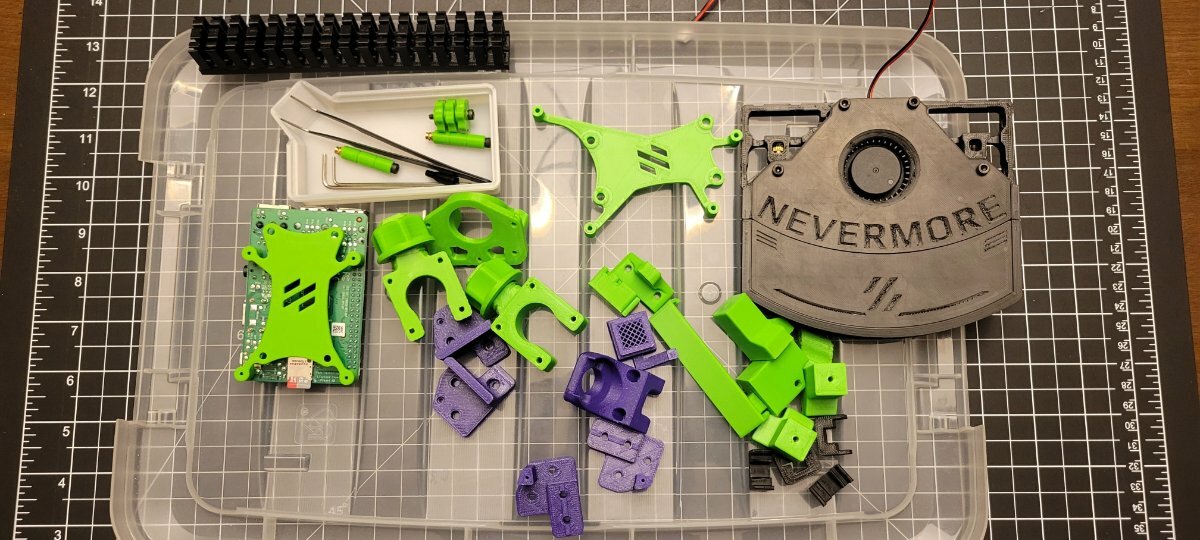
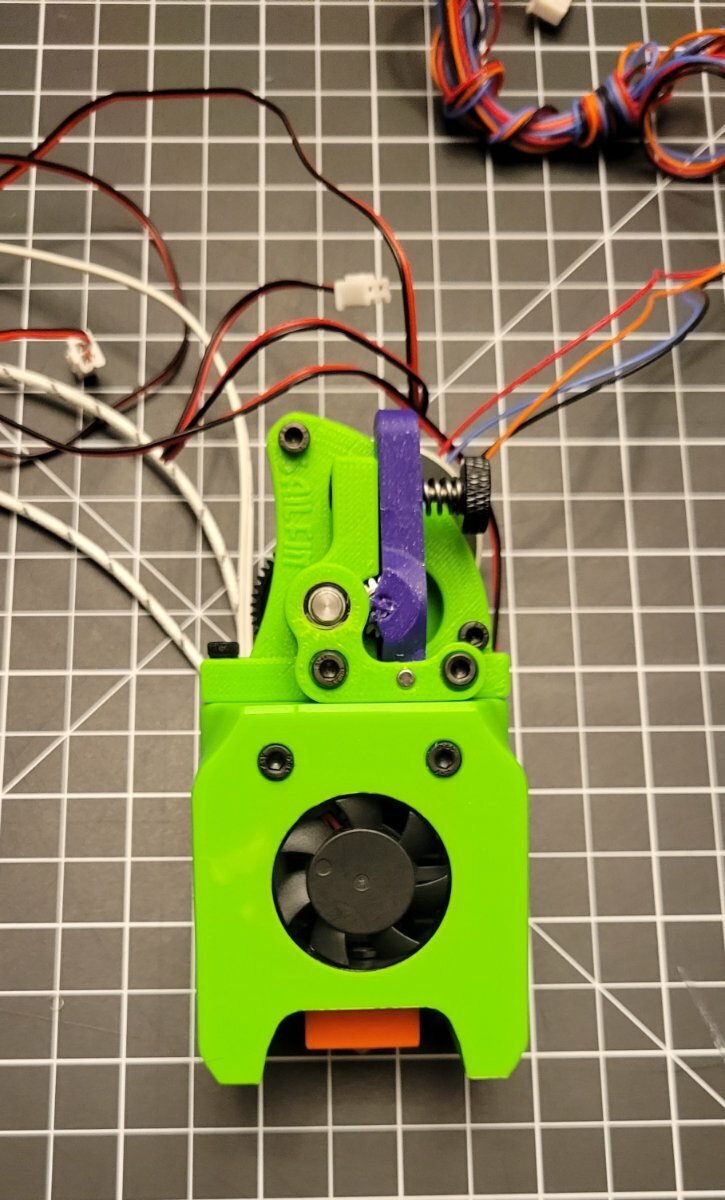
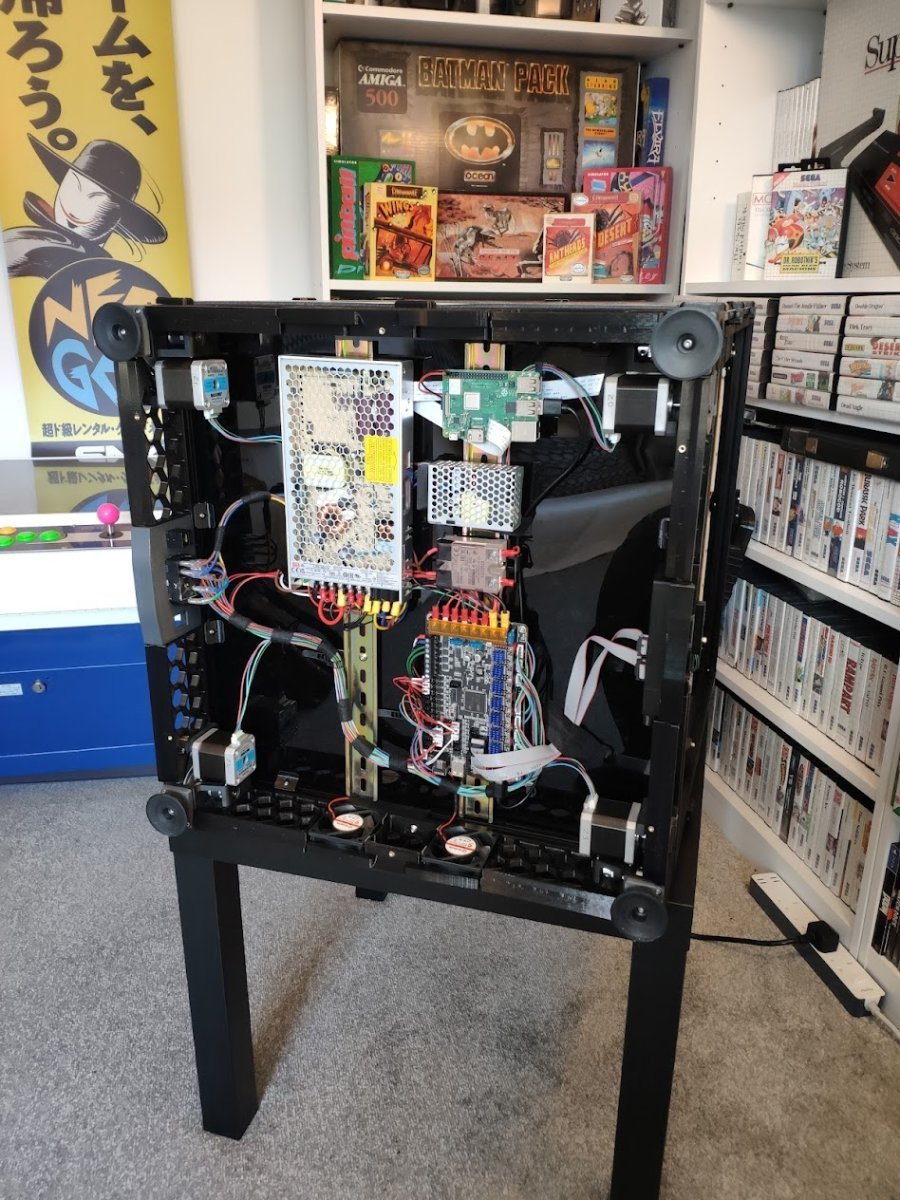
 Planning Phase: Hello me again. Still have the one kit that has been lying in storage for quite some time and decided to get it out and buiild the printer. Due to time constraints this may be a much slower build than the others. Will follow the same structure as the Trident build with mods incorporated into the build as I go along. Having built a 2.4r2, I hope this build will be quite straightforward - but then there are the mods: Octopus Pro v1.1 with Canboot and canbus connection Mellow Fly SB2040 Canbus toolhead PCB install Stealthburner Cover with integrated fanmount Umbilical mod Voron TAP (I just love this thing!) Orbiter 2 with filament runout sensor in Stealthburner Toolhead e3d Revo Voron Hotend VFach Filter (Thanks @Buurman) Silicone Nozzle brush with purge bucket Voron Pin Mod for A/B motors Pin mod for Z-Idlers Nero3D idler bearing stack Ramalama2 Front idlers (pinned) PTFE Bowden Tube guide for Umbilicus Dual Nevermore filters Ellis Bed fan mod Single door with Voron 2.4 hinge mod Logitech C922 Camera mount BTT PiTFT50 with Klipperscreen mount Revo Nozzle Holder skirt mod Panzer ball feet Chamber LEDs mount Extrusion Profile covers Z-Belt Cover mod Deck Panel Supports Engaged Rabbit feeder - (This one I know is going to be a b.....) I think that is it, but with me ----- you never know As some of the mods (Silicone brush holder, Orbiter 2 Mellow Fly combination for e.g) will involve some Fusion 360 work, it may take a while. Though I followed @claudermilkadvise and watched all the lessons from Paul McWorther, I still struggle with the more intriquite designs in Fusion 360. Might call on @Penatr8tor for some advice when the time comes. Next - Color decisions.
 -
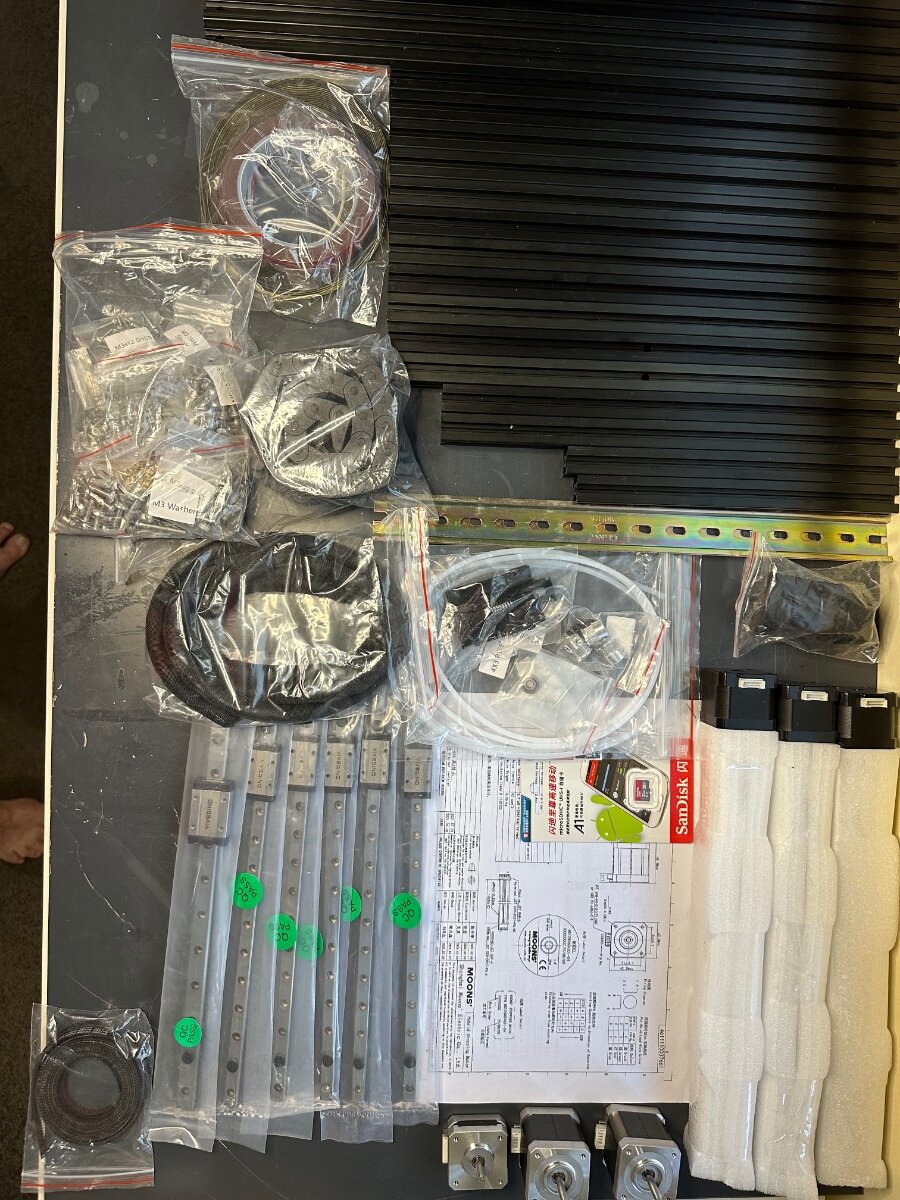
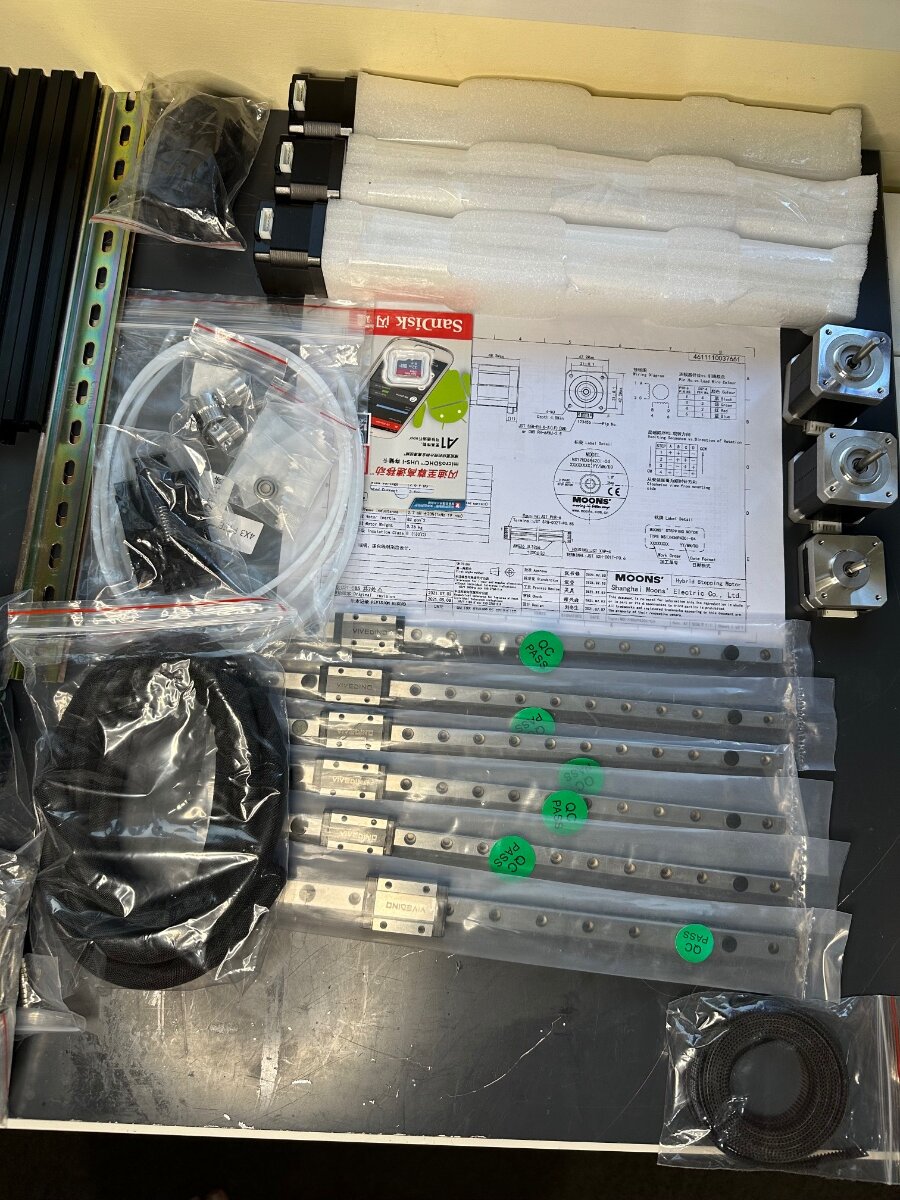
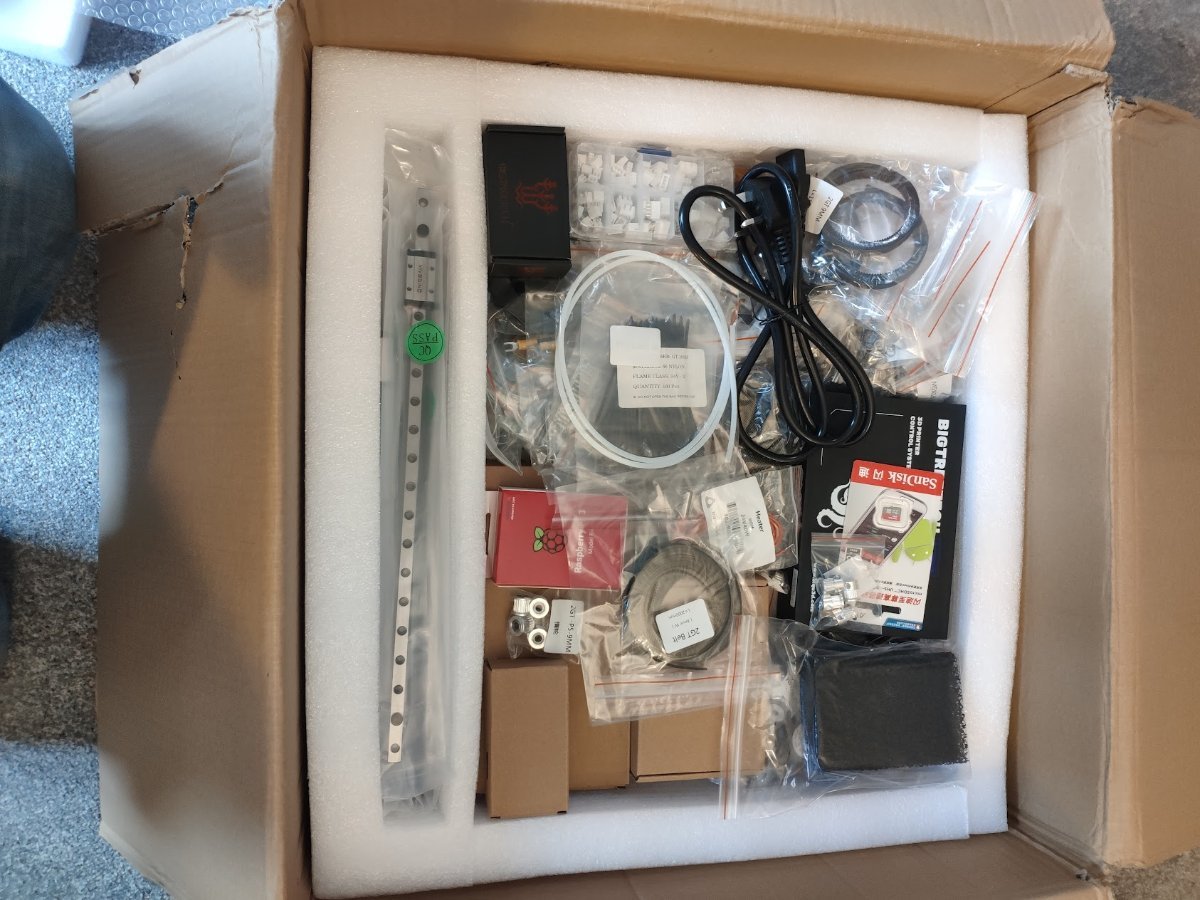
Received by Formbot3d Voron V0.1 BOM in a box today which I had ordered on January 14th. Other than assembling a Creality CR-10 I have no other 3d printer experience. I was so eagerly wanting a Voron I bought two kits the V0.1 and the V2.4. I think I have bitten off more than I can chew..... I'll be lucky if I get the V0.1 built and working. Though I suspect I will learn lots along the way. I am still waiting on my printed parts so in the meantime I did the unboxing to just document what I got from Formbot and how it matched up to their website advertisement. I welcome any words of wisdom or guidance to help me along with this build.
-
I haven't started my build yet per se, I am still in the pre phases, waiting for parts kit to arrive, preparing to print ABS on my current printer, gathering some extra tools. I thought I'd immortalize a nice laugh for everyone in my very first post here. My current printer that I will be printing the ABS parts on is a Creality CR-10s PRO V2. I just completed my final upgrade to it over the weekend, installing a Wham Bam flexible bed system. This is a magnetic base with a spring steel sheet coated with PEX on the top. (PEX is just their fancy PEI). Last night I tried to do my first test print with it and no matter what I did, I could not get a good first layer adhesion. I went through all the troubleshooting steps and to even get any sort of adhesion I had to lower my z offset so much it made a terrible first layer. On my 3rd of 4th attempt at googling for a suggestion I found a reddit post where someone was having first layer problems on the same bed (Wham Bam) and in the thread someone mentioned removing the protective plastic sheet off the PEX before printing. Lo and behold I had left the plastic sheet on the PEX. I removed it and like magic, it prints perfectly without any z offset adjustments or anything. I'm going to call this my first poo brain moment in this process, and I suspect at least some more poo brain moments to come. Anyone here's some pictures of the enclosure I built for printing ABS on the current printer: Any recommendations for printing ABS on PEX/PEI? This'll be my first time printing ABS at all.
-
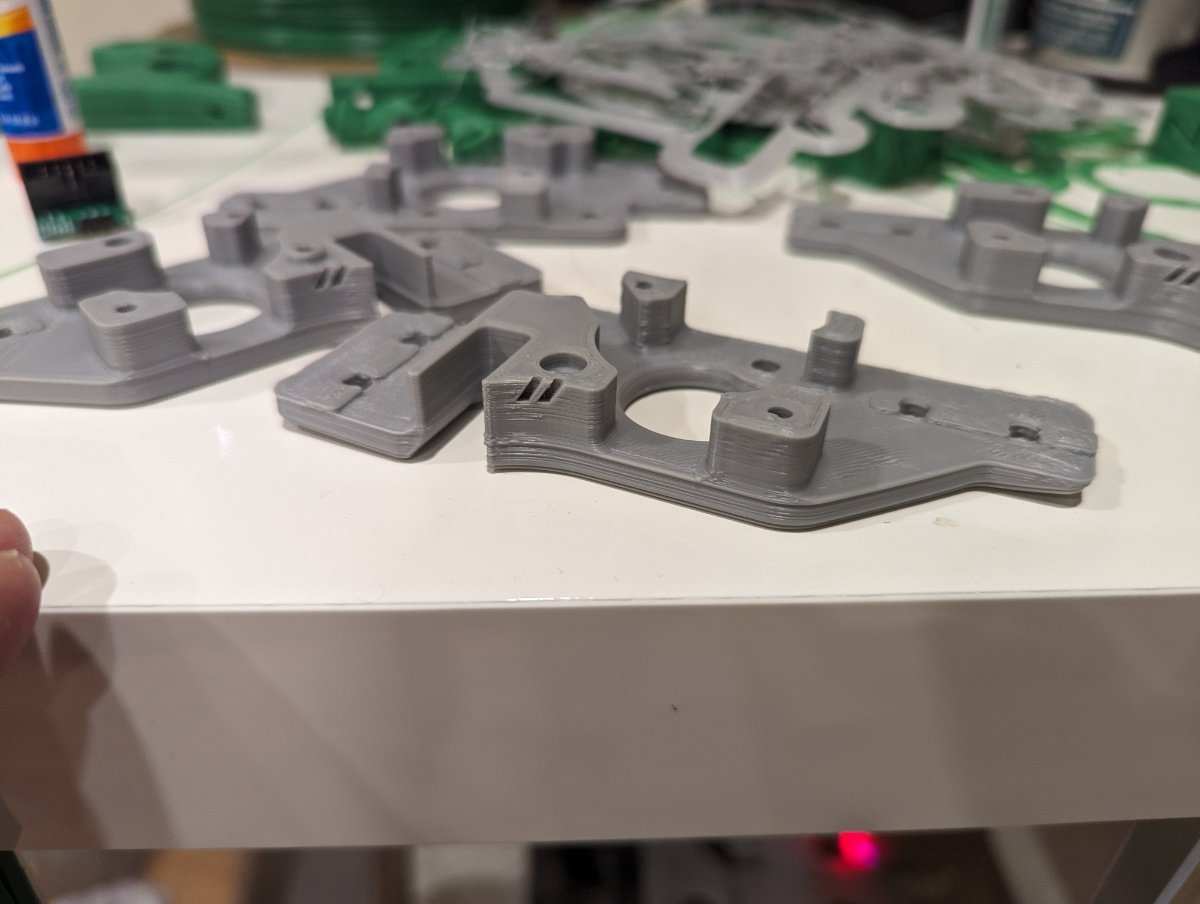
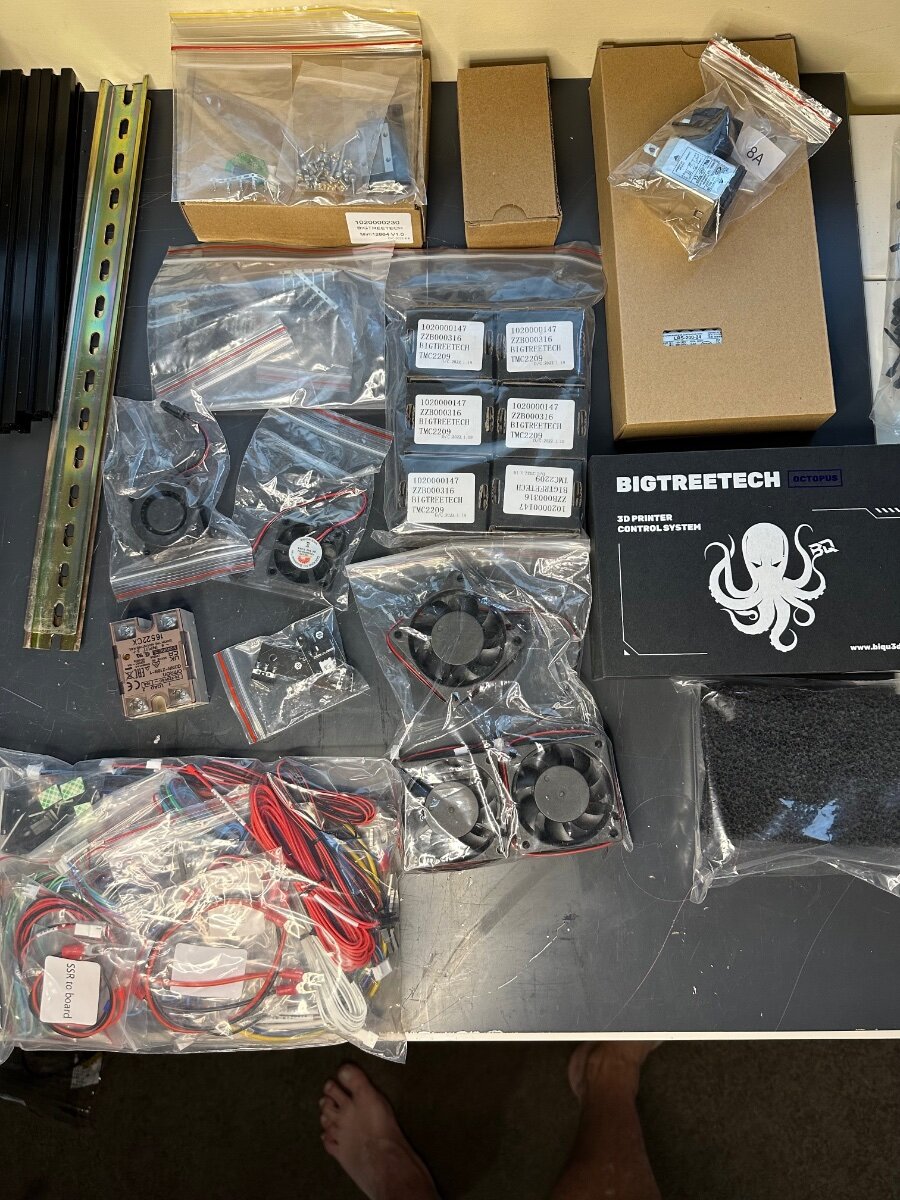
Dusted off the Trident 250mm Formbot kit and laid out the parts on the build table. You're not building ANOTHER one!, she said rolling her eyes. But honey - its the Trident build - remember Poseidon or Neptune - powerful Gods all had the three thronged spear. I gotta have one too. Yeah but you're not in Atlantis - you're in sunny Oz! What can I say but Trident it is. Build plan: (I know it will change as I go along this three pronged journey) Color Scheme: Main: Grey Accent: Silver and Light blue (Black for electronics bay - cause if the magic smoke happens everything is already black) @Buurman - tested the silver for strength as you suggested - seems to be holding up as good as the grey Filament: eSun ABS+ (Hotend 245, Bed 110 Chamber 42) Printed Parts printed on Voron 2.4r2, - 40% infill, 0.4width forced, speed 100mm/s, acceleration: 4000mm/s Hardware: 1. Formbot Kit as a basis (Frame, hardware, wiring, electronics, etc) BTT Octopus v1.1 board, TMC2209 stepper drivers included as well as a Bigtreetech Mini 12864 v1.0 LCD 2. Voron TAP with 5V PCB and optical sensor: (https://github.com/VoronDesign/Voron-Tap) 3. Sexbolt Z endstop: (https://github.com/hartk1213/MISC/blob/main/Voron Mods/Voron 2/2.4/Voron2.4_SexBolt_ZEndstop/STLs/TridentSexBolt.stl) 4. Pin Mods for AB Drives and XY joints:(https://github.com/VoronDesign/VoronUsers/tree/master/printer_mods/hartk1213/Voron2.4_Trident_Pins_Mod) 5. Ramalama2 front idler mod: (https://github.com/Ramalama2/Voron-2-Mods/tree/main/Front_Idlers) 5. Door Hinge mod: (https://github.com/VoronDesign/VoronUsers/tree/master/printer_mods/randell/Door_Hinges) 6. Nevermore Carbon Filter: (https://github.com/nevermore3d/Nevermore_Micro/tree/master/V5_Duo) 7. Logitech C922 camera mount (https://github.com/VoronDesign/VoronUsers/tree/master/printer_mods/Iakabos/C920_mount) 8. Inverted Electronics mount (https://github.com/VoronDesign/VoronUsers/tree/master/printer_mods/LoganFraser/TridentInvertedElectronics) 9. Raspi Pi 4, 4GB 10. BTT PiTFT50 with Klipperscreen 11. Revo Voron Hotend Mods considered but not yet included: (will see when I get to that part of the build ) 1. Internal Spoolholder / Horseshoe spoolholder - don't think this will fit inside a 250mm build: (https://github.com/VoronDesign/VoronUsers/tree/master/printer_mods/LoganFraser/HorseshoeSpoolHolder) 2...... whatever pops up along the way!! No doubt @claudermilk will have some great suggestions. I know he is planning 3 mods on his already finished Trident Unpacking the kit : Well packaged and surprised at what was included. BTT Octopus, Moons Motored, Dragon HF hotend. Rails look OK, but will have to clean and see how they perform
-
Hey guys, in the Introduction threat I was asked to let you participate in the construction of my first Voron. I hope my Google English can be understood to some extent without laughing to death. A Voron 2.4r2 with 300mm is planned. The following mods should be integrated immediately: Stealtburner with Clockwork2 PCB board for print head Klicky Probe BIGTREETECH PI TFT50 V2.0 with Klipperscreen or Octodash (which would you recommend?) LED case lighting (can I control the stripes directly from the board?) Webcam (Logitech) The basis is the kit from Formbot. Parts are mostly on the way and my Anycubic i3 Mega S is already busy printing the parts. The main color is printed in black from Esun ABS+. The accent color will be silver, either made of ABS+ by Esun or ASA by Extrudr. I will print the parts of the X-Carriage and the Stealtburner out of PA12carbon. If I don't forget to take pictures in between, I'll be happy to show them to you and keep you up to date.
-
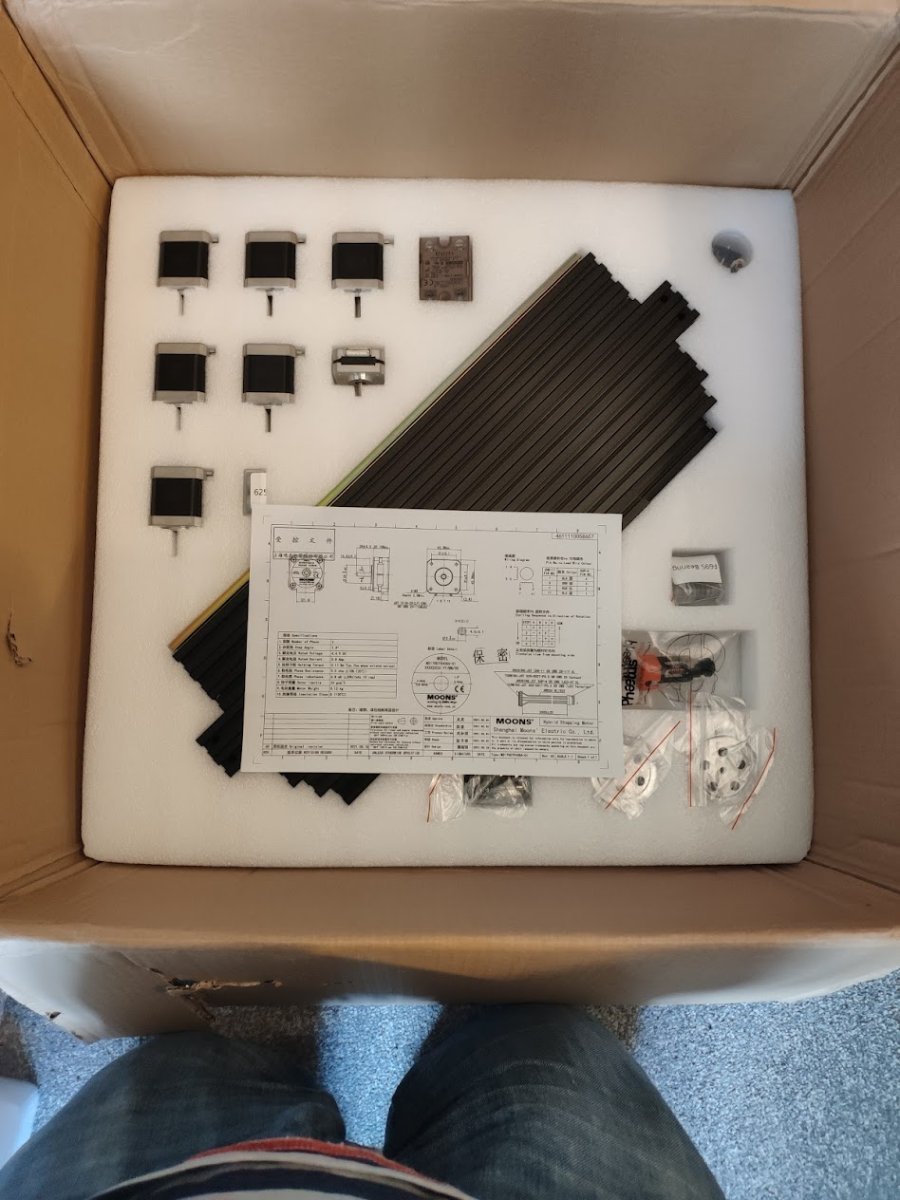
Received three packages from Frombot (Voron 2.4 350mm, Trident 250mm Voron 0 ), as I decided I was going to see what it was like building a kit rather than self sourcing everything as in the previous 3 builds, and comparing the kit form to a self sourced build. The Voron 0 packaging was secure and well packaged. Happy to have received the Moons motors. The controlled board was a BTT SKR 3 mini v3. And No Raspi pi. Luckily I have some spare.
-
Starting building soon, most parts are delivered or in transport now. had some delay of Formbot city lockdown, but LDO is having massive delays also (even worse). Expecting to start building in about two weeks.... to be continued! Voron Kit: Formbot 2.4 R3 350 Vulcan SF Printed Parts: ASA Carbon Black & Neon Yellow (Neon Yellow was self sources, not a default color offered) High Quality prints from Mehmet (Turkey) on Etsy 5 star rating https://www.etsy.com/nl/shop/Yacime3D?ref=simple-shop-header-name&listing_id=1188668167 Wiring: Decided to buy an all black kit + SB kit from OneTwo3D.co.uk LCD: BTT Pi TFT50 v2.0 - BigTreeTech Electronics: Need to decide to mount things normal, or vertical, see what brings best space and cooling. Ventilation/filtering: Nevermore Duo with two Delta fans. Mostly for the hot air distribution, but filtering helps. VEFACH filter outlet MOD
-
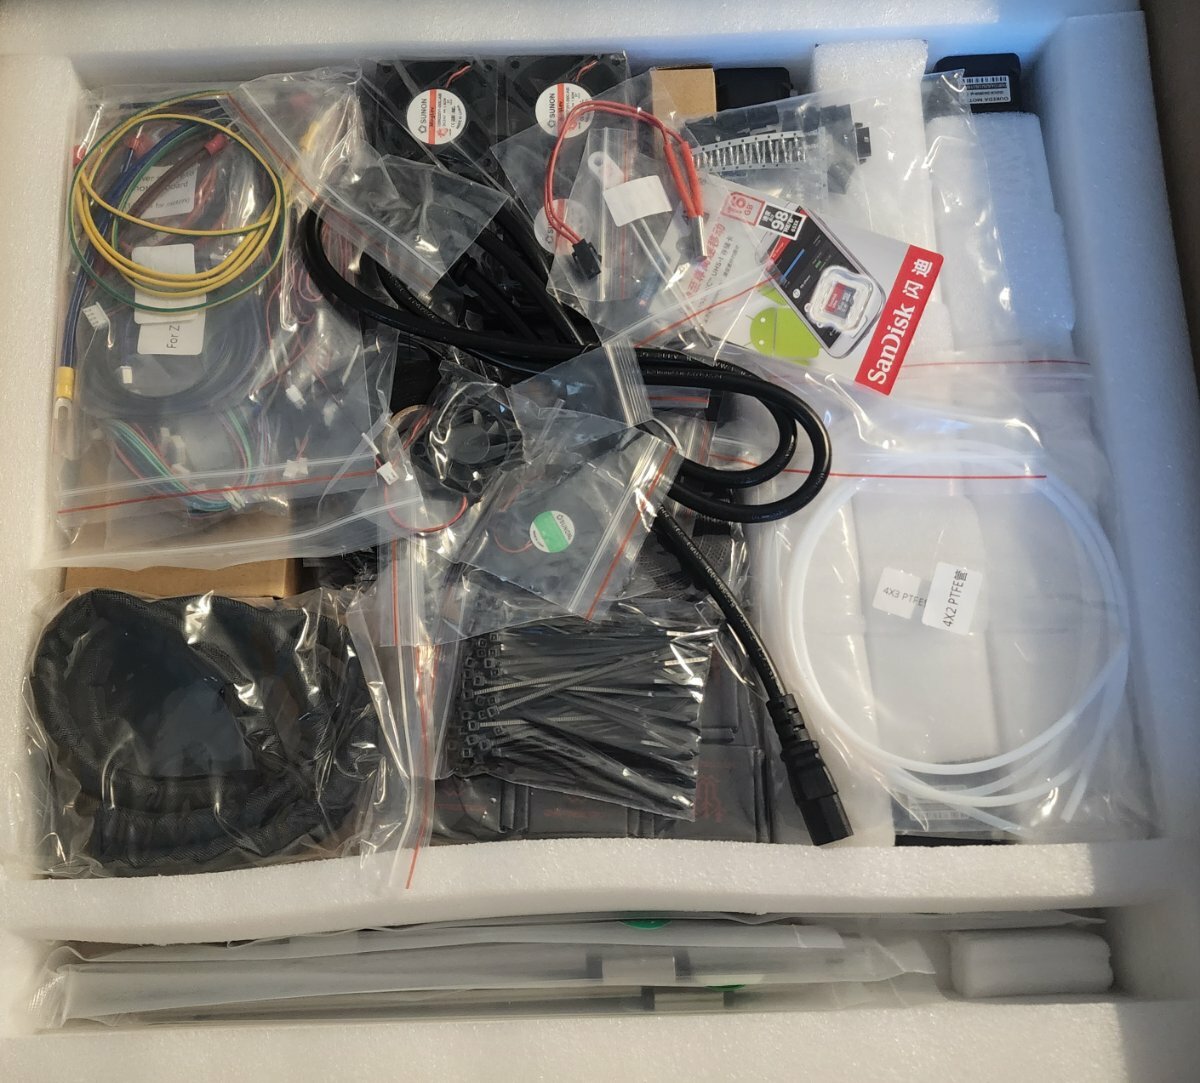
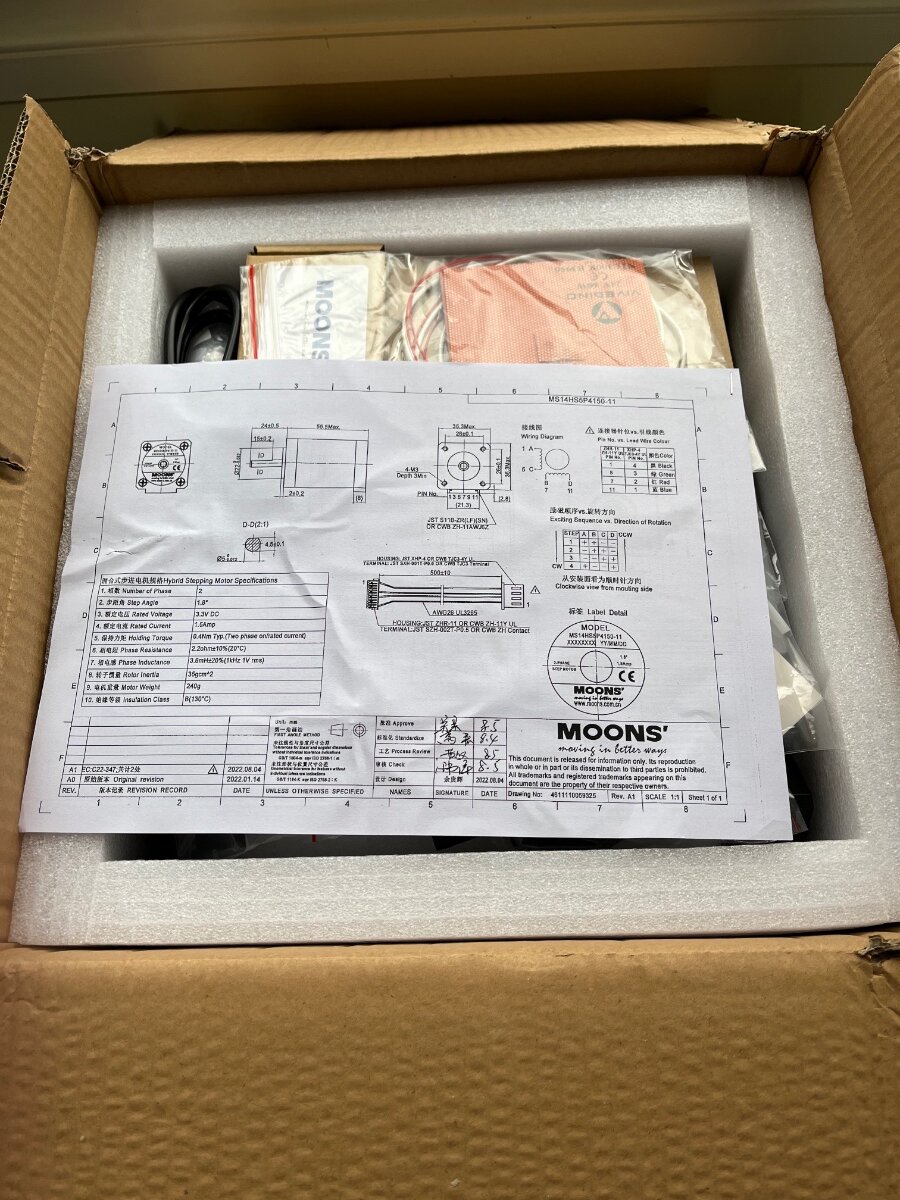
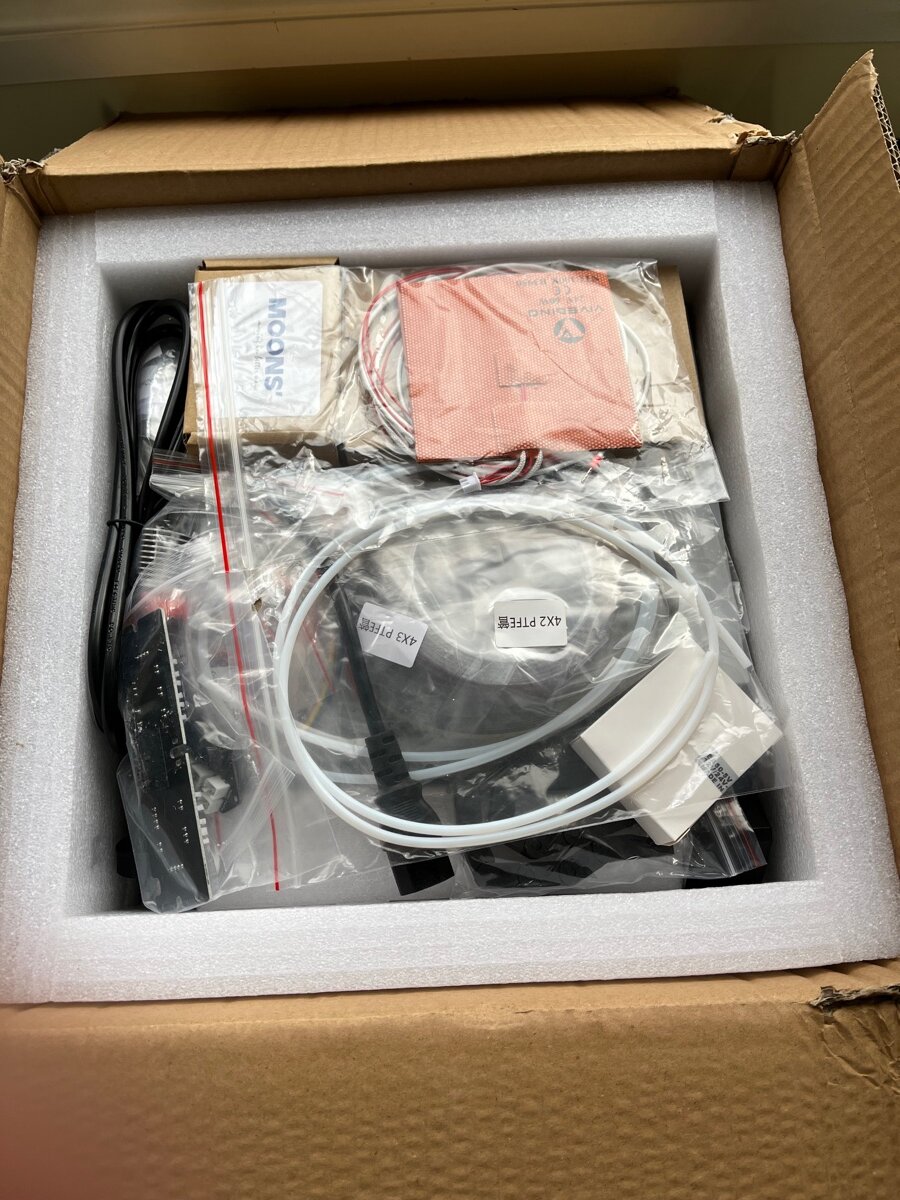
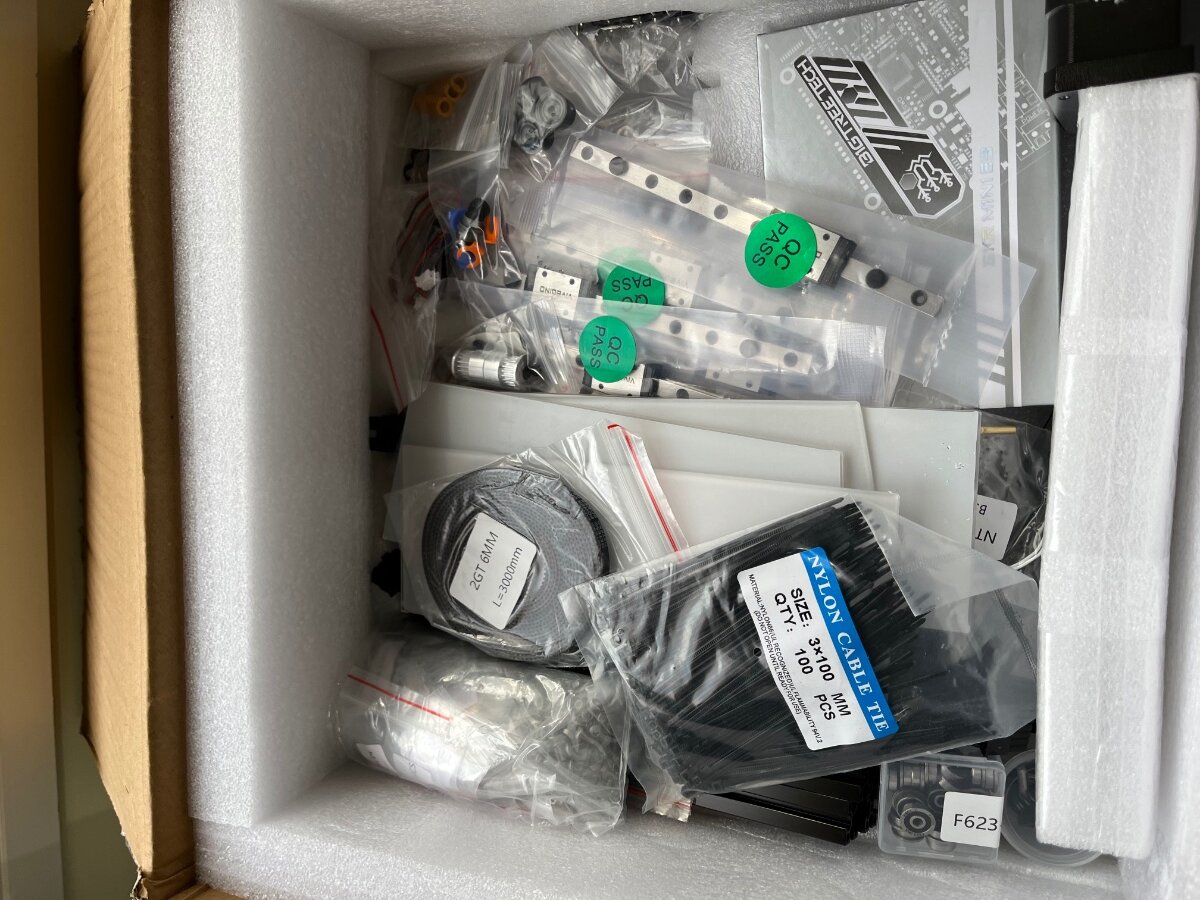
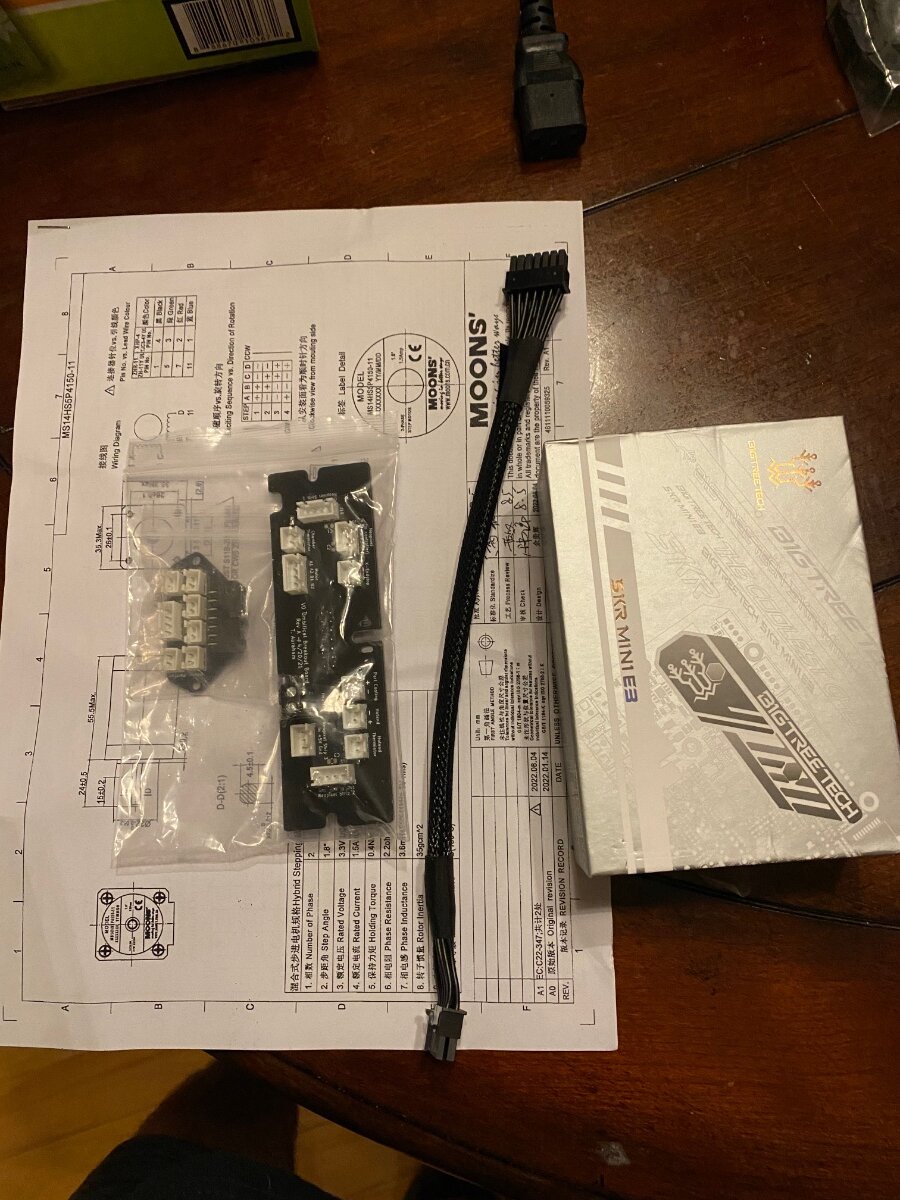
Hi all, Thanks for the warm welcome in the intro section! Appreciate it! just received the Formbot kit. Shipped super fast. Ordered from their website, not AliExpress. There were some surprises in the box. 1. SKR Mini E3 V3.0 board. I was expecting the 2.0 2. All Moons motors, not just the extruder. 3. No JST connector kit or wire. They included the Umbilical Mod. Threw me off. Now I need to research how to do it. There is an umbilical section on the GitHub, plus some extra STL parts I need to print. Looks interesting. Adds plugs for both part fans also, so no need to splice. inventory going on now. Will update soon.
-
Formbot kit. (Dragon HF hotend) Planning to do the Mini AfterSherpa/Sailfin for my print head, mostly because I really want to be able to get to the large plastic gear to manually advance/retract filament when loading and unloading. I have that on my modified prusa (via a bondtech bmg) and I don't want to go back to not having it. Bought parts for the Umbilical (https://deepfriedhero.in/products/voron-v0-umbillical-and-rear-connector-boards?_pos=2&_psq=umbilical&_ss=e&_v=1.0) but not sure how to get the board pointed straight up given that the sailfin turns the extruder motor sideways. went ahead and built the extruder/hotend without the umbilical for now, since the kit has most of the wires already made, and I'd have had to redo them for the umbilical, anyway. I'll save that mod for the first time I want to change out the extruder (and get annoyed that I have to open up the whole cable bundle to do so). Bought a fan an some (supposedly non acidic) charcoal for a nevermore, so went ahead and printed the parts and put that together while waiting for my kit to arrive. Main parts printed in Fusion Filaments Geomagnetic Mauve Accent parts printed in Atomic Filament Neon Green UV Reactive ABS Black parts printed in Atomic black ABS Other mods/things I'm considering: Per https://www.youtube.com/watch?v=z3_A5d-1Vq4 an additional thermistor (for measuring build chamber temp) can be connected to SPI GND+MOSI pins. That seems useful enough to do. https://www.printables.com/model/146877-voron-0-voron-01-raspberry-pi-camera-mount I'm spoiled having cameras on all my octoprint instances. I'm probably going to want a camera on this printer, too. Though I'm new to klipper, I've seen mention of using cameras with it, so I'll figure it out. https://voronregistry.com/mods/quackprofit-v0adafruitneopixelledmounts Well, if I'm going to have a camera, I'm probably going to need some lights, so why not go a little extra? Kit delivered, and I got all the accent parts printed (since that filament showed up first). Went ahead and built a nevermore filter while I'm at it, since I expect to be using this printer to print ABS and whatnot. I found a link to that cable channel model somewhere in the voron community, but can't for the life of me find it now. The picture I saw was it fitting in a V0.1, so I'm hoping I can find a place to put it and help manage the cable mess that printers always become. Put the extruder/hotend together to make sure I had all the pieces I need. Not sure where I'm supposed to get a different carriage, since this one has a curve in the top that doesn't line up to where the motor actually is on the sailfin, but whatever, it doesn't obstruct anything, so I'll keep it this way for now until I find or design a different carriage. + Tip: The PEI stickers from Prusa for their Mk3 steel sheets are big enough to make exactly four PEI stickers for a bed the size of the voron 0. Since my flex plate came with textured PEI on one side, but bare metal on the other side, and I had a couple spares of these, the bare side got a PEI sticker to give me options for a print surface. Progress on the actual printer build. Having done the bed frame, i now understand why people buy the stamped metal ones. Lining up the nuts for those 8 screws was the most time consuming thing I've done so far on this thing. And more parts printing (the angle of the camera is exagerating the warp, but yes, those parts are warping. This enclosure is a little too big to heat up well, so I probably need to avoid having parts near the edge of the print bed. We'll see in an hour when this set is done if these will be usable, or if they're scrap. Other errata: The printer above is actually my second Prusa mk3 (a mk3s+ to be specific). I printed all the green parts, black parts, and the first batch of purple on my first mk3, but it's old and struggling. I was having extrusion issues (unable to tune for temp or extrusion modifier effectively) when I checked the nozzle and found it was hollowed out to about .6 by years of printing abrasives (it's hardened tool steel, but even that has limits). Then, after replacing the nozzle and getting it printing much better, it had a temperature panic and reset during a print job. I tried to run a PID tune, thinking that ABS prints hotter than the CFPETG I usually run through it, so maybe tuning was in order, when I saw fumes coming off the nozzle during the heatup/PID tune. At first I thought it was steam and the filament was wet, but then I saw the temp go from 245 to 280 in about a second and a half, and realized two things almost instantly: a. My thermistor is dying/failing/flaking. b. That wasn't steam, it was smoke, and I was burning filament. So I quickly reset the printer and opened a window to keep my smoke detectors from going nuts (the camera is close to the nozzle, so the actual amount of smoke was small, but I was definitely burning the filament. ABS doesn't smell pleasant on a good day, but I had to air out that room for a while to be comfortable going in there. So yeah, I guess my old mk3 needs some love before it's going to be doing big print jobs again. Hopefully I get the V0 up and running soon, and it can fill in for now until rebuild the hot end (I was getting annoyed at the PINDA probe, anyway, since printing at ABS temps starts to get to the point where the PINDA messes up its reading and your nozzle height gets screwy. The new generation (Super PINDA) on the mk3s+ has no trouble levelling the bed even after heating up for 20 minutes to try to get the enclosure to a decent temp. (Well, I say that, but the picture above does show the parts curling, so obviously the enclosure didn't get as warm as I'd like). Okay, that's probably enough for now. That batch is almost done on the printer, so I can check the parts and do some more assembly if they're usable.
- 16 replies
-
- 4
-
-
-
- builddiary
- v0.1
- (and 1 more)
-
I guess about two months after building my first Voron for myself I am starting to build a second one. This kit is slightly different than the first build, this one will be all Formbot default, no custom wiring, Klicky or Stealthburner... all default R2/Formbot build. EDIT1: I realise the only thing I am adding to this build is the VEFACH filter inserts, default doesnt work, this mod is absolutely amazing, good filter functionality. Kits and parts are getting more expensive, self sourcing has gotten more expensive than buying a kit. (yes, I did compare) So with this build I just want to see IF the default kit is good enough, what are the down and upsides from it. I am based in Amsterdam, so I ordered it from Formbot directly and had it shipped from Szech, this prevents extra import costs, but the kit is more expensive than from China, yet you still save about 100 euro. The kist price was 1000 DOLLAR, excluding Raspberry Pi, (you get 45 dollar back if they dont have it) I found a Raspberry Pi 4 in stock for 45 euro. You get the Dragon hotend send from China, if you dont choose the default hotend. In this kit the Extruder cable was missing, but it was added to the hotend from China by default. They will fix this in future kits I am sure, but this was no issue for me. I have printed all the parts on my Voron, same color scheme as the first ASA, black and NeonYellow. (Holy crap thats a lot of prints) NEXT POST: Unpacking the Formbot KIT.
- 9 replies
-
- 4
-
-
- builddiary
- v2.4r2
- (and 1 more)
-
First build and I must say I'm pretty darned impressed with the Formbot kit. I only had a few issues with the kit. The supplied probe was for the older versions and with the r2 the probe sits level with the nozzle. No power wire supplied for the exhaust fan. One of the BTT TMC2209 quit working while tuning the printer for the first time but thats not really a Formbot issue. Other then that its been great... Lots of extra hardware and I even got lucky with a Raspberry pi4! I'll post some more pics as I finish things up a bit.
- 11 replies
-
- 5
-
-
- builddiary
- kit
- (and 1 more)
-
 Formbot Trident Kit (minus rails, heater ,and board) Octopus Pro v1.0 Board Orbiter 2.0 Extruder Mellow Carbon Fiber X Axis Secondary Mean Well LRS150-48 150w 3.3A 48v PSU Fystec 5160qhv Stepper Drivers x2 for A/B Motors (For 48v) LDO 42STH48-25094AC Stepper Motors 2.5A Max for A/B KvP Steller Black ABS + KvP Banana Yellow ABS Accent + Paramount Deception Purple ABS Accent Polymaker PC-ABS Filament Blend for increased heat resistance for A/B motor mounts Fabreeko Edge to Edge Heater Fabreeko HoneyBadger Rails Printedsolid ACM Panels for Trident 3x Igus EGLM-05 Bearings to replace the GE5C Triangle Labs Rapido Hotend Bondtech CHT Nozzles 0.4mm - 1.0mm Titanium Extrusion Backers from Fabreeko Fystek 355x355 0.3mm Frosted PEI for back of Formbot Flexplate Mods: Klicky, Sexbolt, Rama's Better Front Idlers, Nevermore, AB ERCF 3.2 PCB, ADXL PCB, Steathburner, 270 degree door hinges Spacelab's Orbiter 2.0 Mount PiCam v2.1, FFC Mod (once its back in stock) ERCF 9 Color MMU from BlueRolls Ikea Lack Table I'm currently through page 62 of the Trident manual. This is my first time building a printer, and I only got into 3D printing in Nov 2021 (bought an Artillery Genius Pro). Been a lot of reading, watching, and geeking out. Hello Wisconsin!!! -OneStepAhead
-
Just leaving these here for now. Details of my journey to follow soon! All the best, StalkS